How to add additional rows above or below in Microsoft Excel
Here's how to add a new row of data above or below existing cells

Copy and paste is the obvious fix for most situations in Excel, but it’s rarely the right choice. Take this example: adding a new row of data above or below existing cells. Instead of selecting, copying, and pasting, there’s a much easier way that doesn’t involve the added steps, and it’s hiding in your right-click menu.
Editor's Note: This tutorial was written for Excel 2016, but a similar method still applies to modern versions of Excel.
How to insert rows and columns in Excel
1. Open a blank Excel workbook.
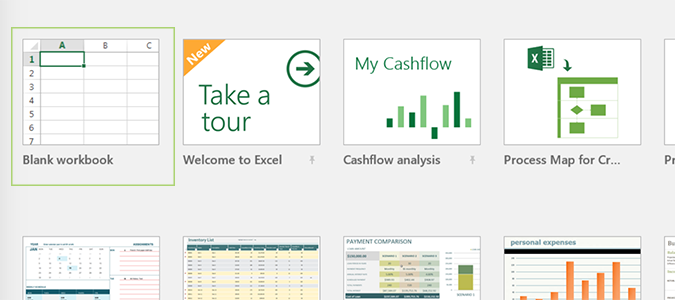
2. Enter data, or choose an existing workbook with data already pre-filled. Here we’re going to use a listed of alphabetized names. If we forget one, we can quickly add the space we need to add the name without moving anything else around.

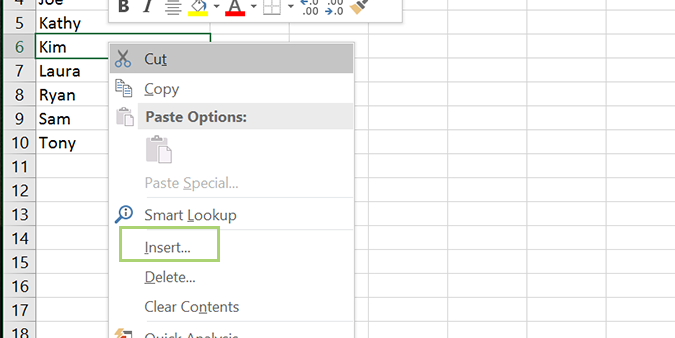
3. Right-click the cell you’d like to add blank space above or below and select Insert 1 row above.
In the previous version, just select Insert.
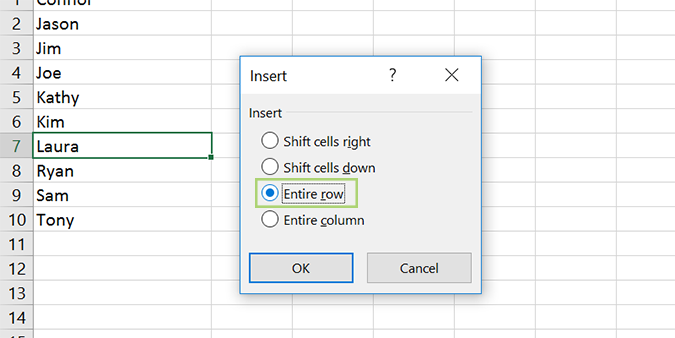
4. Choose Entire row.
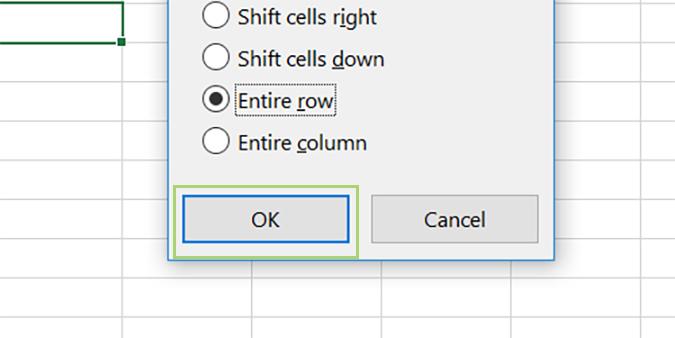
5. Click OK.
Microsoft Excel Tips
- Use VLOOKUP in Excel
- Back Up Files Automatically in Excel
- Remove Duplicate Data in Excel
- Create a Waterfall Chart in Excel
- Lock Cells in Excel
- Freeze Rows and Columns in Excel
- Build a Forecast Chart in Excel
- Create a Funnel Chart in Excel
- Make a Treemap in Excel
- Convert Excel Sheets to Google Sheets
- Open Google Sheets in Excel
- Combine Data from Different Cells
- Merge Cells to Span Multiple Columns
- Use AutoFill for Repetitive Data
- Copy and Paste Repetitive Data the Easy Way
- Use Text to Columns
- Draw Diagonal Line in a Cell
- Create a New Shortcut Menu
- Transpose Columns Using Paste Special
Stay in the know with Laptop Mag
Get our in-depth reviews, helpful tips, great deals, and the biggest news stories delivered to your inbox.
Bryan covers everything you need to know about Windows, social media, and the internet at large for Laptop Mag. Thanks to his extensive knowledge of operating systems and some of the most popular software out there, Bryan has written hundreds of helpful guides, including tips related to Windows 11 drivers, upgrading to a newer version of the OS, editing in Microsoft Photos, or rearranging pages in Google Docs.
