How to Back Up Images from Apple Photos
While Apple wants you to pay for iCloud storage space in order to back up your Photos library, you can also manually export your entire library to a local disk. If you copy your photos to an external hard drive, you can protect your data without paying Apple a recurring monthly charge.
Here's how to back up images from Apple Photos.
1. Click Command + A to select all images.

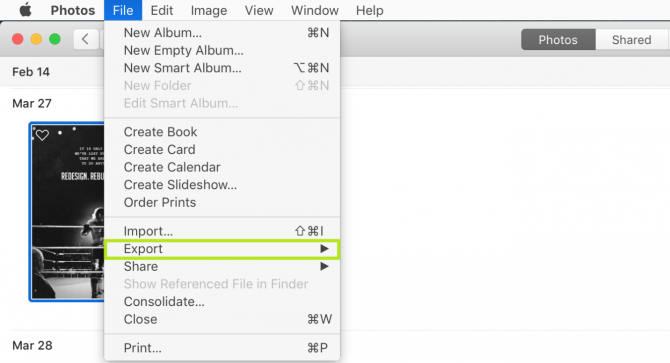
2. Select File.

3. Select Export.
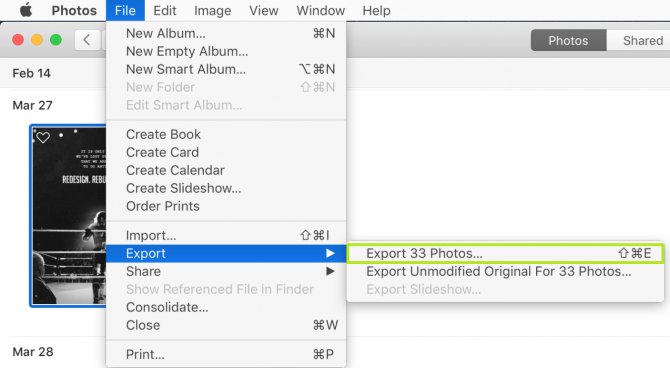
4. Select Export Photos. Select Export Unmodified Original to save images without any edits you've made.
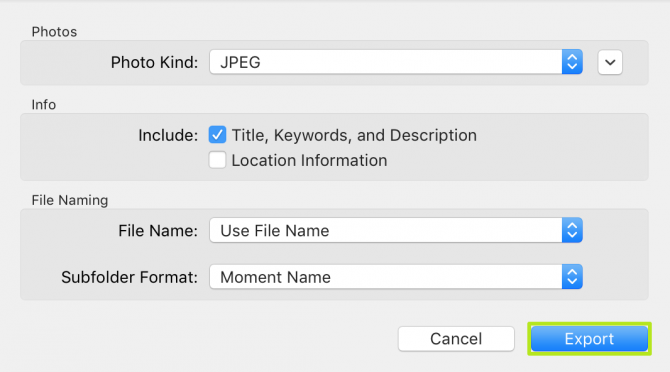
5. Click Export. You can choose between JPEG, TIFF and PNG files, how much metadata is backed up and how images are named and sorted.
Stay in the know with Laptop Mag
Get our in-depth reviews, helpful tips, great deals, and the biggest news stories delivered to your inbox.
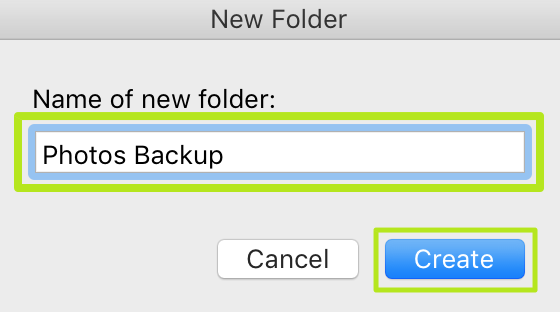
6. Navigate to a location and click New Folder.
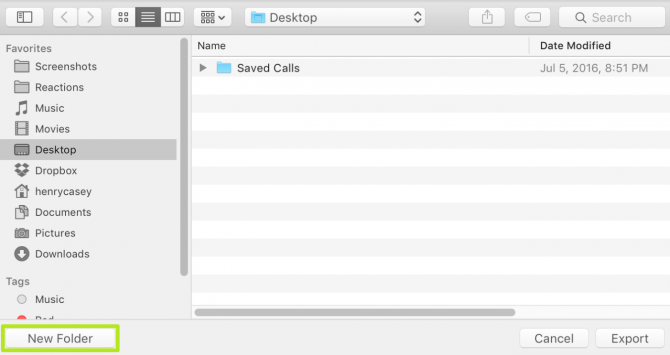
7. Name the folder and click Create. Choose something catchy.
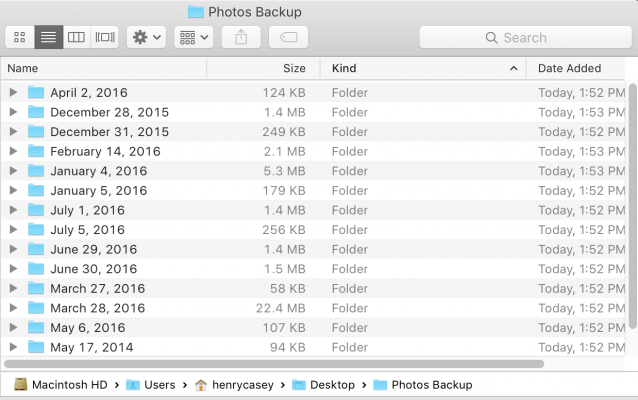
You've backed up an Apple Photos library.
Henry was a contributing writer at Laptop Mag. He penned hundreds of articles, including helpful how-tos for Windows, Mac, and Gmail. Henry has also written about some of the best Chromebooks, and he has reviewed many Apple devices, including various MacBook Air laptops. He is now a managing editor at our sister site Tom's Guide, covering streaming media, laptops, and all things Apple.
