How to Block Websites on Your Mac
Many web browsers offer plugins to help you stay productive, and not open the websites you waste time on, but you can take things one step further by simply blocking your computer from accessing specific sites all together.

This is why I recommend editing the Hosts file on your Mac, using Terminal. Yes, it looks a little intimidating, but once you get the hang of it, you'll have banned those websites across all browsers, and doing so without relying on a plugin that may lose support when its developer grows tired of updating it.
The below steps were performed on a MacBook Air running macOS High Sierra (10.13), but they should work the same on all Mac from the last decade or so.
MORE: Which MacBook Should You Buy? MacBook vs. Air vs. Pro
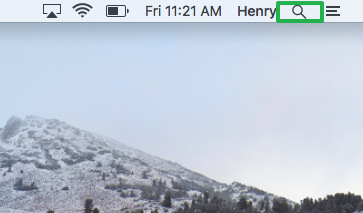
1. Click the magnifying glass in the top right corner. If it's not there, hit Command+Space.
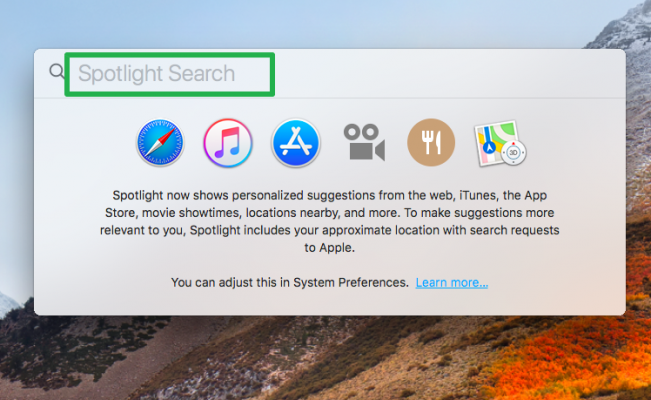
2. Type "Terminal"
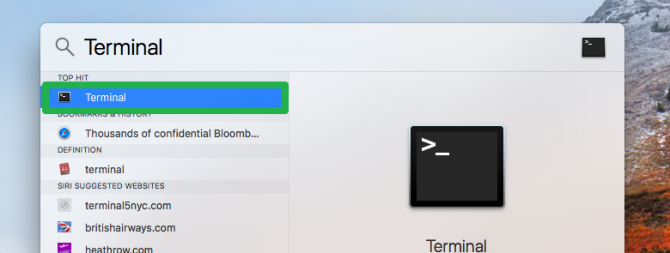
3. Select Terminal.
Stay in the know with Laptop Mag
Get our in-depth reviews, helpful tips, great deals, and the biggest news stories delivered to your inbox.
4. You've reached the command line, it's a little intimidating, but don't worry.
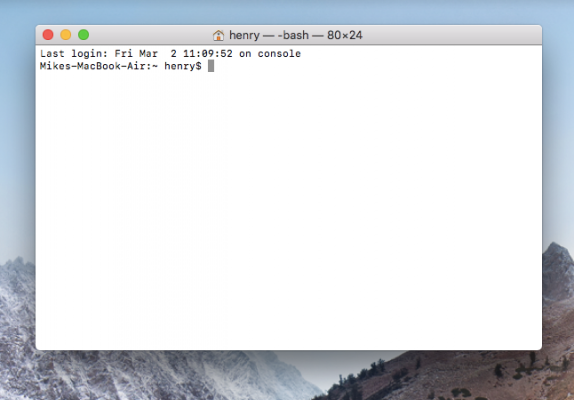
5. I'm going to give you a series of commands to type in, and each will have quotation marks on the front and back, which you should ignore.
6. Type in "sudo nano /etc/hosts"
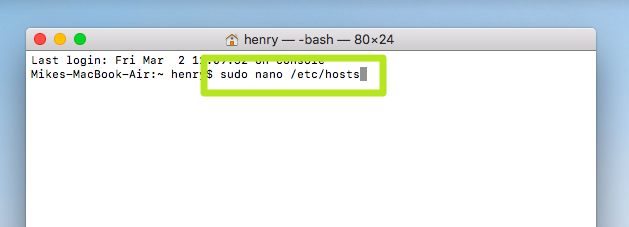
7. Hit Return.
8. Type your system admin password.

9. This is the host file database, tap the down arrow to move your cursor below the line that says "127.0.0.1 localhost"
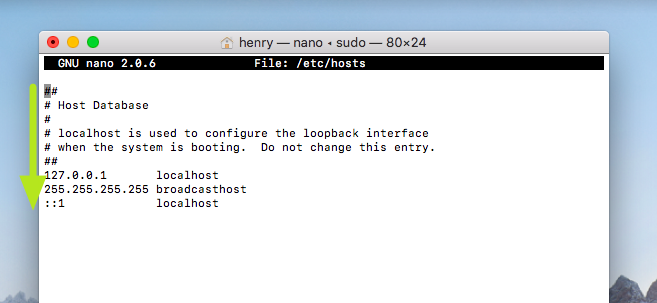
10. Type in "127.0.0.1 " and then the address of the site you want to block, making sure to keep a space between the numbers and the address. For example, "127.0.0.1 facebook.com" will block Facebook.
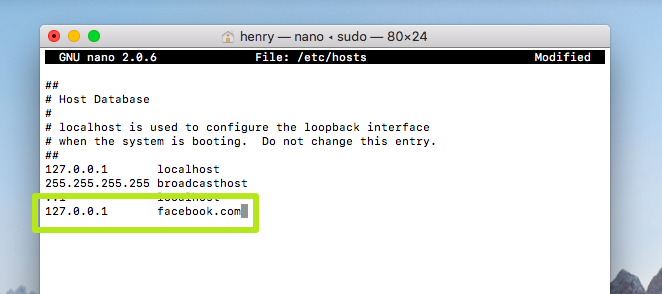
11. Hit return.
12. Type in "127.0.0.1 " followed by that address with the "www." prefix in front of it, for extra measure. For example, "127.0.0.1 www.facebook.com"
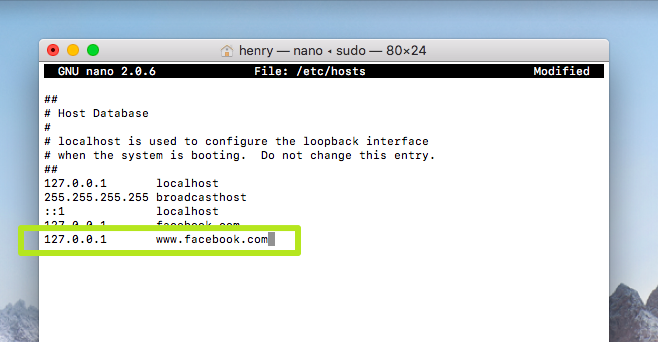
13. Hit return.
14. Click Control + O to save your change.
15. Click Return.
16. Click Control + X.
17. Type "sudo dscacheutil -flushcache"

18. Hit return.
Now, when you open that website, in any browser on that Mac, you'll get a message that says you're unable to connect.

macOS Guide
- How to Password Protect a Folder in a Mac
- How to Force Quit or Close Frozen Applications
- Move Your Mac files to a Windows PC
- How to Dual-Boot Windows and macOS
- Increase the Text Size on Your Mac
- Install or Uninstall Mac Apps
- How to Eject USB Devices and Memory Cards in macOS
- Switch Between Open Apps in macOS
- How to Unlock a MacBook with Your Apple Watch
- Clean Out Your macOS LaunchPad
- How to Use Trackpad Gestures to Navigate macOS
- How to Use Right-Click in macOS
- Use Siri on Your Mac
- How to Customize the Notification Center
- Add a Signature to PDFs with Mac Preview
- Use Memories in the Photos App on Mac
- How to Use Night Shift in macOS
- How to Change Your Mac's Password
- How to Edit Siri's Activation Keyboard Shortcuts on macOS
- Change Views in Finder
- Use macOS Dark Mode
- Transfer Files with AirDrop
- How to Use Mission Control on a Mac
- Use Optimized Storage
- How to Enable Parental Controls on a Mac
- How to Mark Up PDFs in macOS
- Back Up Mac with Time Machine
- How to Use Dictation on a Mac
- How to Use the macOS Feature
- Use Apple Pay in macOS
- How to Block Websites on Your Mac
Henry was a contributing writer at Laptop Mag. He penned hundreds of articles, including helpful how-tos for Windows, Mac, and Gmail. Henry has also written about some of the best Chromebooks, and he has reviewed many Apple devices, including various MacBook Air laptops. He is now a managing editor at our sister site Tom's Guide, covering streaming media, laptops, and all things Apple.
