How to Customize Windows 10's Autoplay Menu
Whenever you insert a USB stick, external hard drive, DVD or other media into your Windows 10 laptop, you're likely greeted with a pop-up asking you what the computer should do next. This is called AutoPlay, and if you're anything like me, you find it a bit annoying. If you want to do away with AutoPlay, all you have to do is follow a few steps to turn it off forever. Alternatively, you can customize how it reacts to different media.
Here's how to customize AutoPlay pop-ups in Windows 10:
Disable Autoplay in Windows 10
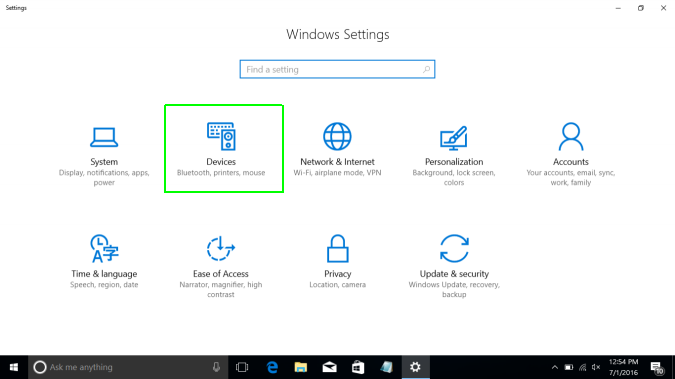
1. Go to Settings > Devices.
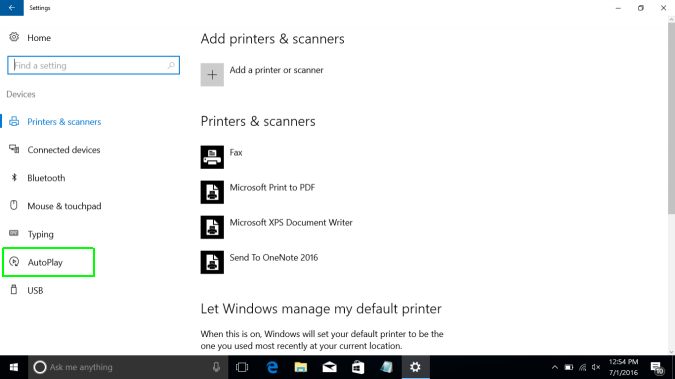
2. Click AutoPlay on the sidebar.
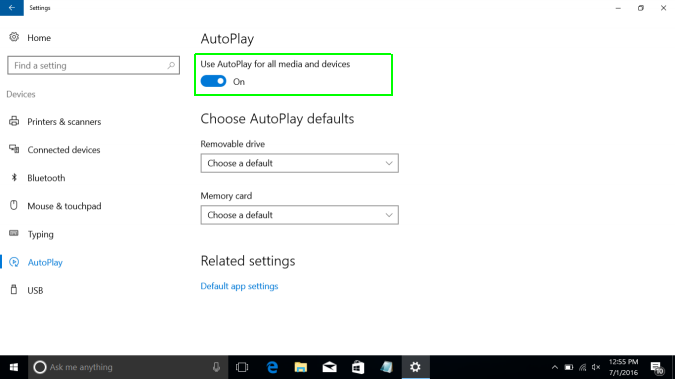
3. Switch "Use AutoPlay for all media and devices" to off.
Pick Specific Actions
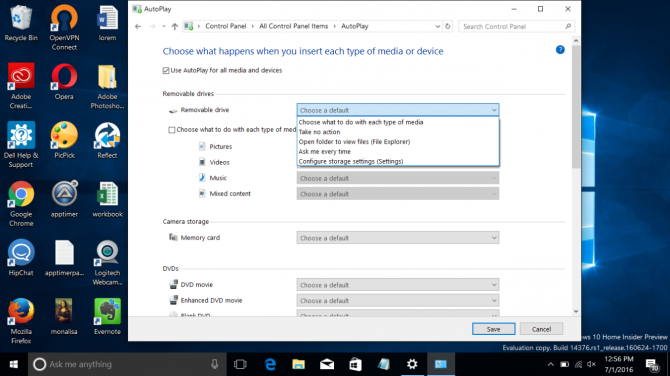
1. Open the Control Panel.
2. Choose AutoPlay.
Stay in the know with Laptop Mag
Get our in-depth reviews, helpful tips, great deals, and the biggest news stories delivered to your inbox.
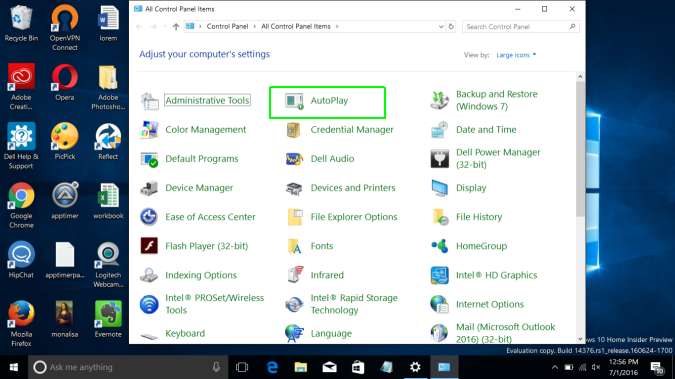
From here, you can choose different types of drives and files should do when you insert media into your laptop. When you're done, click save.
Windows 10 Annoyances and Problems
- Repair Windows 10
- Remove the Lock Screen
- Disable or Enable Grayscale Mode
- Set Compatibility Mode for Apps
- Access the BIOS on a Windows 10 PC
- Stop Windows Update from Automatically Restarting Your PC
- Turn Off App Notifications
- Fix a Slow-Opening Windows Downloads Folder
- Disable Personalized Ads on Microsoft Sites and Apps
- Stop Skype’s Annoying Auto Updates
- Fix a 'Boot Configuration Data File is Missing' Error
- Clear the Run Command's History
- Disable Cortana
- Uninstall and Restore Built-in Apps
- Restore a Missing Battery Icon
- Fix a Boot Configuration File Error
- Get to the Advanced Startup Options Menu
- Delete a Locked File
- Restart without Rebooting
- Roll Back Windows 10 to an Earlier Version
- Disable Automatic Driver Downloads
- Disable Internet Explorer
- Pause Windows Updates for Up to 35 Days
- Use Battery Saver
- Downgrade to Windows 10 S
- Save Netflix Videos for Offline Viewing
- All Windows 10 Tips
- Worst Windows 10 Annoyances
- Disable Password Prompt on Wake
Andrew is a contributing writer at Laptop Mag. His main focus lies in helpful how-to guides and laptop reviews, including Asus, Microsoft Surface, Samsung Chromebook, and Dell. He has also dabbled in peripherals, including webcams and docking stations. His work has also appeared in Tom's Hardware, Tom's Guide, PCMag, Kotaku, and Complex. He fondly remembers his first computer: a Gateway that still lives in a spare room in his parents' home, albeit without an internet connection. When he’s not writing about tech, you can find him playing video games, checking social media and waiting for the next Marvel movie.
