How to Customize the MacBook Pro Touch Bar
The Touch Bar, a thin OLED display strip that sits atop the keyboard on Apple's new 13-inch and 15-inch MacBook Pro notebooks gives users a series of shortcuts, depending on which app they're using. If you don't like the default options, though, you can add and remove buttons to customize the Touch Bar to your own preferences.

Touch Bar buttons display for both Apple's own programs, such as Photos, iTunes and Maps, as well as third-party offerings including 1Password, Day One and djay Pro. Here's how to customize the Touch Bar on a MacBook Pro.
MORE: Best Touch Bar Apps for Your New MacBook Pro
1. Click File. You need to open a window in an app to edit the Touch Bar options for that view.

2. Select New Window.

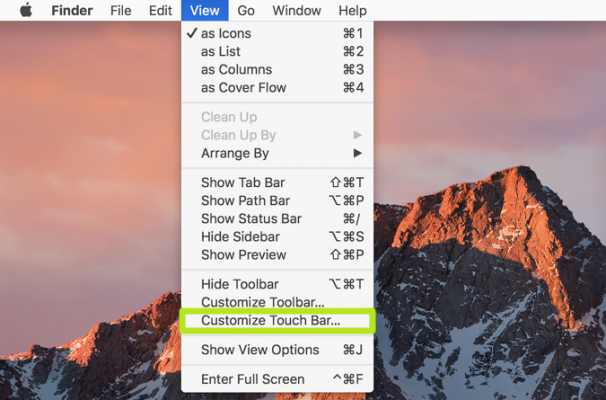
3. Click View.

4. Select Customize Touch Bar.
Stay in the know with Laptop Mag
Get our in-depth reviews, helpful tips, great deals, and the biggest news stories delivered to your inbox.

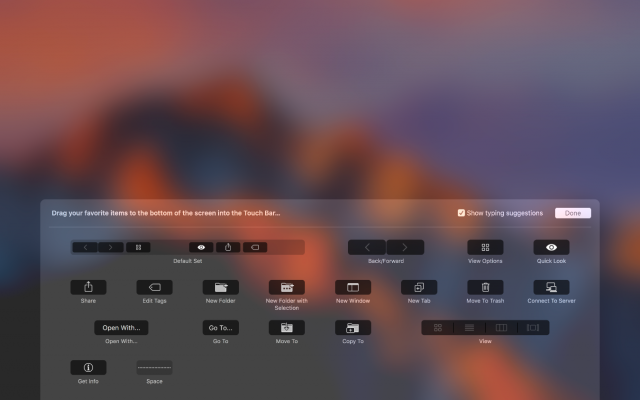
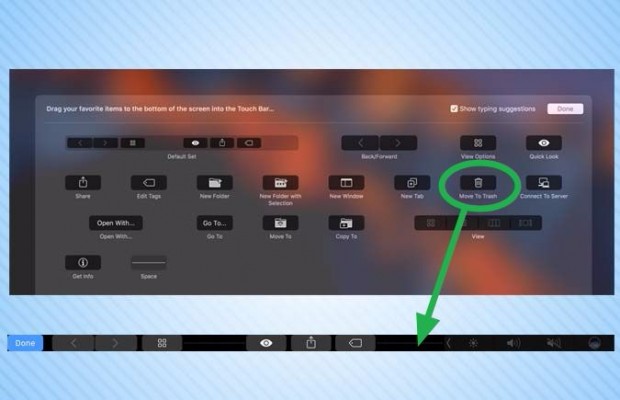
5. Click and drag buttons down from the display to the bottom of the screen, bringing them to the Touch Bar. You'll only see the options for your current view.

6. To move a Touch Bar button, hold and drag it to a different spot.

7. To remove a button from the Touch Bar, hold and drag it to the far left end.

8. Release your finger when "Remove From Touch Bar" appears.

Apple Laptop Guide
Henry was a contributing writer at Laptop Mag. He penned hundreds of articles, including helpful how-tos for Windows, Mac, and Gmail. Henry has also written about some of the best Chromebooks, and he has reviewed many Apple devices, including various MacBook Air laptops. He is now a managing editor at our sister site Tom's Guide, covering streaming media, laptops, and all things Apple.
