How to Disable Skype's Annoying Auto Updates
It happens all the time. You have an important business call scheduled for 2 p.m. At 1:57 p.m., you launch Skype for Windows and are greeted by an update message that says "Just a moment, we're improving your Skype experience . . ." The program then takes several minutes to download and install a new version of itself, making you embarassingly late for your appointment.
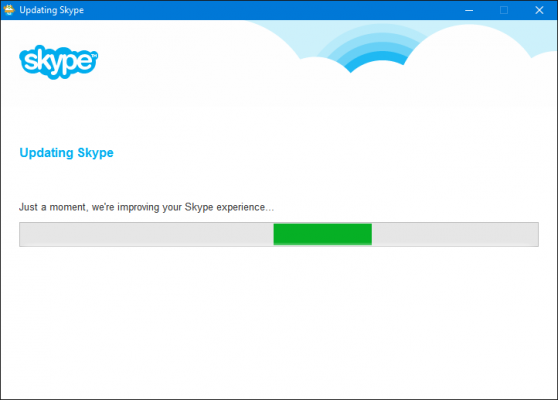
On some systems, you're given a choice before this happens, but on others, you are stuck waiting. Fortunately, there's a way to turn off these time-consuming Skype updates. Here's how.
1. Launch Skype for Windows if it's not already open.
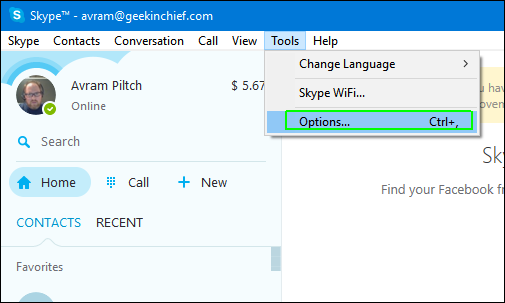
2. Navigate to Tools -> Options.
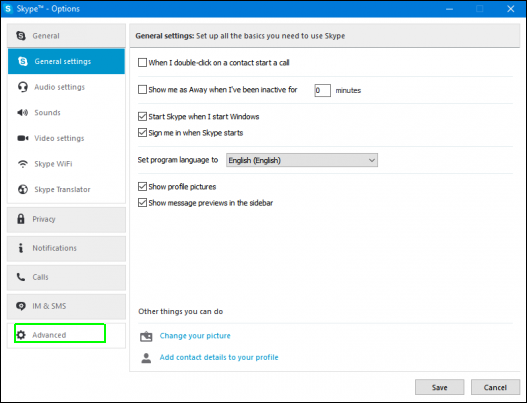
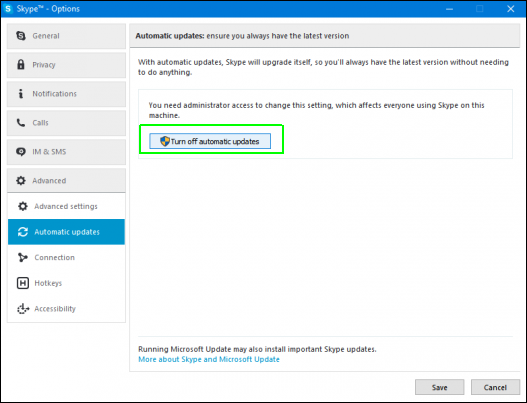
3. Select the Advanced tab in the left pane.
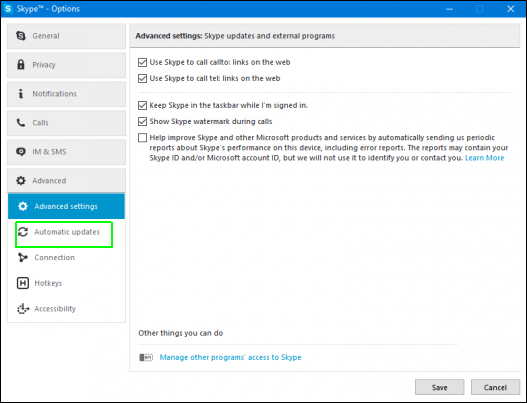
4. Select Automatic updates in the left pane.
5. Click the "Turn off automatic updates" button. If the button says "Turn on automatic updates," the updates have already been disabled and you can stop here.
Stay in the know with Laptop Mag
Get our in-depth reviews, helpful tips, great deals, and the biggest news stories delivered to your inbox.
6. Click Save.
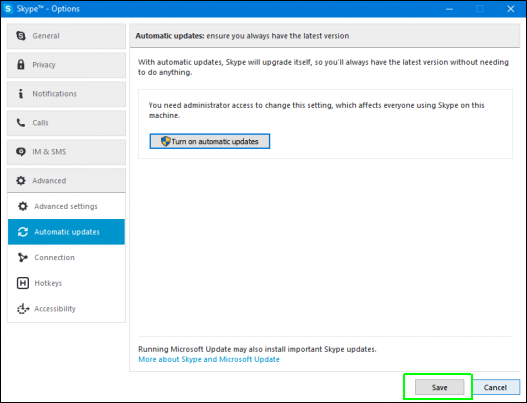
After you make this change, Skype will no longer update itself. This means that, if you want to keep the program up-to-date on your computer, you'll need to go download new versions manually from Skype.com.
Windows 10 Annoyances and Problems
- Repair Windows 10
- Remove the Lock Screen
- Disable or Enable Grayscale Mode
- Set Compatibility Mode for Apps
- Access the BIOS on a Windows 10 PC
- Stop Windows Update from Automatically Restarting Your PC
- Turn Off App Notifications
- Fix a Slow-Opening Windows Downloads Folder
- Disable Personalized Ads on Microsoft Sites and Apps
- Fix a 'Boot Configuration Data File is Missing' Error
- Clear the Run Command's History
- Disable Cortana
- Uninstall and Restore Built-in Apps
- Restore a Missing Battery Icon
- Fix a Boot Configuration File Error
- Get to the Advanced Startup Options Menu
- Delete a Locked File
- Restart without Rebooting
- Roll Back Windows 10 to an Earlier Version
- Disable Automatic Driver Downloads
- Disable Internet Explorer
- Pause Windows Updates for Up to 35 Days
- Use Battery Saver
- Downgrade to Windows 10 S
- Save Netflix Videos for Offline Viewing
- All Windows 10 Tips
- Worst Windows 10 Annoyances
- Disable Password Prompt on Wake

