How to Hide Your Name and Email Address on Windows' Login Screen
If you're using a Microsoft account to log into your computer, Windows displays your real name and email address on the login screen. This can be a privacy concern--for example, with shoulder surfers when you're using your laptop in public--and it's less secure than requiring you to enter both your username and password to get into your computer. Here are two ways to hide this personal information in the login screen.
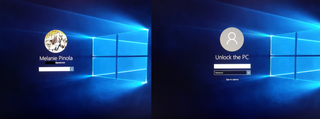
The steps below work for Windows 8 and Windows 10 and will be applied to all user accounts on your PC. Note that if you're using Windows 10 Home edition, you'll need to use the registry method, since you won't have access to the Group Policy Editor.
Method 1: Edit the Computer Policy to Hide Your User Information
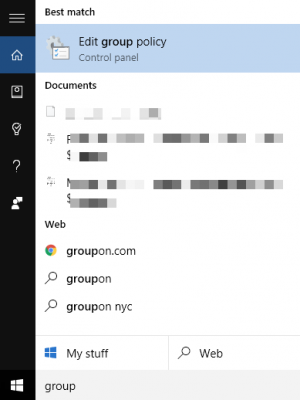
1. Search for "Local Group Policy Editor" in the Windows taskbar and hit Enter.
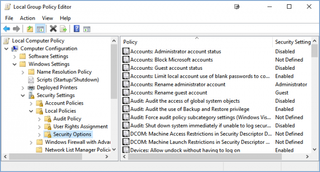
2. Navigate to Computer Configuration > Windows Settings > Security Settings > Local Policies > Security Options.
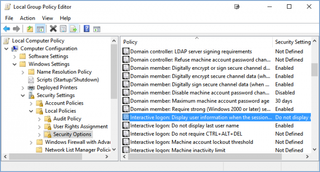
3. Double-click "Interactive logon: Display user information when the session is locked". This tells Windows which user information to show on the login screen when your laptop is locked.
4. Select "Do not display user information."
Stay in the know with Laptop Mag
Get our in-depth reviews, helpful tips, great deals, and the biggest news stories delivered to your inbox.
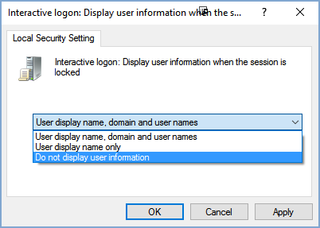
5. Click Apply then OK to have this go into effect immediately.
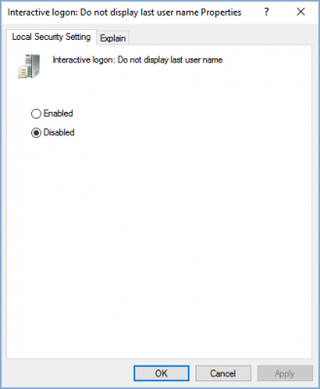
6. Next, double-click "Interactive logon: Do not display last user name". This tells Windows whether or not to display your user info when you boot your computer.
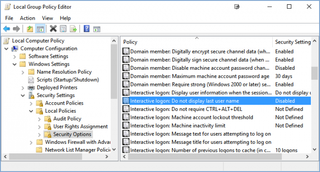
7. Change the setting to Disabled and Click OK.
Method 2: Edit the Registry to Hide Your User Information
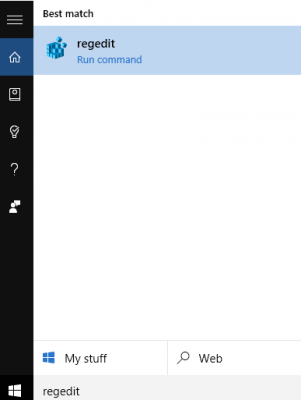
1. Search for "regedit" in the Windows taskbar and hit Enter.
2. Navigate to HKEY_LOCAL_MACHINE\Software\Microsoft\Windows\CurrentVersion\Policies\System
3. Double-click dontdisplaylastusername.
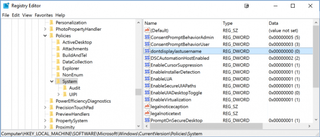
4. Change the 0 to 1 in the Value data field.
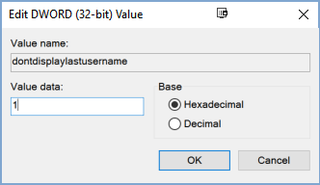
5. Click OK.
6. Right-click an empty area in the right panel and select New > DWORD (32-bit) Value.
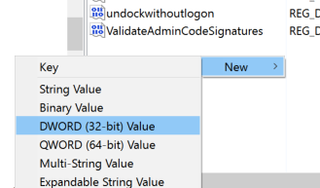
7. Enter DontDisplayLockedUserID for the DWORD name.

8. Double-click DontDisplayLockedUserID.
9. Change the 0 to 3 in the Value data field.
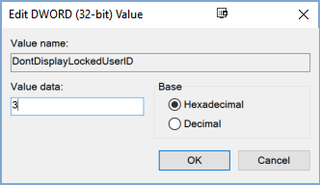
10. Hit OK.
The next time you log into your computer, your info will be hidden. To log in, you'll need to fill in both your username (email address or your first and last name) and your password. It's an extra step, but one many people might want to do for privacy or security reasons. While you're at it, you can disable the lock screen in Windows 10 too and get to the login screen more quickly.
Customize Windows 10
- Create Custom Keyboard Shortcuts
- Make Windows 10 Look and Feel Like Windows 7
- Change the Default Windows Font
- Turn Off Notification and System Sounds
- Change Your Desktop Background in Windows 10
- Change the Icon Size
- Give Windows 10 a Dark Theme
- Make Your Own Windows 10 Theme
- Hide Your Name on the Login Screen
- Add Another Column to the Start Menu
- Get Mac-Like File Previews
- Add My Computer Icon to Desktop
- Edit Photos to Fit as Backgrounds
- Add Accent Colors
- Customize Autoplay Menu
- Install and Delete Fonts
- Customize the Action Center
- Disable Transparency Effects
- Get Classic Solitaire and Minesweeper
- Change the Look of Windows 10 Books
- Add a URL Field to the Taskbar
- Add Clocks from Multiple Time Zones
- Get the Old Volume Control Back
- Disable Windows 10 Startup Delay
- Add Quick Contacts to the Start Menu
- Show Hidden Files and Folders
- Enable Spatial Sound
- Best Themes
- All Windows 10 Tips
- Change the Login Screen Background
- Install New Desktop Themes
