How to Enable Parental Controls on a Mac
Here's how to set up the parental controls on macOS

Set up the parental controls on macOS once to keep your kids safe every time they use the Mac or go online. You can limit the kinds of content they can access and also how much screen time they're allowed each day with the steps below.
- More: How to Set Screen Time for Kids on a Windows 10
- How to improve your Mac's security and privacy
- Best Apple deals on the latest products
Create a Child Account on macOS
First we'll set up a new "managed account" on the Mac with parental controls enabled, as opposed to "administrator" or "standard" accounts. If you've already created an account for your kid, whether managed or standard, skip to the next section.
1. Open System Preferences and then Users & Groups.
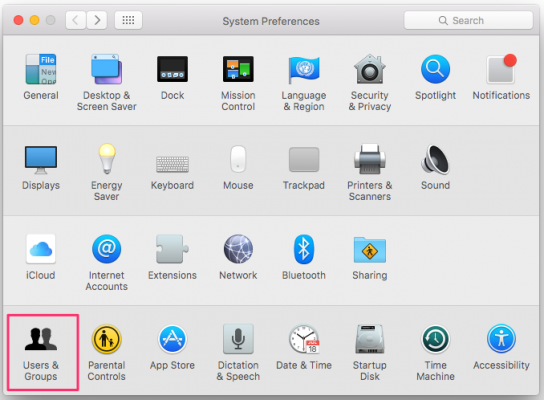
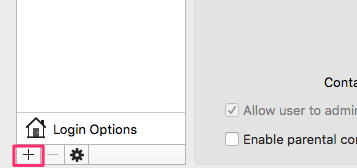
2. Click the + button at the bottom left of the screen to start creating a new account.
3. Select "Managed with Parental Controls" for the new account type in the next window.
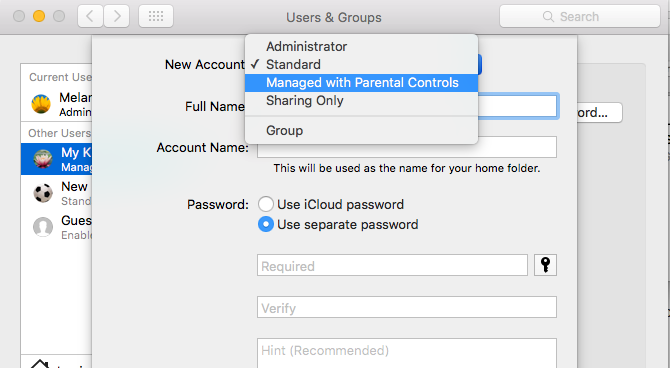
4. Fill in the account details. Select an age group (4+, 9+, 12+, or 17+), enter the name, and create a password for the account to share with the child.
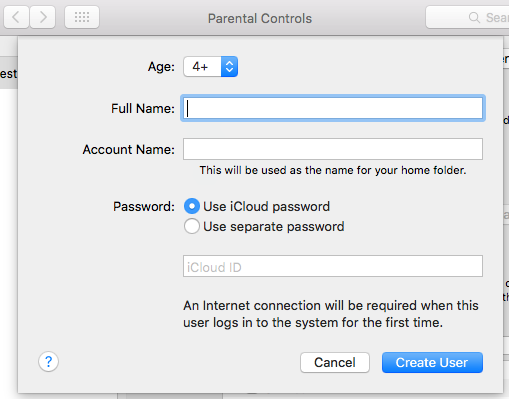
5. Click Create User.
Stay in the know with Laptop Mag
Get our in-depth reviews, helpful tips, great deals, and the biggest news stories delivered to your inbox.
Parental controls will then be turned on for this account and you can tweak them so they're appropriate for your family.
Set Parental Control Restrictions
MacOS offers a lot of granular control over computer and online usage for each user account. Here's how to configure the parental controls.
1. Open System Preferences and click Parental Controls.
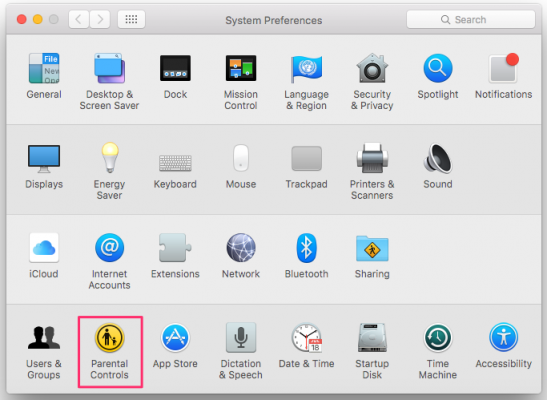
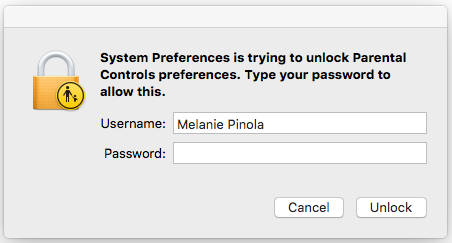
2. Click the lock icon to unlock parental controls.

3. Login with an administrator's username and password.
4. Select the user account to manage.
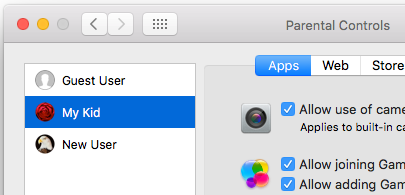
If you get the "Parental controls are turned off for this account" error, that just means the user account wasn't set up as a managed account previously (e.g., through the steps above). Enable parental controls for this standard account by clicking the "Enable Parental Controls" button.
[parental-controls-enable.png]
5. Choose the features to allow or block. We recommend looking at least these settings:
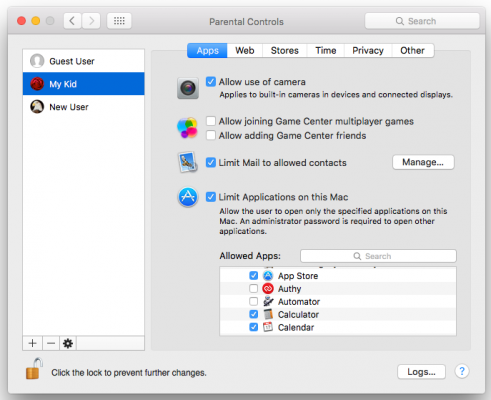
- Uncheck "Allow joining Game Center multiplayer games" and "Allow adding Game Center friends" if your child is too young for mutiplayer games
- Check "Limit Mail to allowed contacts" and then click the Manage… button to select the contacts
- Check or uncheck the apps your child can access under "Limit Applications on this Mac"
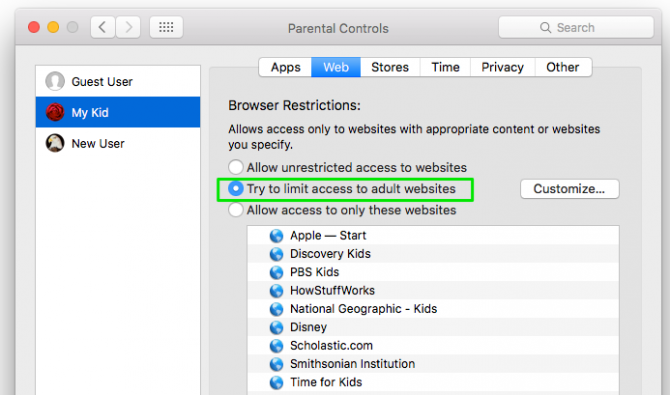
- On the Web tab, select "Try to limit access to adult websites"
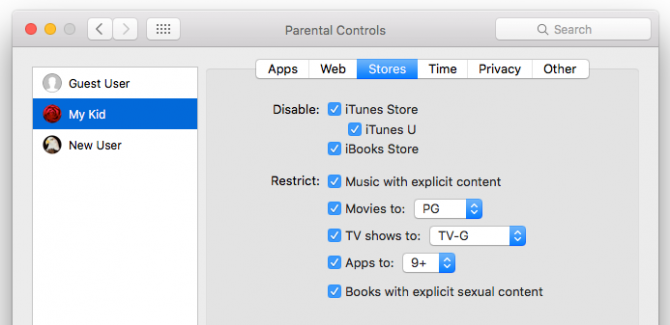
- On the Stores tab, choose the maturity ratings appropriate for your child. You can also disable iTunes Store and iBooks Store here
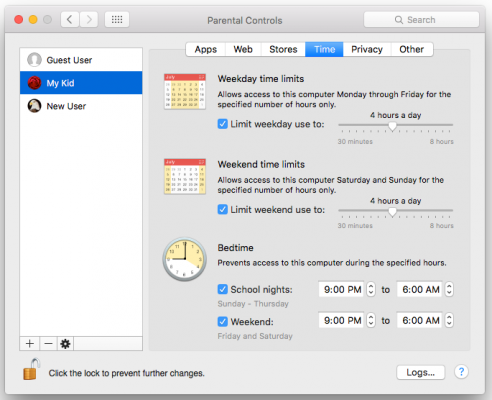
- On the Time tab, set the time limits for your child
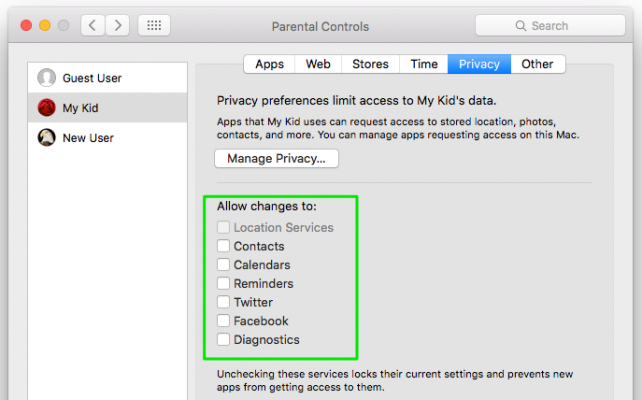
- On the Privacy tab, uncheck all of the options under "Allow changes to:" This prevents apps from accessing your child's contacts, calendars, reminders, Twitter, Facebook, or diagnostics
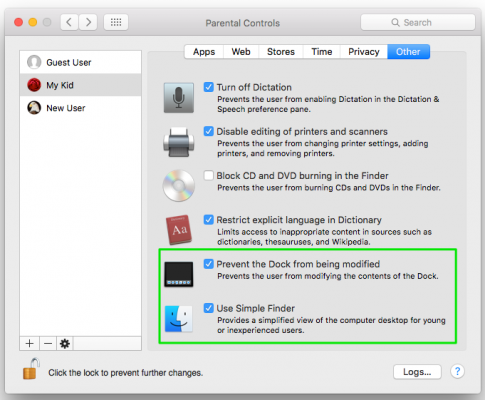
- On the Other tab, check "Prevent the Dock from being modified." Check "Use Simple Finder" for young kids (Kindergarten age or younger)
6. Click the lock when you're done to require an administrator password for any additional changes to the parental controls.
Melanie was a writer at Laptop Mag. She wrote dozens of helpful how-to guides, covering both the software and the hardware side of things. Her work included topics like SSDs, RAM, Apple, Excel, OneDrive, and detailed guides for Windows users. Outside of all her useful advice, Melanie also penned a few reviews for Laptop Mag, including Android emulators that help you run apps on your PC.
