How to Uninstall Windows 8 From a Dual-Booting PC

If you set up your PC to dual boot between Windows 7 and Windows 8, but have decided to end the experiment and go back to using Windows 7 full time, we have good news. It's incredibly easy to erase Windows 8 from your hard drive and reclaim those precious gigabytes of storage space.
Note: If you overwrote Windows 7 with Windows 8 rather than dual-booting, then you'll need to do a full system restore from a back up.
To erase your Windows 8 installation from the dual-boot configuration and just have Windows 7, perform these steps:
1. Boot into Windows 7
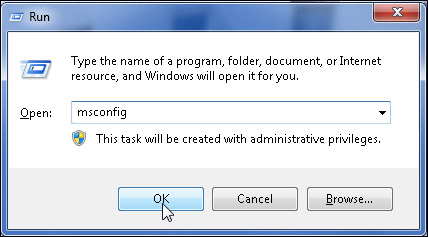
2. Launch Msconfig by hitting Windows + R to get the run box, typing msconfig and clicking Ok.

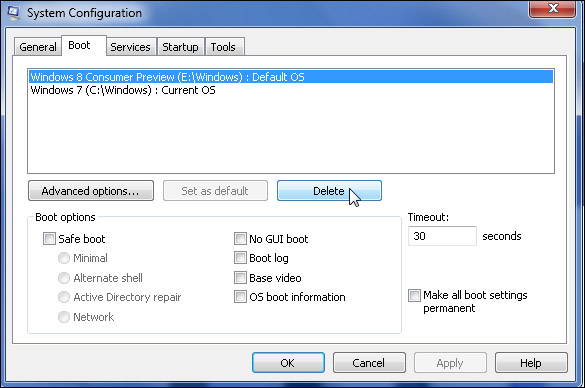
3. Select the Boot tab.
4. Select Windows 8 and click Delete.
Stay in the know with Laptop Mag
Get our in-depth reviews, helpful tips, great deals, and the biggest news stories delivered to your inbox.

5. Click OK to exit msconfig.
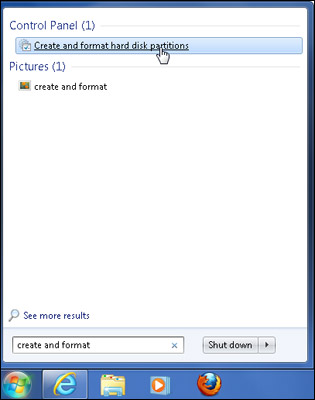
6. Launch Disk management by typing "Create and format" into the Start Menu and clicking on the "Create and Format Hard Disk Partitions" shortcut.

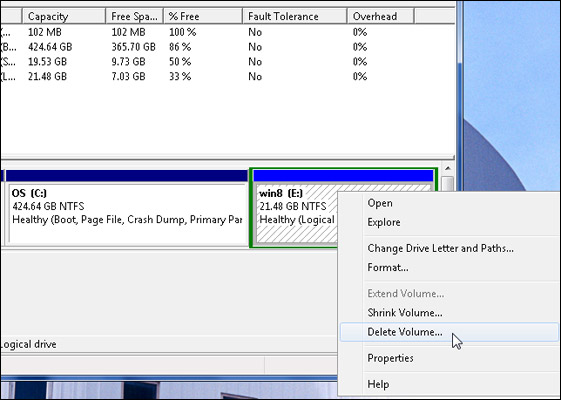
7. Right click on the Windows 8 partition and Select Delete Volume.

After you delete Windows 8's partition, you can either turn the unallocated space it leaves behind into a separate partition for data or add it on to your current Windows 7 partition by clicking on the primary partition (usually your C drive) in disk management and selecting Extend volume.

