How to Use macOS Photos to Turn Live Photos into GIFs
Your iPhone shoots Live Photos, which capture video footage from before and after a still image, but while iOS can't turn those into GIFs on its own, your Mac can. All you need to do is open those image in the Photos app, which uses iCloud to sync images from your phone, and know about a couple of steps.

Before we dive in, you'll want to think about what kind of GIF you want. GIFs made using the Loop cycle show the footage over and over again, while those made with the Bounce effect play that footage forward, then in reverse and repeat. Here's how to turn Live Photos into GIFs in Photos for macOS:
MORE: Best New macOS 10.13 High Sierra Features
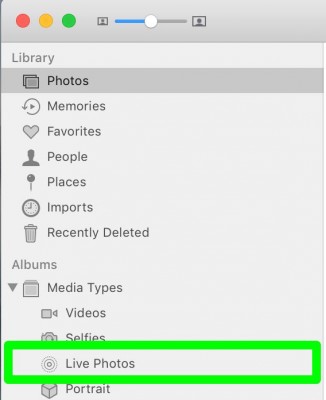
1. In the left menu, under Albums, select Live Photos.
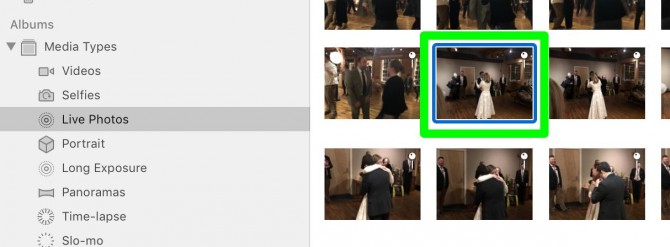
2. Double click a Live Photo. Hover over an image to preview its motion.
3. Click Edit.

4. Click Live to open the motion menu.
Stay in the know with Laptop Mag
Get our in-depth reviews, helpful tips, great deals, and the biggest news stories delivered to your inbox.

5. Select an option. Bounce cycles the footage forwards and then in reverse and Loop shows the video chronologically, while Long Exposure doesn't convert to GIF. After you select an option, you'll see how the effect works for yourself.

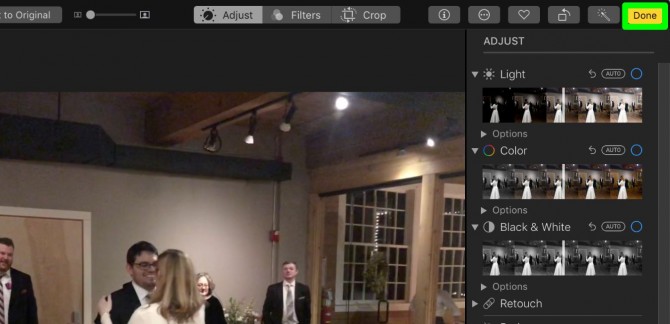
6. Click Done.
7. Click File.

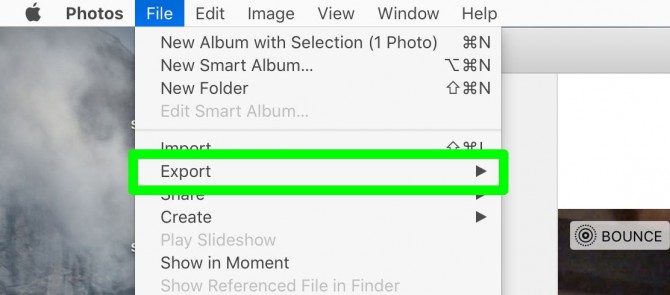
8. Select Export.
9. Click Export GIF.

10. Navigate to a location and click Export.
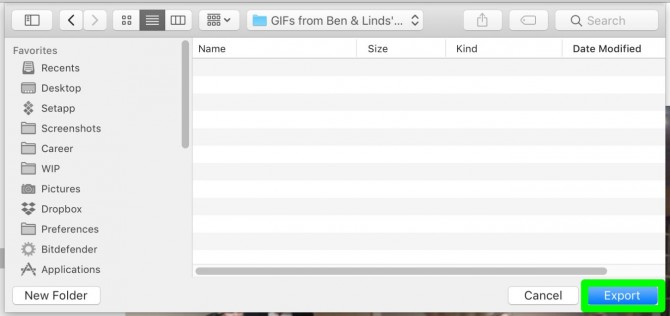
Congrats, you've made a GIF out of a live photo!

macOS High Sierra Tips
- How to Download and Install macOS High Sierra
- How to Use Picture-in-Picture on a Mac
- How to Use Siri on Your Mac
- How to Use Optimized Storage in macOS Sierra
- How to Use Memories in the Photos App on Mac
- How to Use Messages in macOS Sierra
- How to Use Apple Pay in macOS Sierra
- How to Unlock a MacBook with Your Apple Watch
Henry was a contributing writer at Laptop Mag. He penned hundreds of articles, including helpful how-tos for Windows, Mac, and Gmail. Henry has also written about some of the best Chromebooks, and he has reviewed many Apple devices, including various MacBook Air laptops. He is now a managing editor at our sister site Tom's Guide, covering streaming media, laptops, and all things Apple.
