Change Your Router's Media Access Control (MAC) Priority Settings: How to

MAC settings are typically under the Quality of Service settings, though MAC priorities affects hardware settings instead of software. Assigning MAC priorities allows you to rank the devices in your home, assigning the highest priority to those commonly used to stream online video or play online games. For example, if you have an Xbox 360 in your household and use it to stream movies and TV shows from Netflix, Hulu or Amazon, you’ll want to make sure the Xbox 360 always takes priority over other devices when multiple devices are being used.
MAC priority settings only kick in if multiple devices are being used at the same time, which might be a seldom occurrence based on your usage habits. When multiple devices are being used, however, the combination of MAC and QoS priority will ensure your network is blazing fast.
1. Log into your account. Open your browser and enter the manufacturer’s default IP address, typically located on the underside of your router or in the user manual or a custom one that you set. Using your username and password, log into your router settings page.
2. Open the Wireless tab to edit your wireless settings.
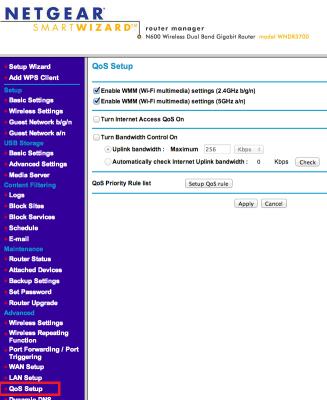
3. Locate the QoS Settings. This can likely be found as a subcategory beneath advanced network settings or Wireless Settings.
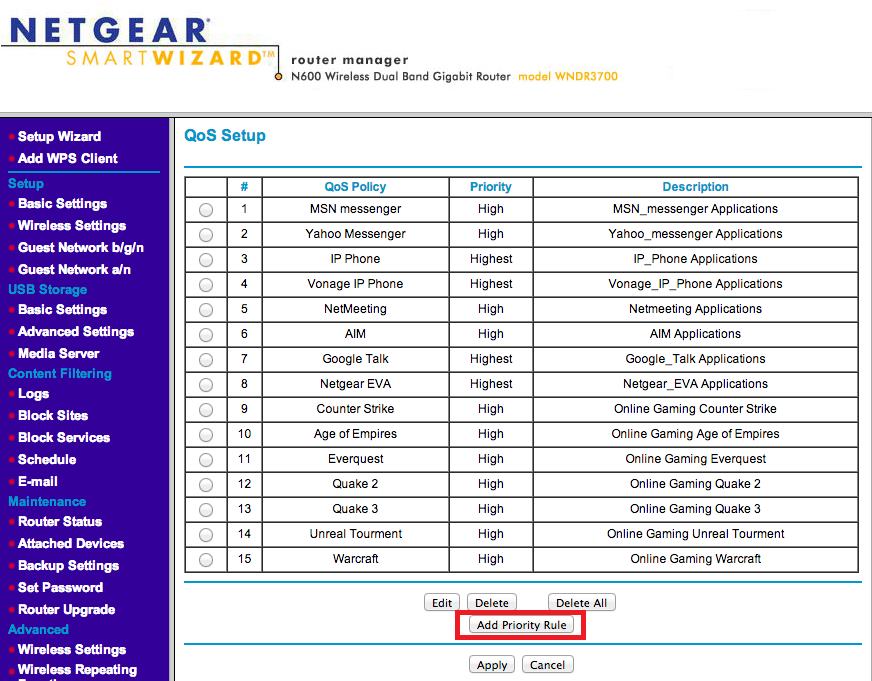
4. Click on the Add Priority Rule button.
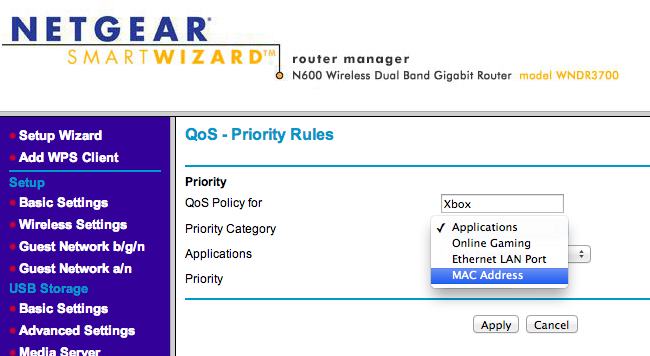
5. Locate the MAC Address of the device you want to assign high-priority to. The location of the device’s MAC address will vary on a per-device basis, and you may need to consult various manuals. The MAC Address is formatted in six groups of two digits, separated by hyphens or, more typically, colons. (01:23:45:67:89:ab, for example).
Stay in the know with Laptop Mag
Get our in-depth reviews, helpful tips, great deals, and the biggest news stories delivered to your inbox.
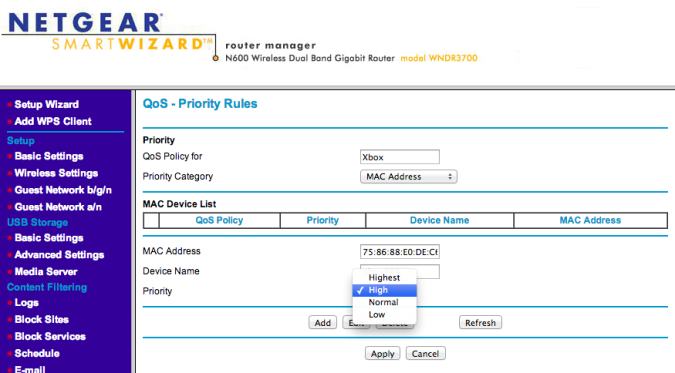
6. Select MAC Address under the Priority category drop-down. Enter your device’s MAC address into the appropriate field, then assign it a priority rating. These ratings typically range from Very High to Low.
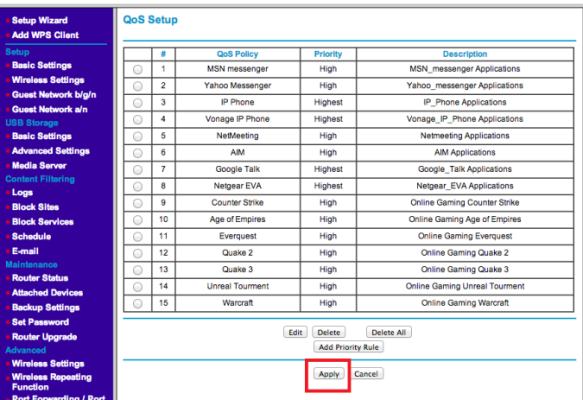
7. Click Apply.
