How to Pin Drives to the Navigation Pane of Windows 10 File Explorer
The File Explorer has all your drives tucked under ‘This PC.’ It makes the left navigation pane clutter free but also adds an extra click to get to the drive you want to access. You can pin the drive so that it shows up at the top for quick access. Or, you can pin folders you use often in the same way.
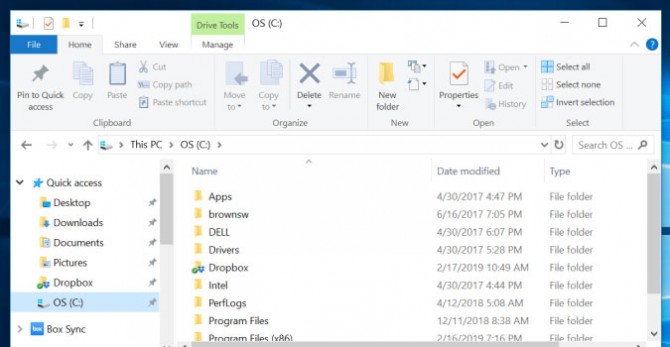
Either way you want to go, you can certainly make File Explorer more useful by pinning a few folders for quick access later.
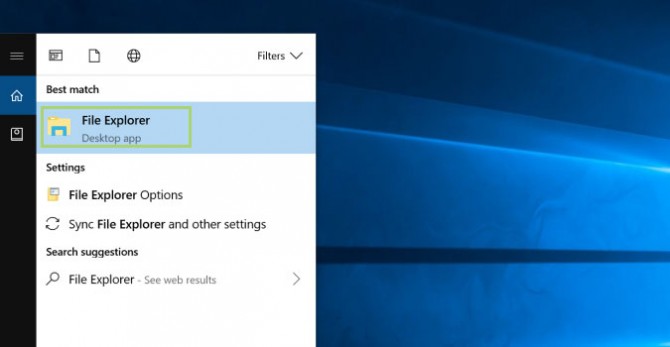
1. From the taskbar, type File Explorer in the search box. You can also search from inside the Start menu if you’ve previously disabled Cortana’s Desktop search field.

2. Click on File Explorer to open a window.
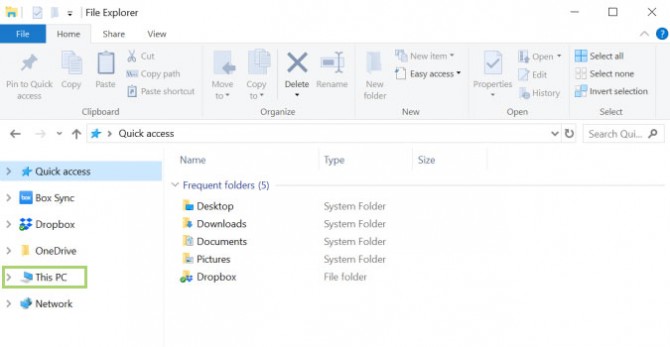
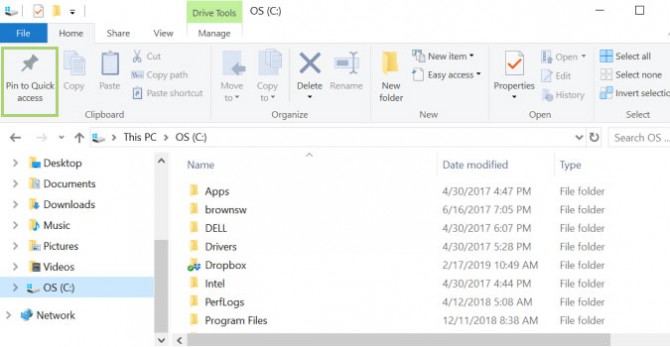
3. Click This PC in the left navigation pane to locate your drives.
4. Select the drive you want to pin.
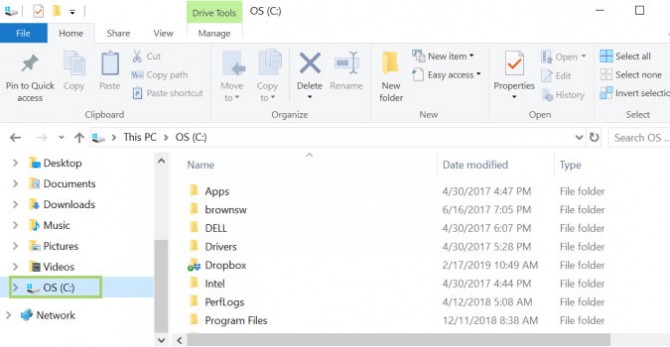
5. Click Pin to Quick Access on the menu bar.
Stay in the know with Laptop Mag
Get our in-depth reviews, helpful tips, great deals, and the biggest news stories delivered to your inbox.
Credit: Microsoft
Bryan covers everything you need to know about Windows, social media, and the internet at large for Laptop Mag. Thanks to his extensive knowledge of operating systems and some of the most popular software out there, Bryan has written hundreds of helpful guides, including tips related to Windows 11 drivers, upgrading to a newer version of the OS, editing in Microsoft Photos, or rearranging pages in Google Docs.
