How to Set Up Canned Replies Using Quick Parts in Outlook
Whether you're using Outlook 365 or Outlook 2016, Quick Parts is designed to make your life simpler by helping to speed up tasks you perform regularly. In this case, we’re going to see how easy it is to create canned email messages you can use over and over again.
The process is simple, and it’ll save you thousands of keystrokes (or more) each year. Setup takes just a few minutes, and Outlook will automatically save your canned replies until you decide to remove them.
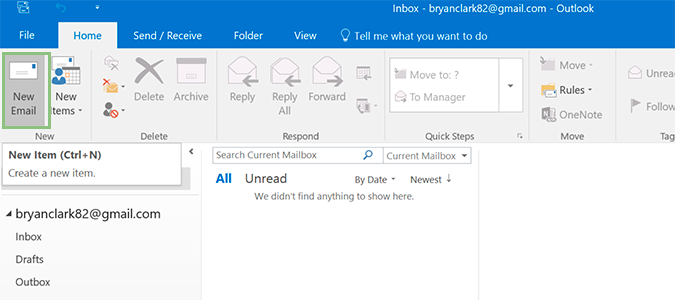
1. Open Outlook and start a new email.
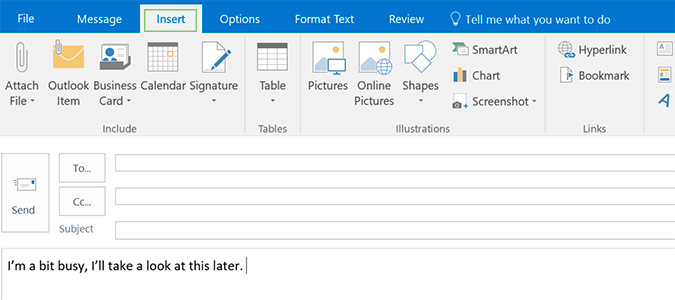
2. Click the Insert tab in the new email.
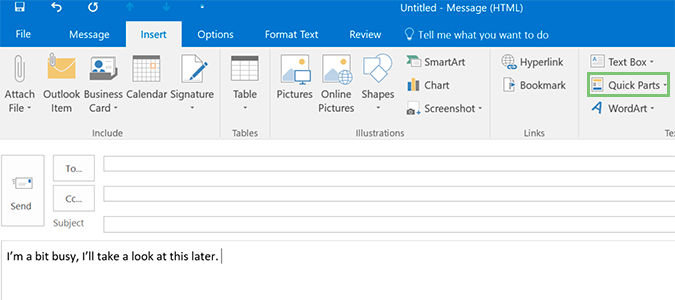
3. Press Quick Parts. If you find it’s greyed and unclickable, simply click within the body of the email and it should appear.
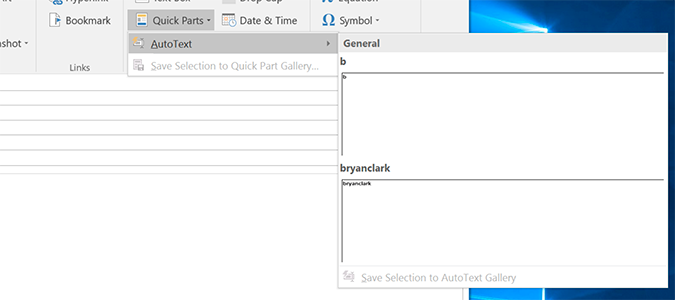
4. Select AutoText and type the desired title in the top box, and the full message below.
5. Click QuickParts and select the appropriate title for your canned response. Once you click, it’ll automatically add it to the body of the email.
Stay in the know with Laptop Mag
Get our in-depth reviews, helpful tips, great deals, and the biggest news stories delivered to your inbox.
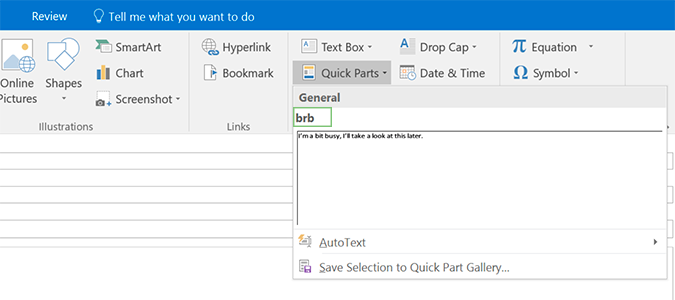
Or, there’s another way to do this on the fly by just selecting text to add. To do that, keep reading.
6. Type a message in the body of an email and select the text.
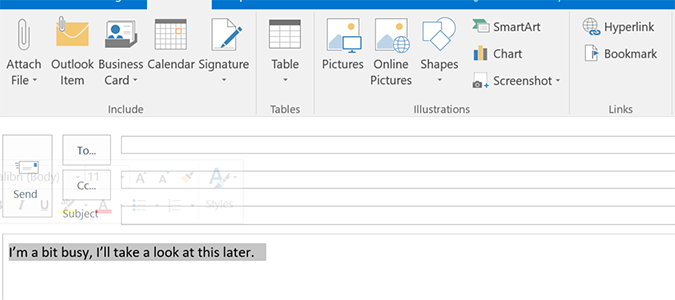
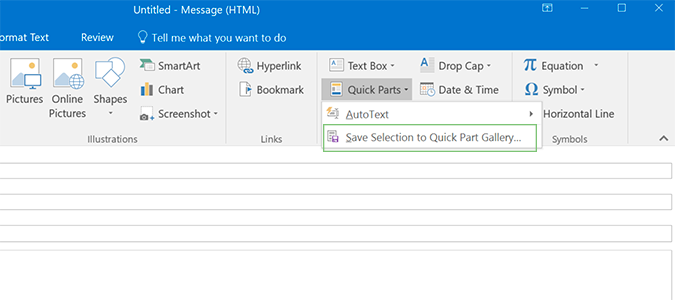
7. Click Quick Parts and Save Selection to Quick Part Gallery…
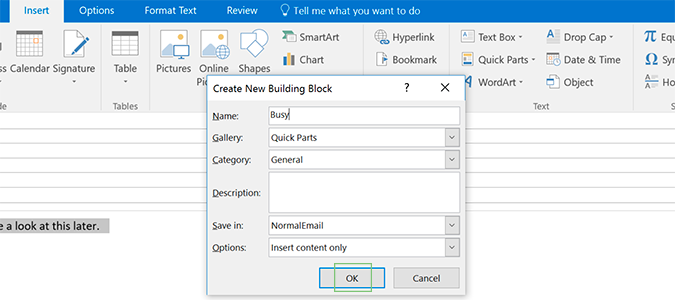
8. Add a title that’s easy to remember, and additional information if desired. Press OK to save. None of it’s required, aside from the title.
9. Repeat Step 5 to add it to the body text of an email when needed.

Microsoft Outlook Tips
- Block a Sender in Outlook 2016
- How to Instantly Mark Messages as Read in Outlook 2016 and Prior
- Edit New Message Alerts in Outlook
- How to Mail Merge in Office 2016
- Set an Out of Office Reply in Outlook
- How to Create Custom Groups in Outlook 2016
- Download Your Address Book in Outlook 2016 and Prior
- How to Archive Mail in Outlook 2016
- Create an Email Signature in Outlook 2016 and Prior
- Attach a Calendar Event to an Email
- Set Up a Universal Inbox
- Import Contacts to macOS Address Book
- Purge Deleted Messages
- Delete Addresses in Outlook Autocomplete
- Change the Attachment Size Limit in Outlook
- Import Contacts via CSV
- Back Up Outlook Data
- Change Fonts in Outlook
- Export Contacts to CSV
- Add an Image to Your Signature
- Set Up Out-of-Office Messages
- Create Email Templates
- Restrict Notifications to Important Emails Only
- Get Read Receipts
- Use Two Time Zones for Meetings
- Recall an Email
- Save Common Searches
- Filter Email
- Block Unwanted Mail
- Stop Sending Winmail.dat
- Automate Repetitive Actions
- Schedule Outgoing Mail
Bryan covers everything you need to know about Windows, social media, and the internet at large for Laptop Mag. Thanks to his extensive knowledge of operating systems and some of the most popular software out there, Bryan has written hundreds of helpful guides, including tips related to Windows 11 drivers, upgrading to a newer version of the OS, editing in Microsoft Photos, or rearranging pages in Google Docs.
