How to get the most out of your M1 Mac: 6 easy tips
Get the most out of your Apple Silicon Mac
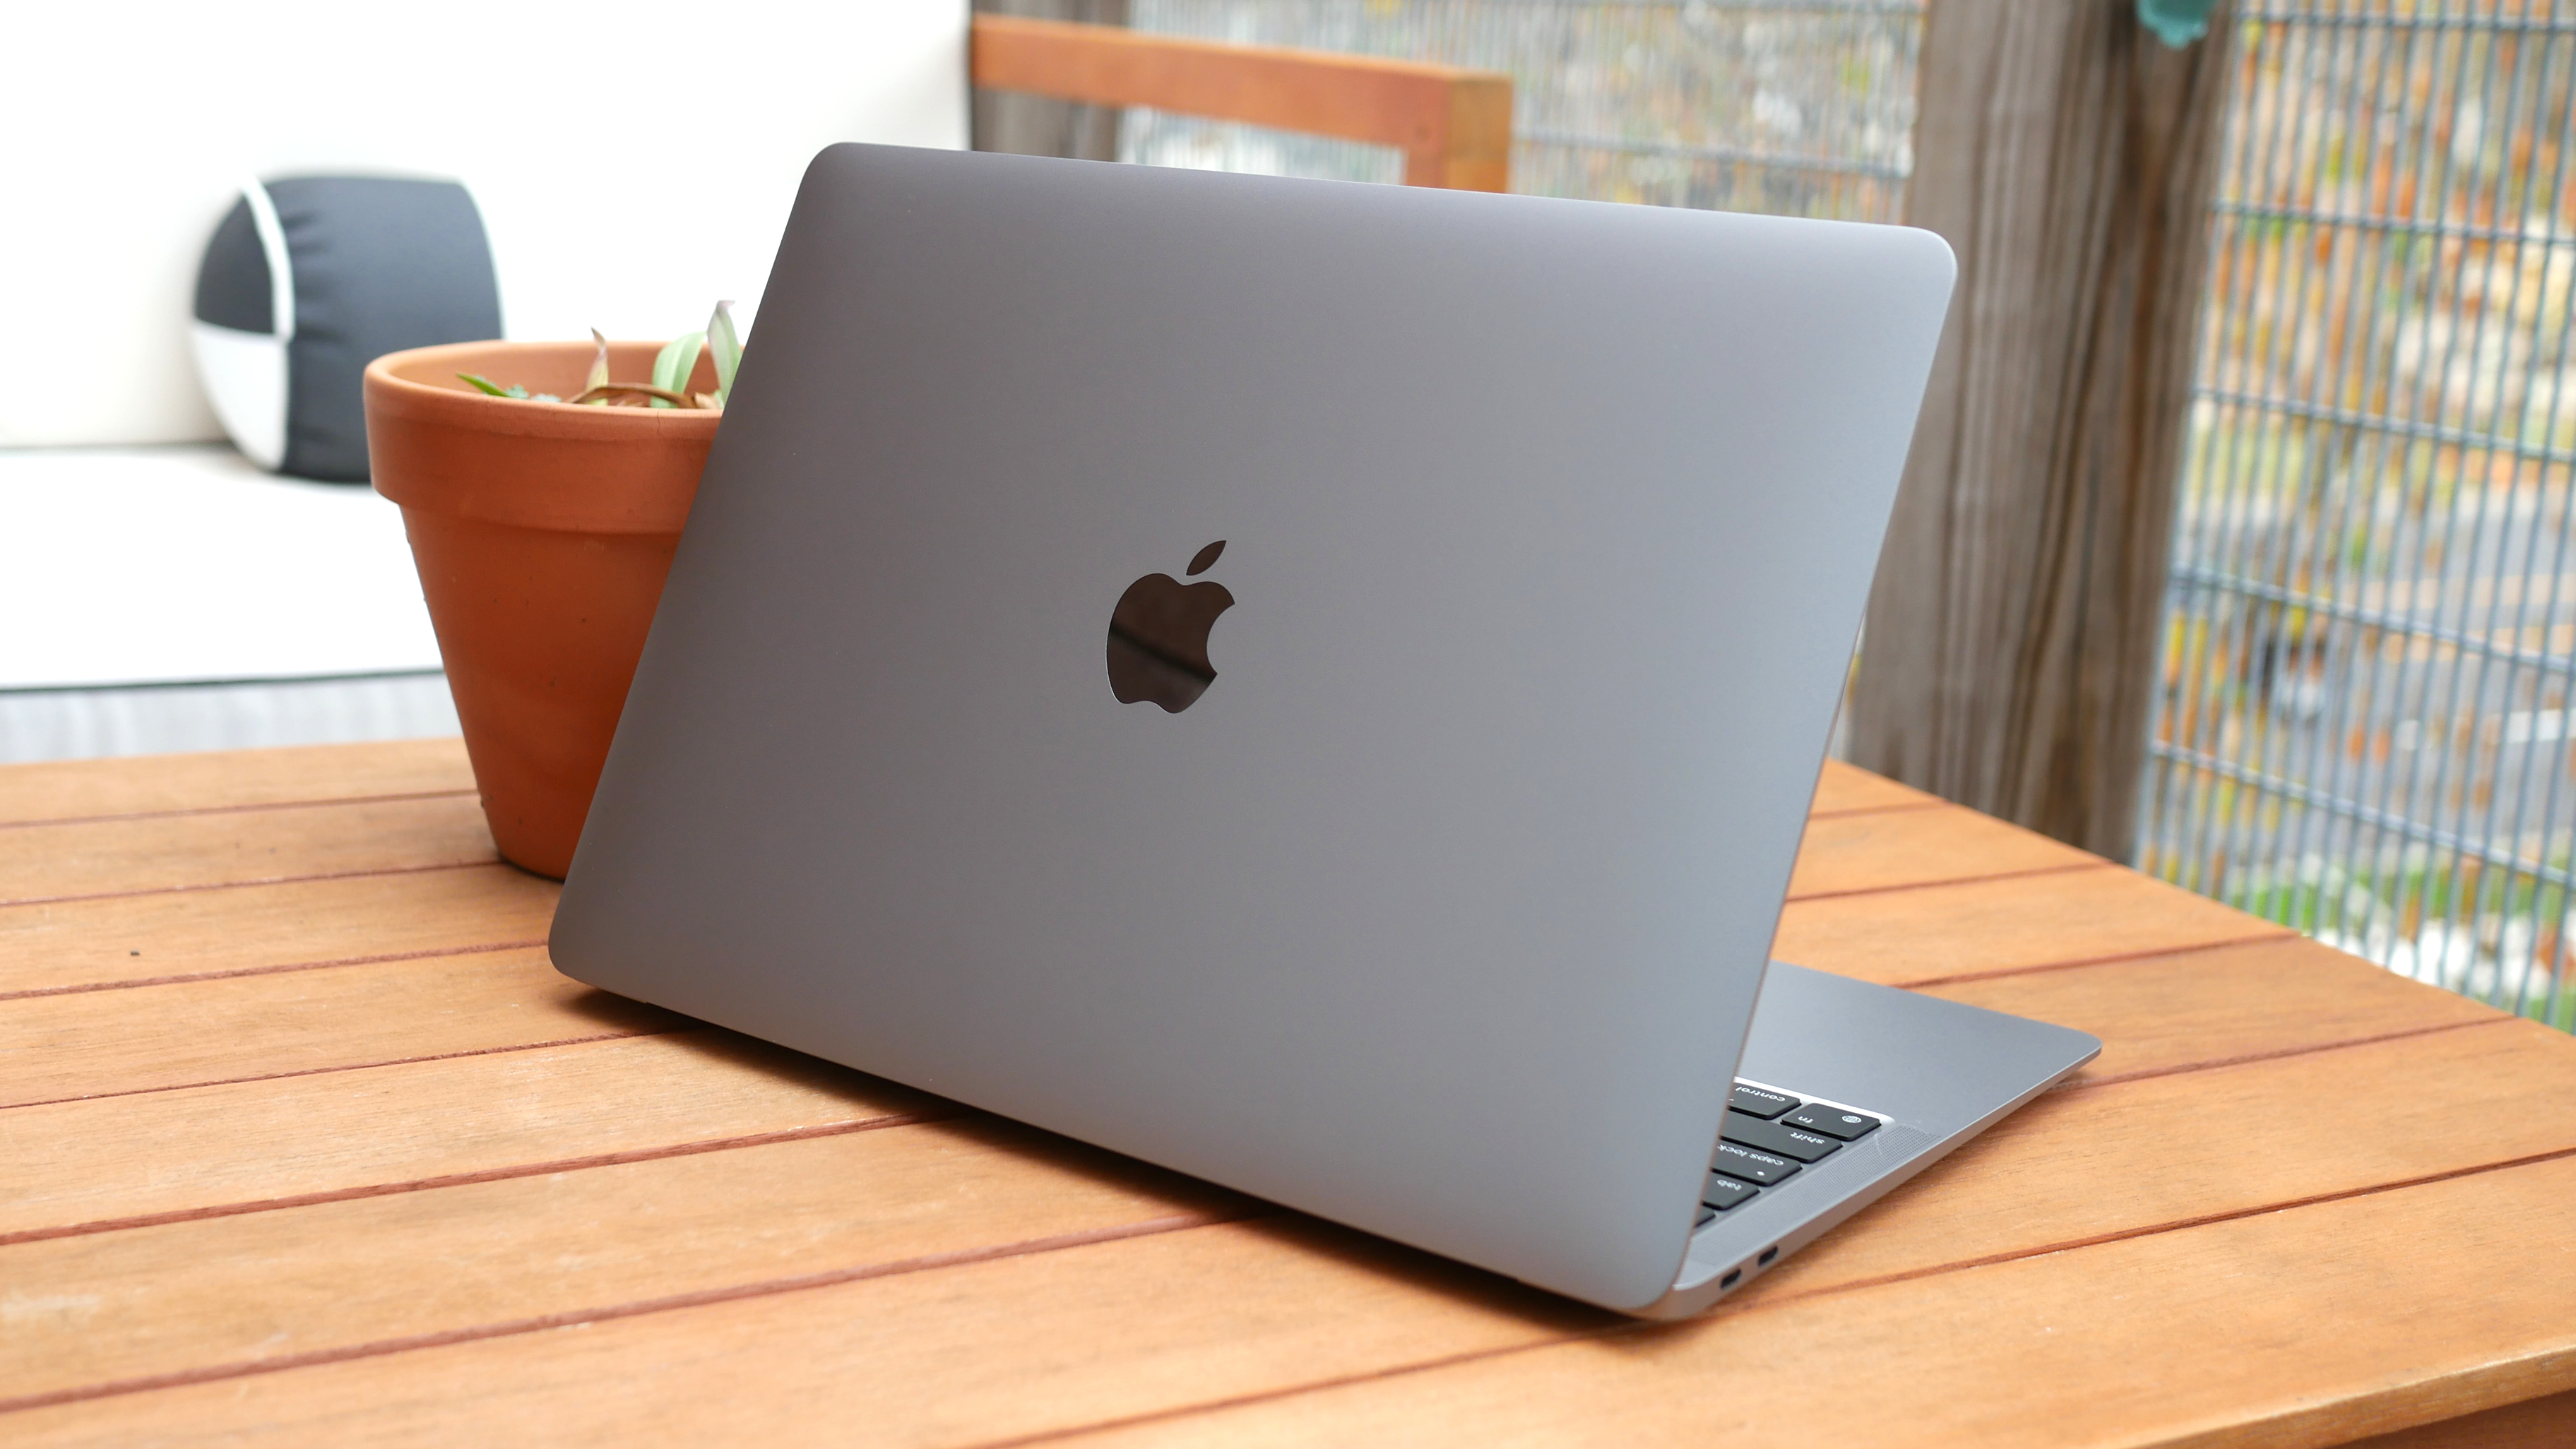
The latest MacBook Air, MacBook Pro, and Mac Mini are the first computers to come equipped with Apple’s in-house M1 chip instead of Intel CPUs. There are a few things to consider when purchasing these new systems, but that doesn’t mean you have to face a steep learning curve when you boot up your new computer.
We’ve compiled the following tips to help you make the most out of your new M1 Mac. Use these tips and you’ll be browsing the web, editing spreadsheets and multitasking between several apps -- or performing any other activity -- as you would normally on your old Intel-powered Mac (but with even better performance!).
1. Check which apps support Apple silicon
M1-powered Macs work best with apps that are optimized for Apple Silicon. However, since this technology is still in its first generation, you’ll often come across apps that haven’t been yet updated for Apple’s M1 platform. While you can run software made for Intel chips on your M1 Mac, it won’t be as efficient as an Apple Silicon client and can take a toll on your battery life.
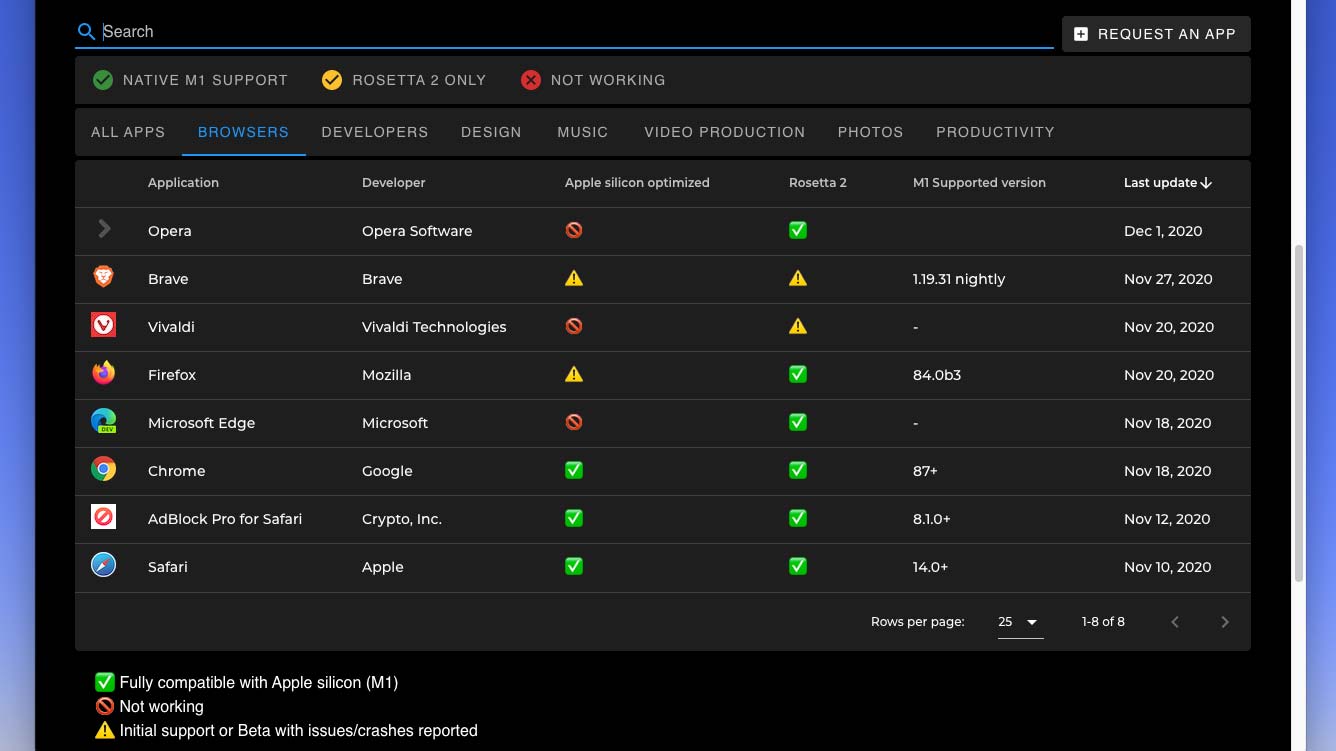
To check whether the app you’re about to install supports Apple's custom ARM-based chips, you can head over to this handy web tool and look for it. The website lists M1 compatibility for the majority of leading Mac apps and also says when it was last updated. On top of that, you’ll find details on how well that app’s Intel counterpart performs on an M1 Mac.
Similarly, there is a range of online resources where you can learn which games have been optimized for Apple Silicon, such as this exhaustive, real-time spreadsheet.
2. What’s Rosetta and why do you need it
When you install an app written for an Intel processor on your M1 Mac for the first time, you’ll be prompted to set up something called Rosetta.
Rosetta is what makes it possible for you to effortlessly run apps that are not compatible with Apple Silicon. You can think of it as a transition layer between the new M1 chip and Intel software. It automatically reengineers that app so that it can work on your M1 MacBook. That means you don’t have to sit around waiting for the original developer to roll out an update.
Stay in the know with Laptop Mag
Get our in-depth reviews, helpful tips, great deals, and the biggest news stories delivered to your inbox.
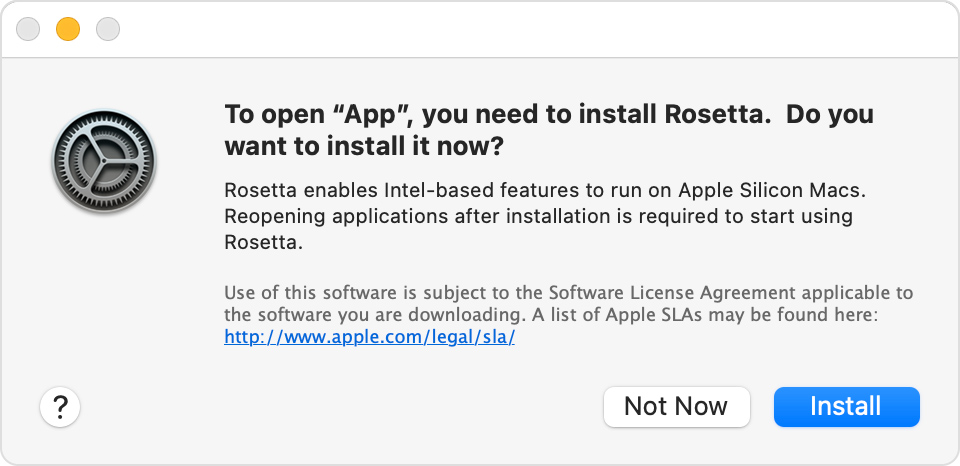
Configuring Rosetta takes mere seconds and all you have to do is click the “Install” button in the confirmation box that will appear when you try to install the first Intel software on your M1 Mac.
3. Force run universal apps in Rosetta
Even if an app has been rewritten for Apple Silicon, there’s a chance it may not function as intended on your Mac. That’s because every app is housed with many different modules, and in case the developer misses any one of these in their M1 revamp, the app can malfunction.
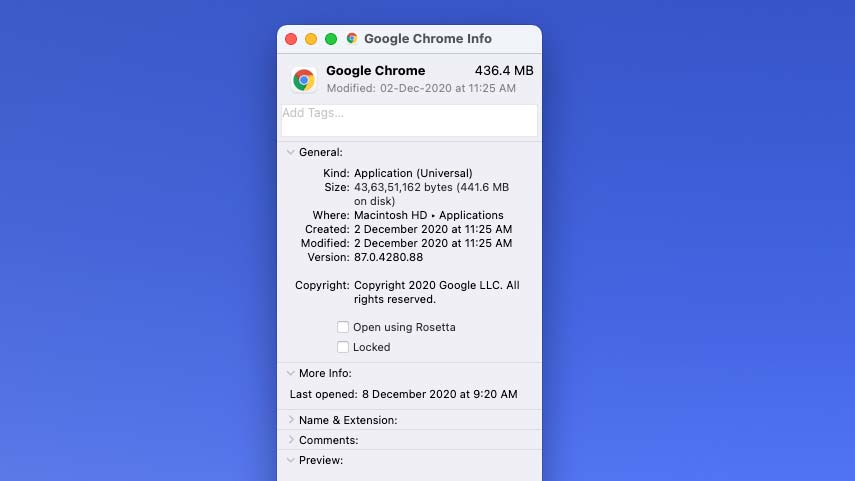
By default, your M1 Mac will launch such apps in the Apple Silicon environment. But if you face troubles or glitches with an app, you can easily switch back to Rosetta and render it as Intel software.
To do that, visit the “Applications” tab in the Finder, and right-click the app. Select “Get Info” and check the “Open using Rosetta” box if you’d like to run it with Rosetta.
4. Choose between Apple silicon and Intel versions of an app
Since the M1 chip is in its early days, most developers offer the option to pick between the Apple Silicon and Intel versions of their apps. This lets you compare both iterations’ performances and keep the one that’s currently better suited to your workflow.
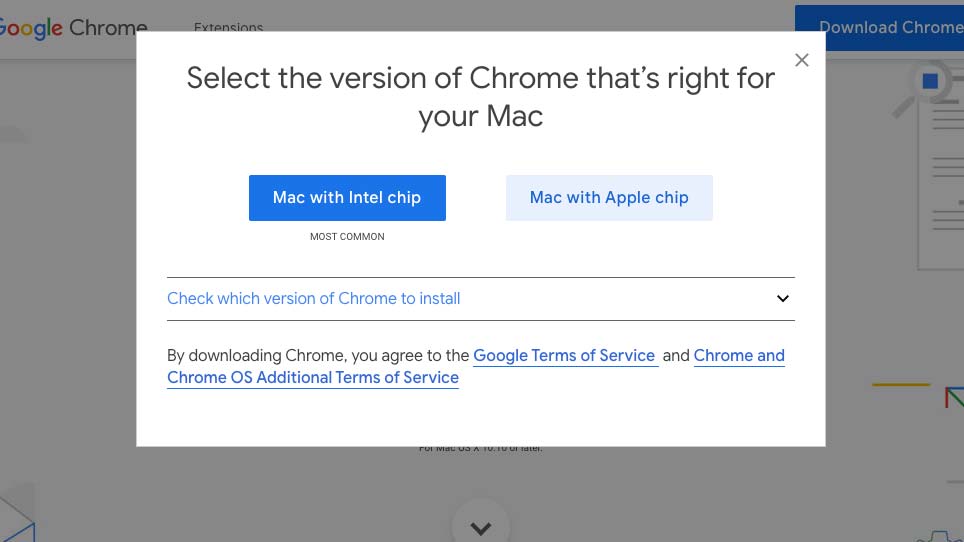
For instance, at the time of writing, Google Chrome’s Apple Silicon client had web image rendering issues. So instead, I downloaded its Intel counterpart.
You should be able to access the option to download either of these versions on the developer’s website if they have made it available.
5. Install iPhone and iPad apps on your Mac
One of the highlights of Apple’s new M1 processor is the ability to natively run iPhone and iPad apps on your MacBook laptop. This means you can install the apps and games you use on your smartphone on your computer and operate them with a mouse and keyboard instead of a touchscreen.
Most of the time, you will have a better experience with the service’s Mac-based app. However, there are plenty of instances where a mobile app is better suited for the job, like watching Netflix without an internet connection and accessing a larger games library.
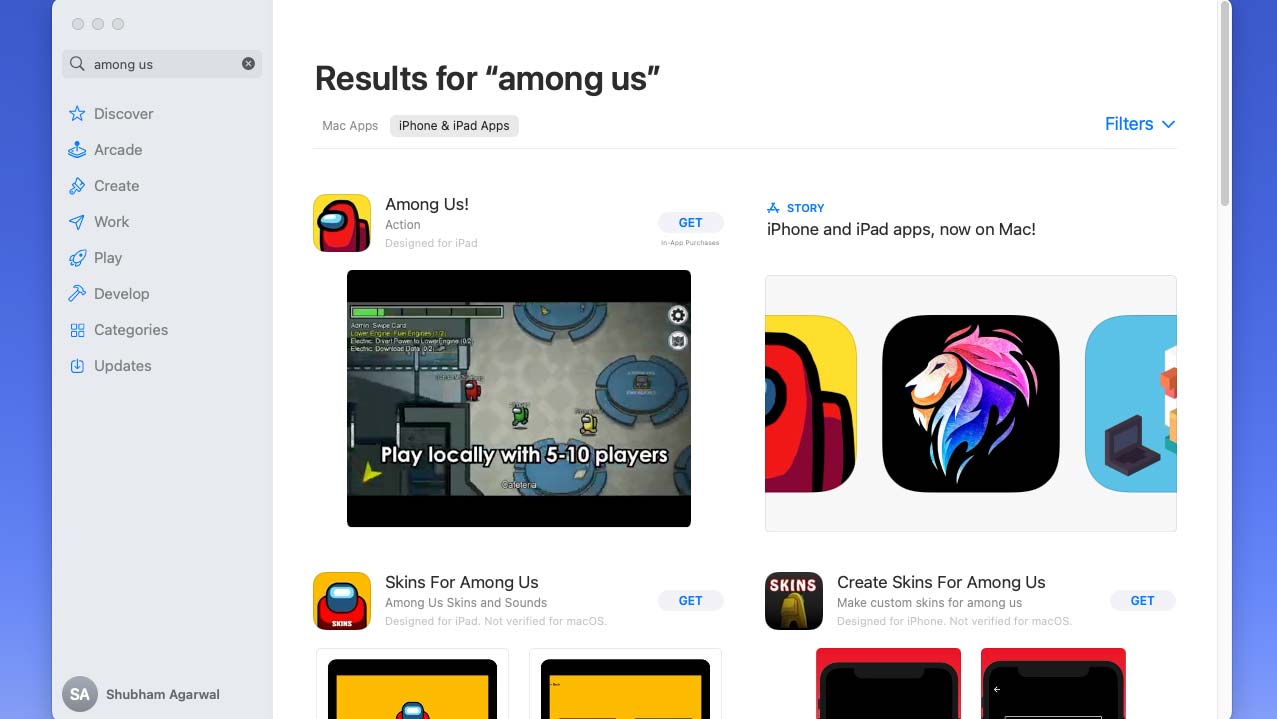
To install an iOS app on your Mac, you will have to search for it in macOS’ App Store and switch to the “iPhone & iPad Apps” tab in the results.
Unfortunately, at the time of writing, most iOS apps and games are not officially available for the Mac or are not optimized for a desktop OS. If you’re not concerned about bugs or abrupt crashes and you own an iPad or an iPhone, you can take advantage of workarounds like iMazing.
With iMazing, you can grab the IPA files of an iOS app from your iPhone or iPad and simply double-click it to install it on your Mac.
6. Find the keyboard alternatives to touch gestures
iPhone apps are designed to be used with a finger and rely on touch gestures like swipes and taps for performing various actions -- none of which you can do on your touchscreen-less Mac. To compensate for the lack of a touchscreen, Apple bundled a set of “Touch alternatives,” which let you execute these gestures with a mouse and a keyboard.
To check these out, launch an iOS app or game on your Mac. Click the app’s name at the top left corner and, in the dropdown, select “Touch Alternatives.”
Shubham Agarwal is a freelance technology journalist from Ahmedabad, India. His work has previously appeared in Business Insider, Fast Company, HuffPost, and more. You can reach out to him on Twitter.
