How to rotate text in Google Docs
A 90-degree rotation just makes sense sometimes

Google Docs is a forever-free document word program. While free, it certainly stands on its own against most paid options, including Microsoft Word. And while rotating text isn’t a great reason to choose Google Docs, or Microsoft Word, for that matter, it’s definitely useful during those odd times you need it.
Rotating your text may seem like a weird way to lay out a document, but it’s not without its uses. Labels on a graph, for example, are a common use, along with watermarks or makeshift organizational tools used for filing. Some even use rotated text as a creative tool to give emphasis to specific sections.
There are a handful of times rotating text in Google Docs proves useful. And for those times, we’re here to show you how it’s done.
Rotating text in Google Docs
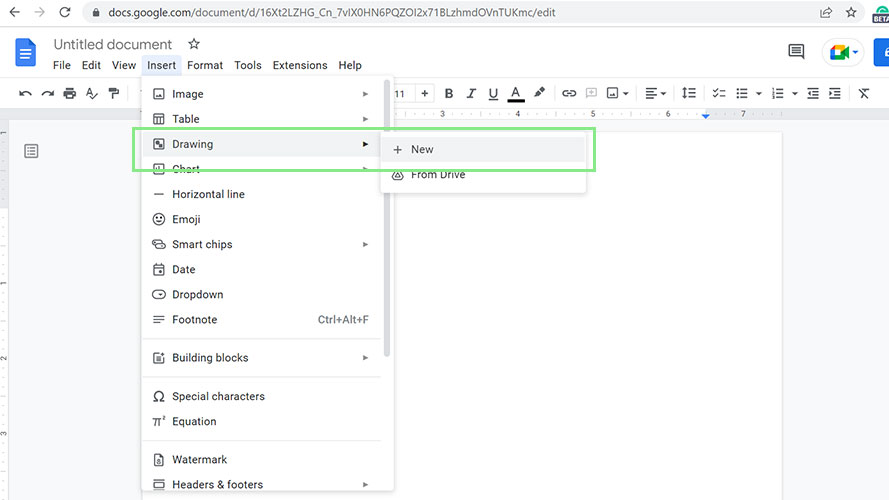
1. Rotating text on Google Docs will involve using its Drawing feature. To insert a rotated text, go to Insert > Drawing > New. This step will open the Drawing window that lets you insert shapes, pictures, and texts.
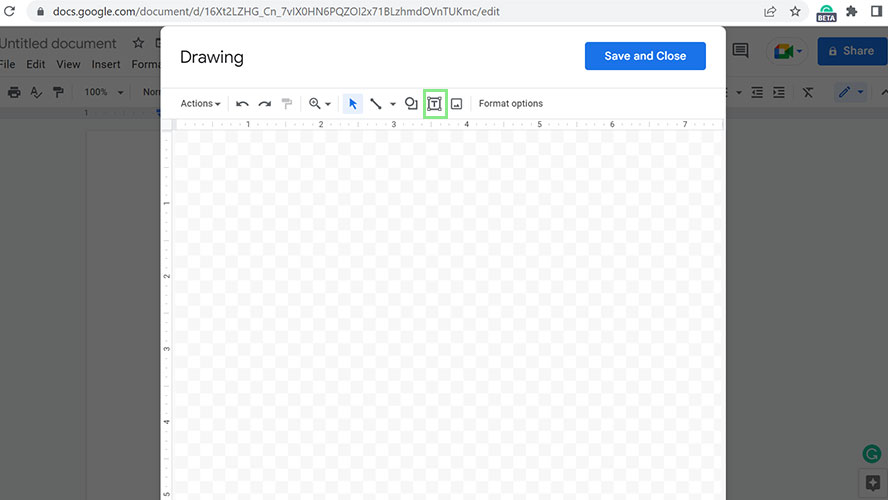
2. From the menu bar of the window above, select the Text box icon. Once you do this, your cursor should change to a plus “+” sign.
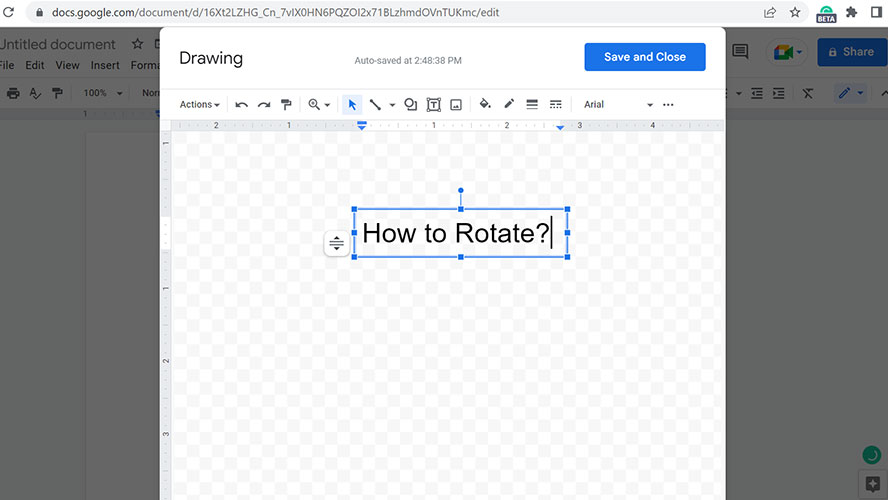
3. Next, draw a text box using your cursor and type in your desired text.
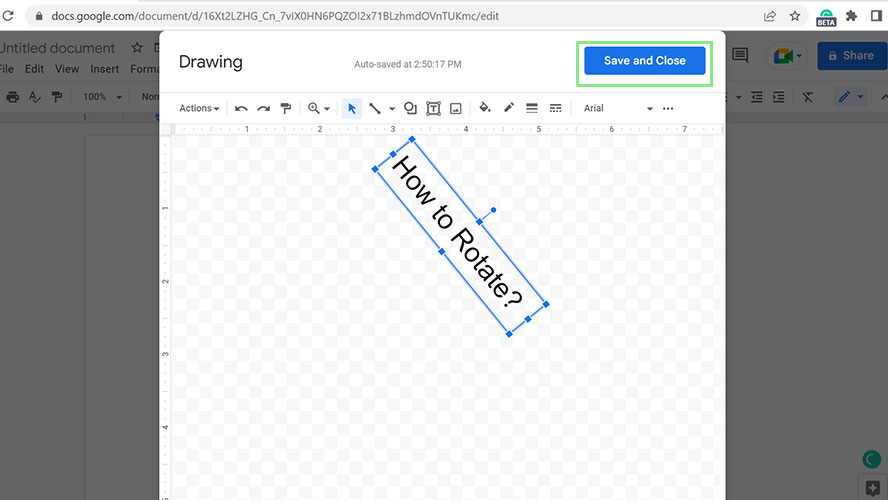
4. After typing your text, pull on the rotate anchor until your text gets to your preferred orientation.
Stay in the know with Laptop Mag
Get our in-depth reviews, helpful tips, great deals, and the biggest news stories delivered to your inbox.
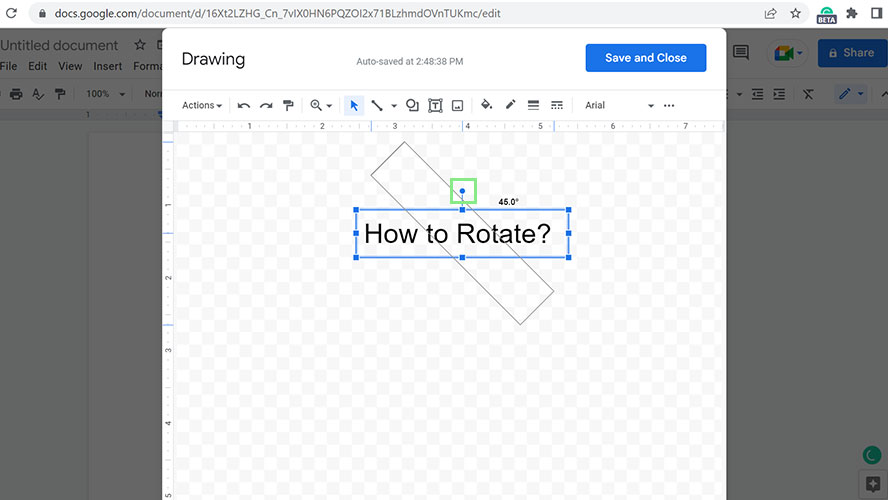
5. Lastly, click Save and Close on the Drawing window.
