How to use an external webcam for FaceTime on macOS
An external webcam can dramatically improve your FaceTime meetings or chats

Apple’s iPhones have some of the best cameras in the smartphone market, however, that hasn’t always been the case for MacBooks and iMacs. While the latest models have improved in this regard, owners of older models and anyone that just wants the best possible image quality will still want to turn to an external webcam for their meetings instead.
If you are one of these unsatisfied customers, you have probably thought about or already bought an external webcam. Although most webcams are plug-and-play, you still need to learn a few things before using an external webcam for your FaceTime meetings.
- Best webcams in 2025
- Where to buy a webcam: Best webcam deals in April 2025
- Best Apple deals of April 2025
First, you need to make sure that the webcam you buy is compatible with macOS. You should also check the resolution of your external webcam and compare it with your Mac’s webcam resolution. If you are looking for the best possible image we recommend a 1080p webcam (4K is still overkill for most users), but keep in mind resolution isn’t everything, a 1080p external webcam with a larger image sensor will outperform the 1080p webcam in the 14-inch or 16-inch MacBook Pro. Other factors you should consider are the materials of the webcam, portability, mounting options, and more.
Installing an external webcam on macOS for FaceTime
1. Before you can work on your external webcam, you first need to check whether your macOS laptop or desktop has the proper port for it. This varies depending on the webcam you choose and could be USB-A, USB-C, Thunderbolt or DisplayPort. If you don’t have an available slot, or your computer doesn’t have the proper port, you’ll first need an adapter or if this is going to be used at your desk consistently then consider a MacBook docking station.

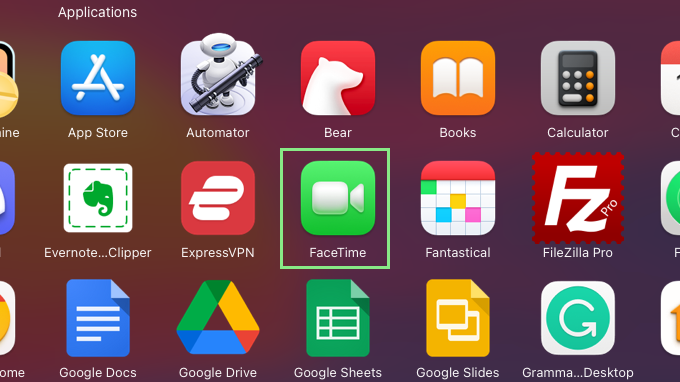
2. Plug in your webcam and open FaceTime. Allow your computer to load for a moment as it connects to your integrated webcam.

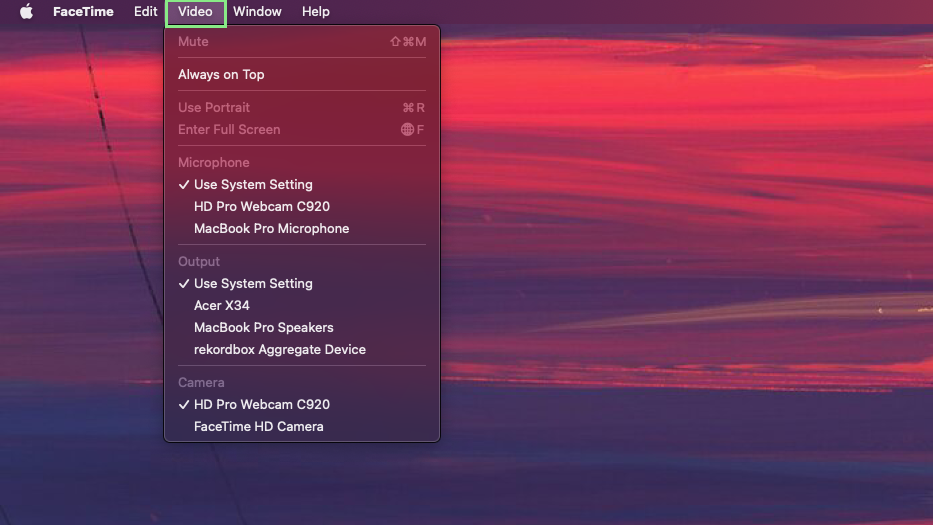
3. Next, click “Video” on the menu bar at the top of your screen.

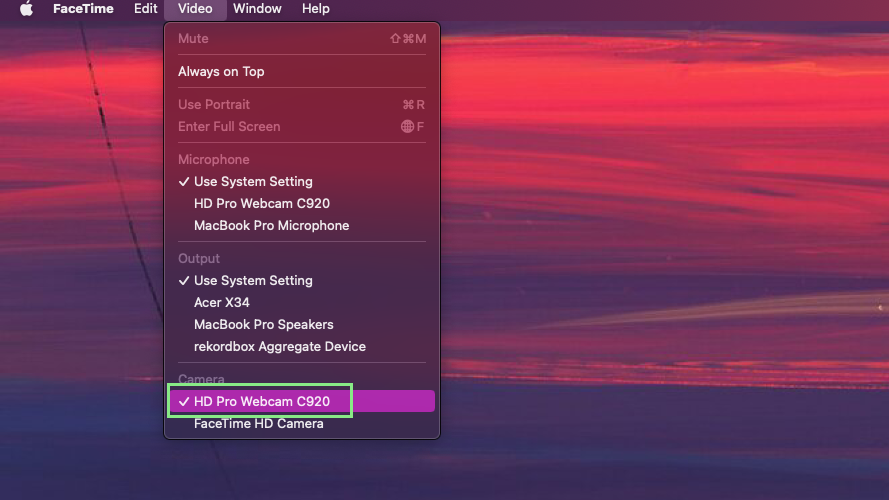
4. Under “Cameras”, select the external webcam you plugged in. Wait for FaceTime to load again as it switches video sources. That’s it; you are now using an external webcam for FaceTime.
Stay in the know with Laptop Mag
Get our in-depth reviews, helpful tips, great deals, and the biggest news stories delivered to your inbox.
