How to add users to Windows 11: Manage a shared computer easily
Keep your Windows 11 PC organized with multiple profiles

If you only have one Windows 11 desktop or laptop computer in the home that multiple people use, learning how to create individual user accounts is a great way to keep things organized. Each user can set up their desktop the way they want it and keep their downloaded files separate from everyone else's.
The easiest way to add users to Windows 11 is via the Settings app, and the process only takes a few minutes to complete for each new user. Once users have been added, you'll be able to switch their account from Standard to Administrator, depending on how much control you want them to have over the computer.
How to add users to your Windows 11 PC
Adding new users to your Windows 11 PC is a simple process, and it's just as easy to customize user profiles and manage permissions after they've been added. Here's how to get started:
1. Open your Settings app. You can click on the Start button and select Settings from there, or use the Windows key + I keyboard shortcut.
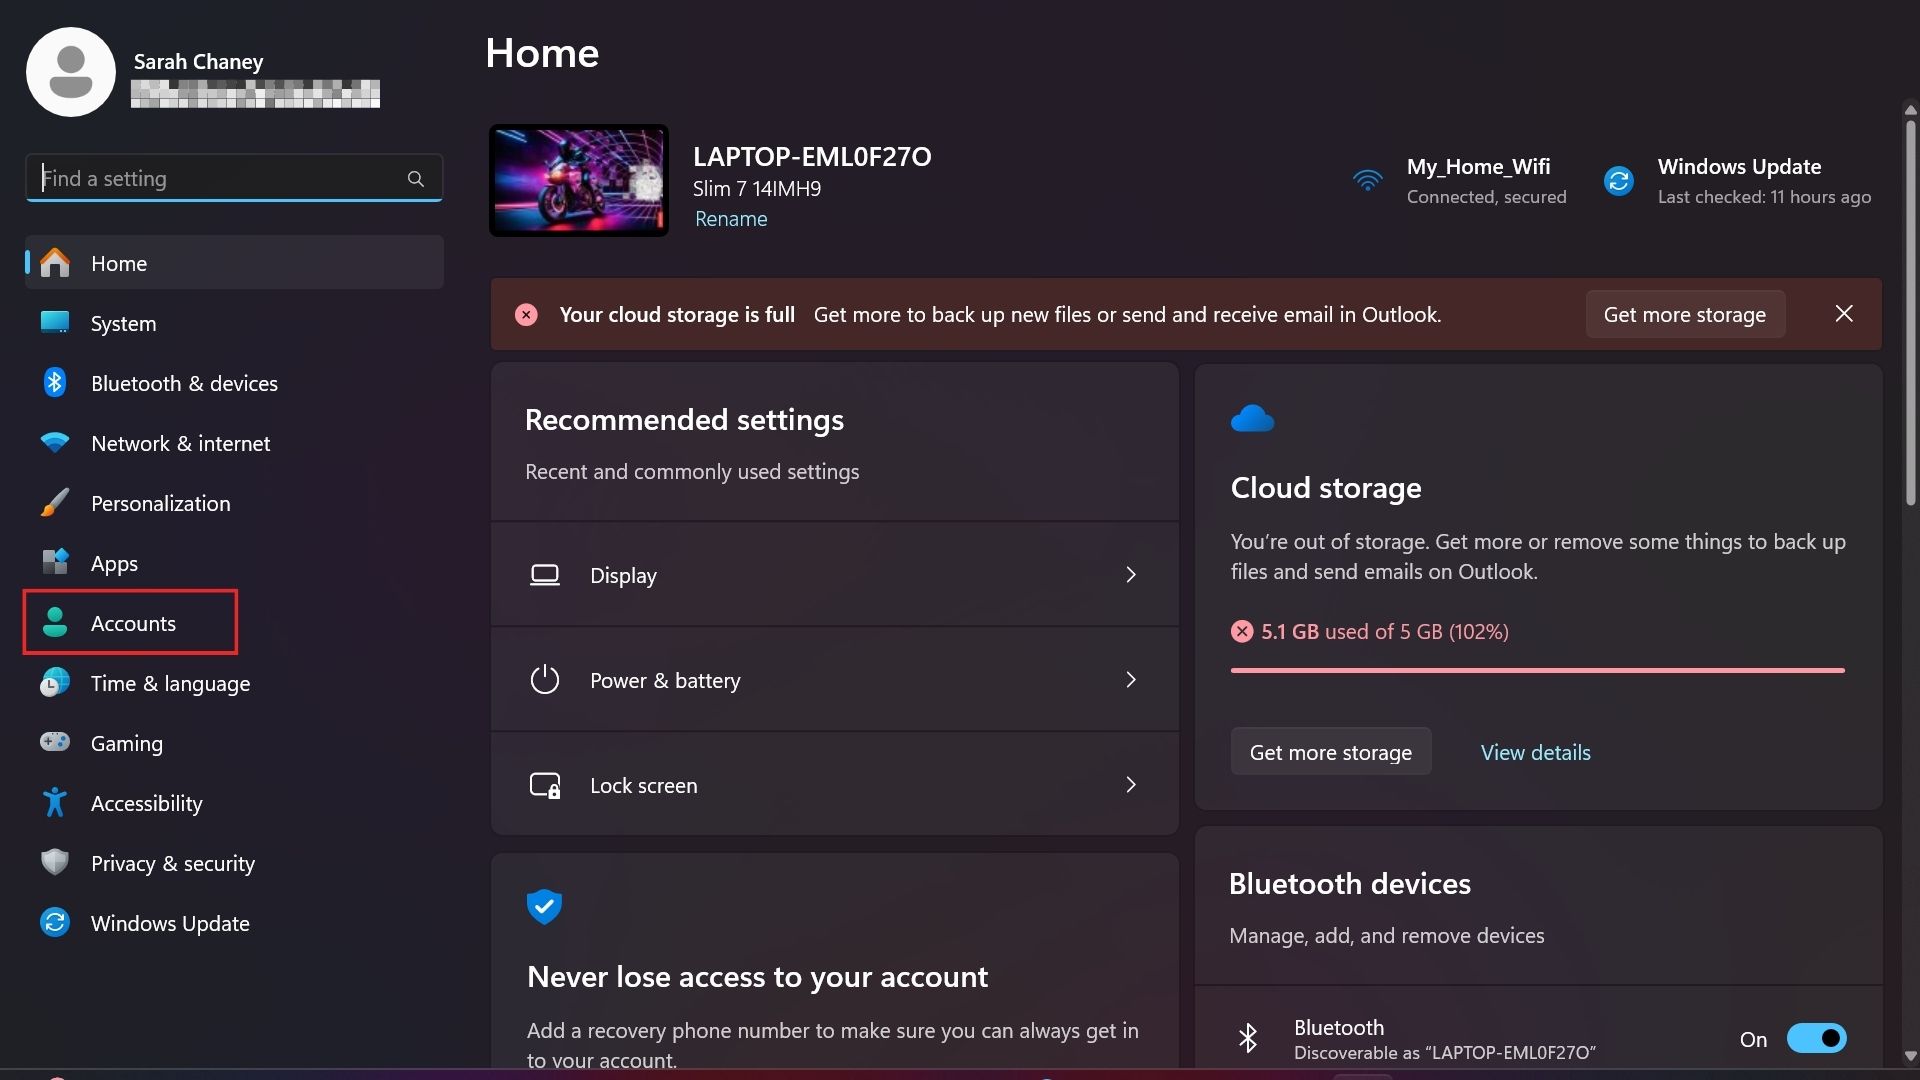
2. Select Accounts in the left-side menu.
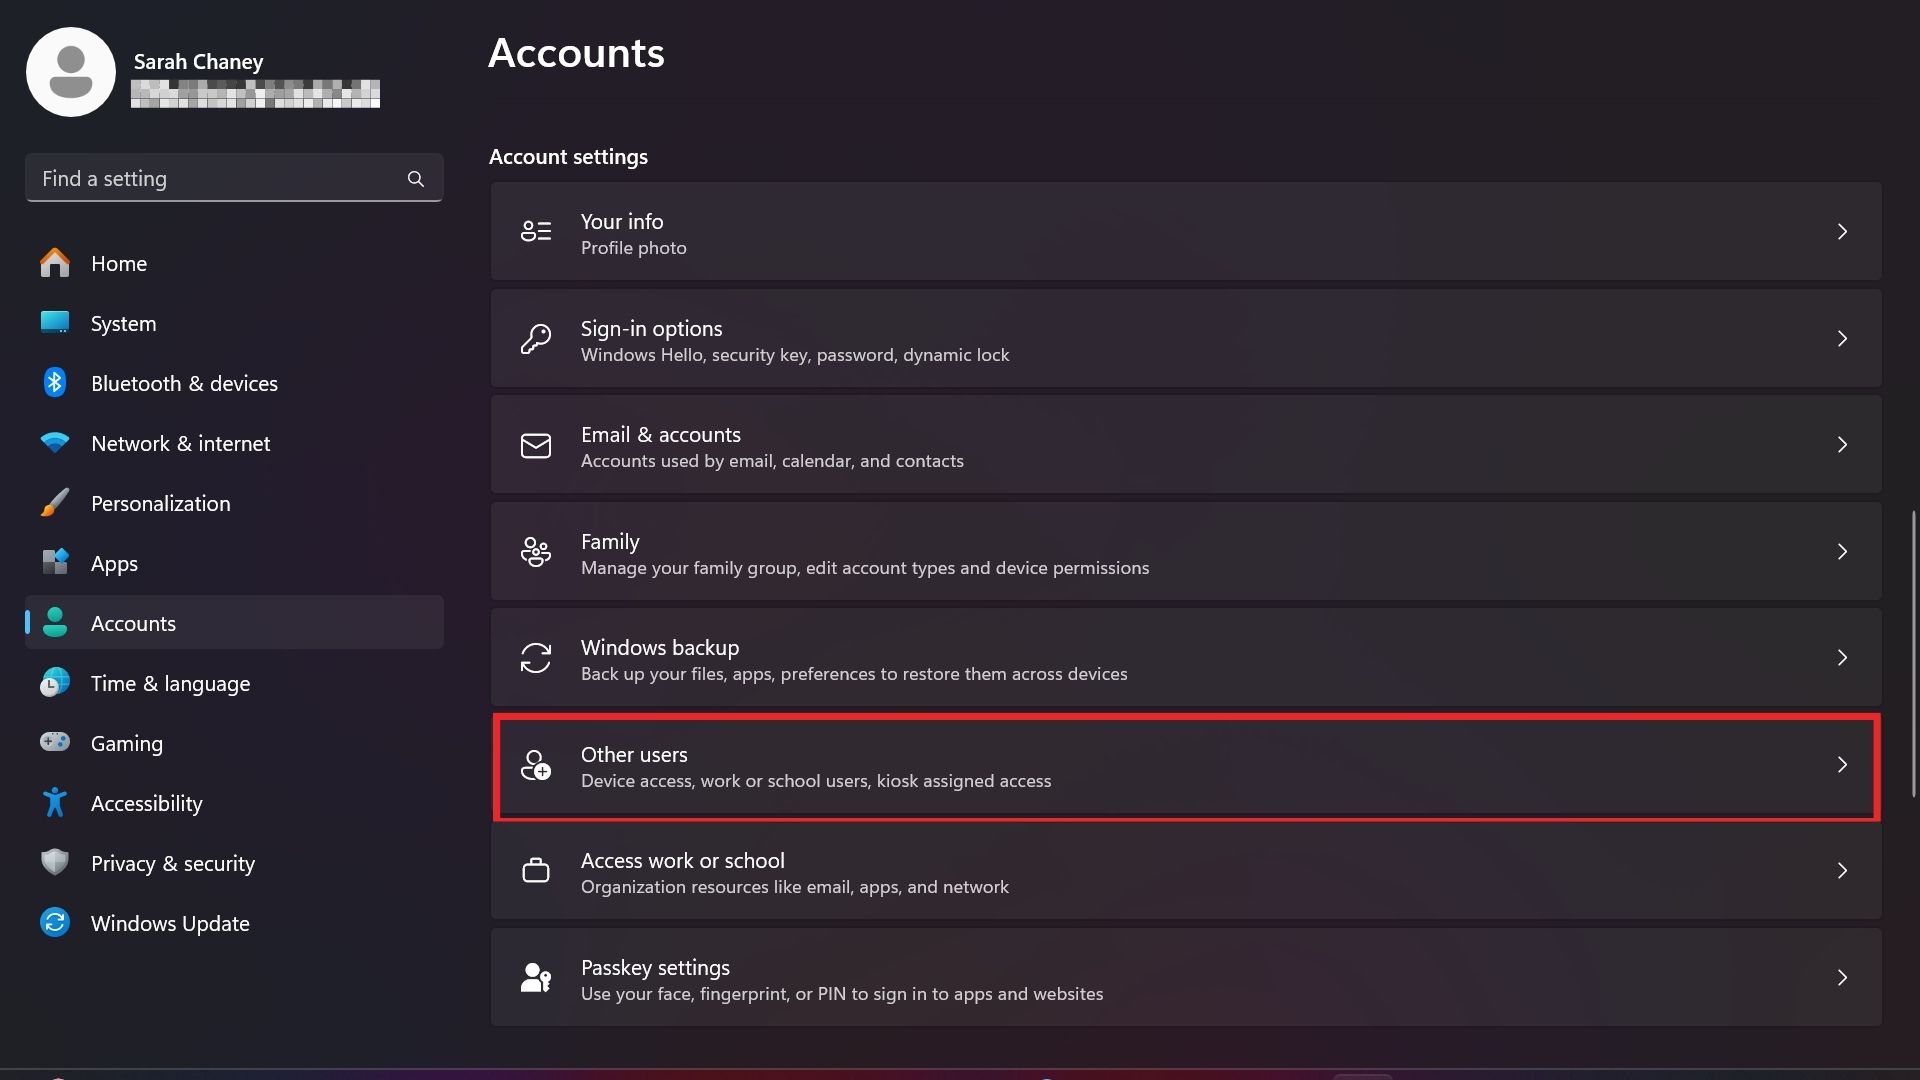
3. Scroll down and click on Other users from the center menu under the Account settings heading.
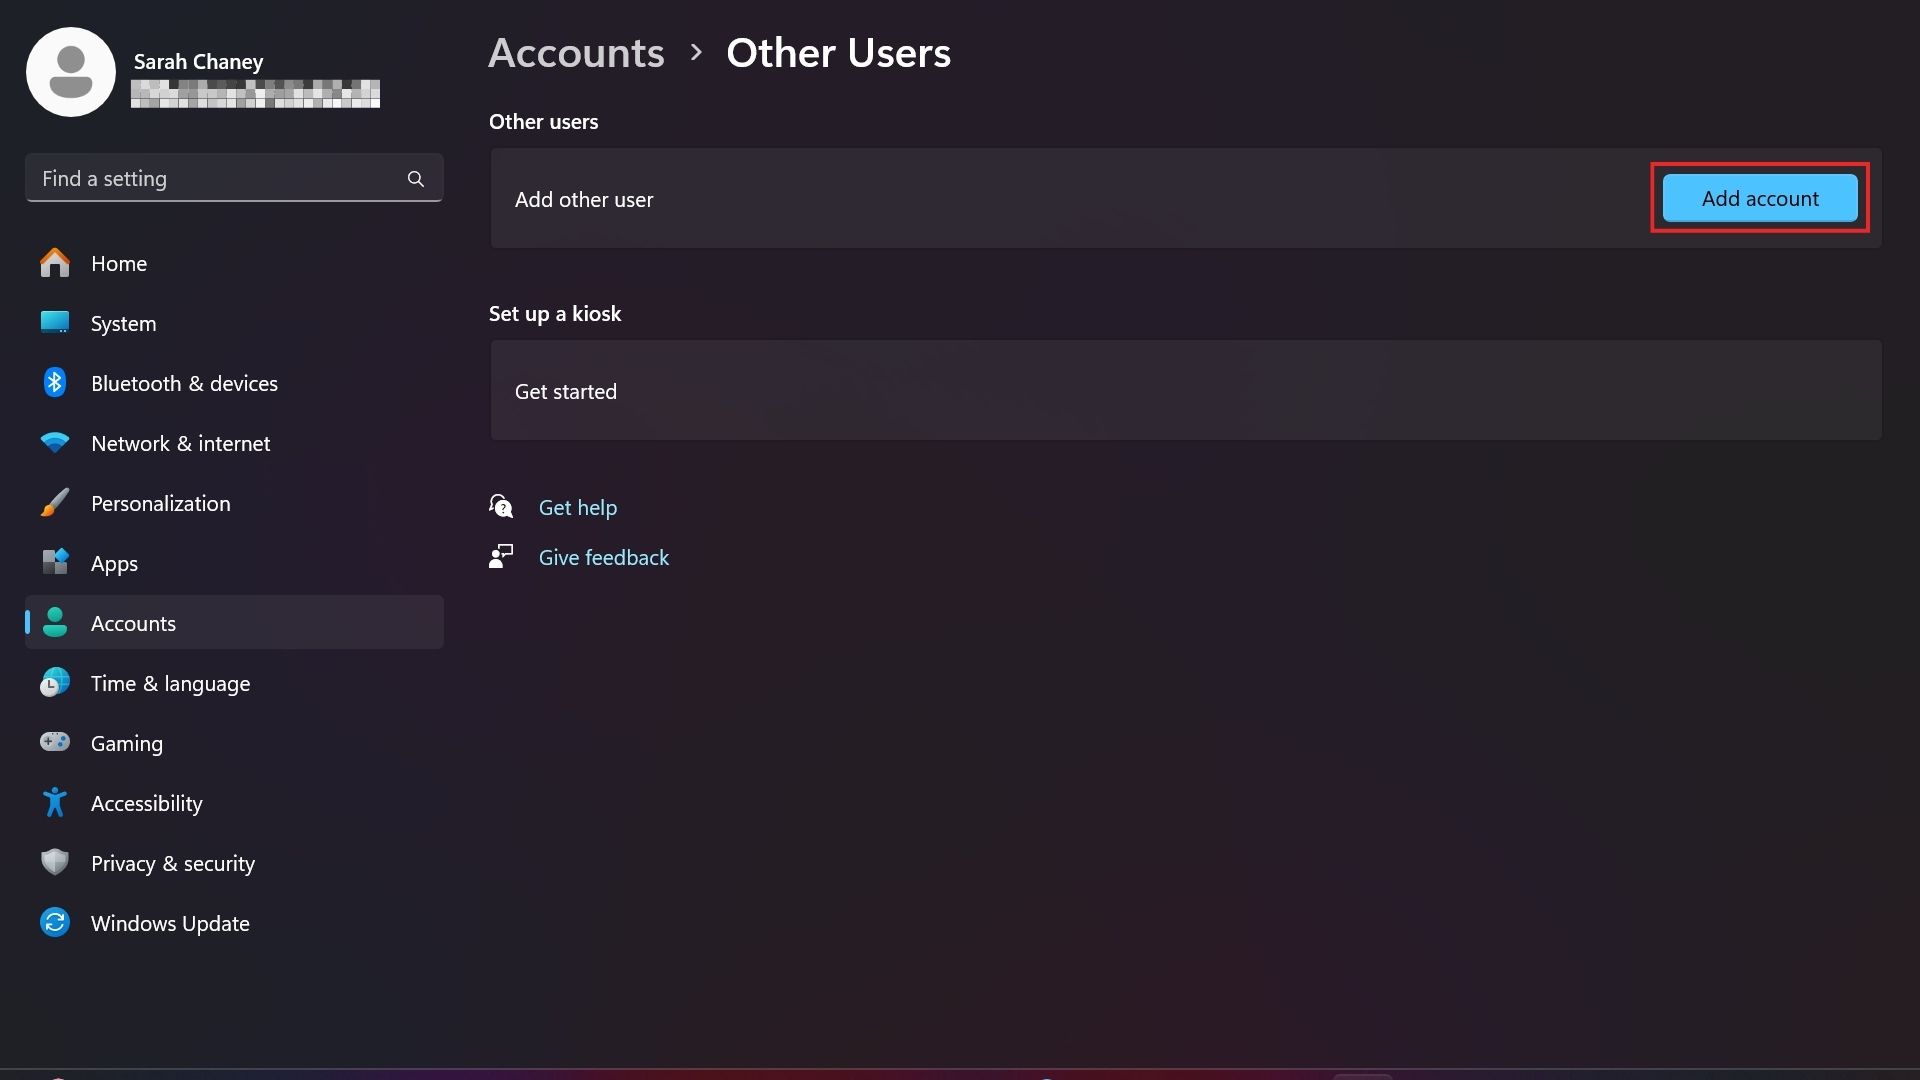
4. Under the Other users heading, click on the blue Add account button toward the top right corner.
Sign up to receive The Snapshot, a free special dispatch from Laptop Mag, in your inbox.
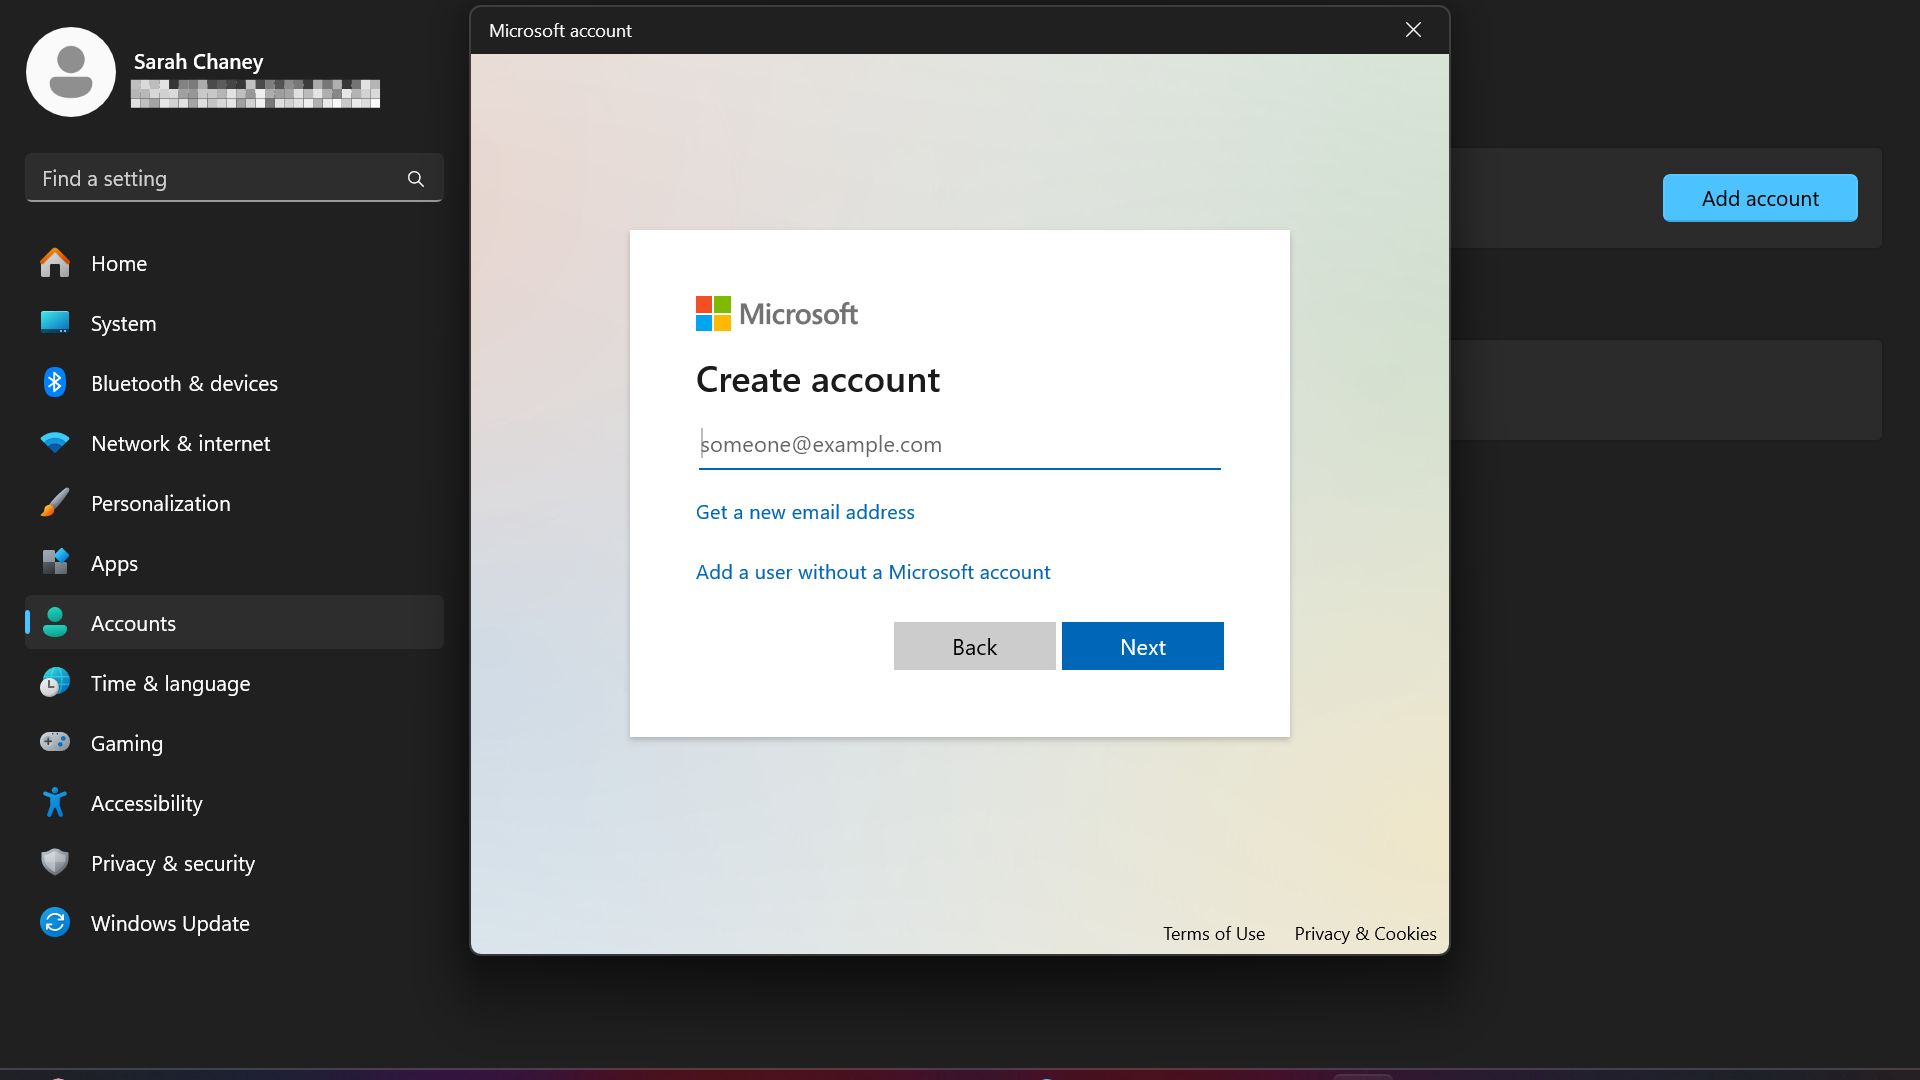
5. If the person you're adding as a new user has a Microsoft account, you can enter their email address here and press the blue Next button. Otherwise, click on Add a user without a Microsoft account, which is in blue text above the Back button.
For this how-to, we'll assume the new user doesn't have a Microsoft account and go with the second option.
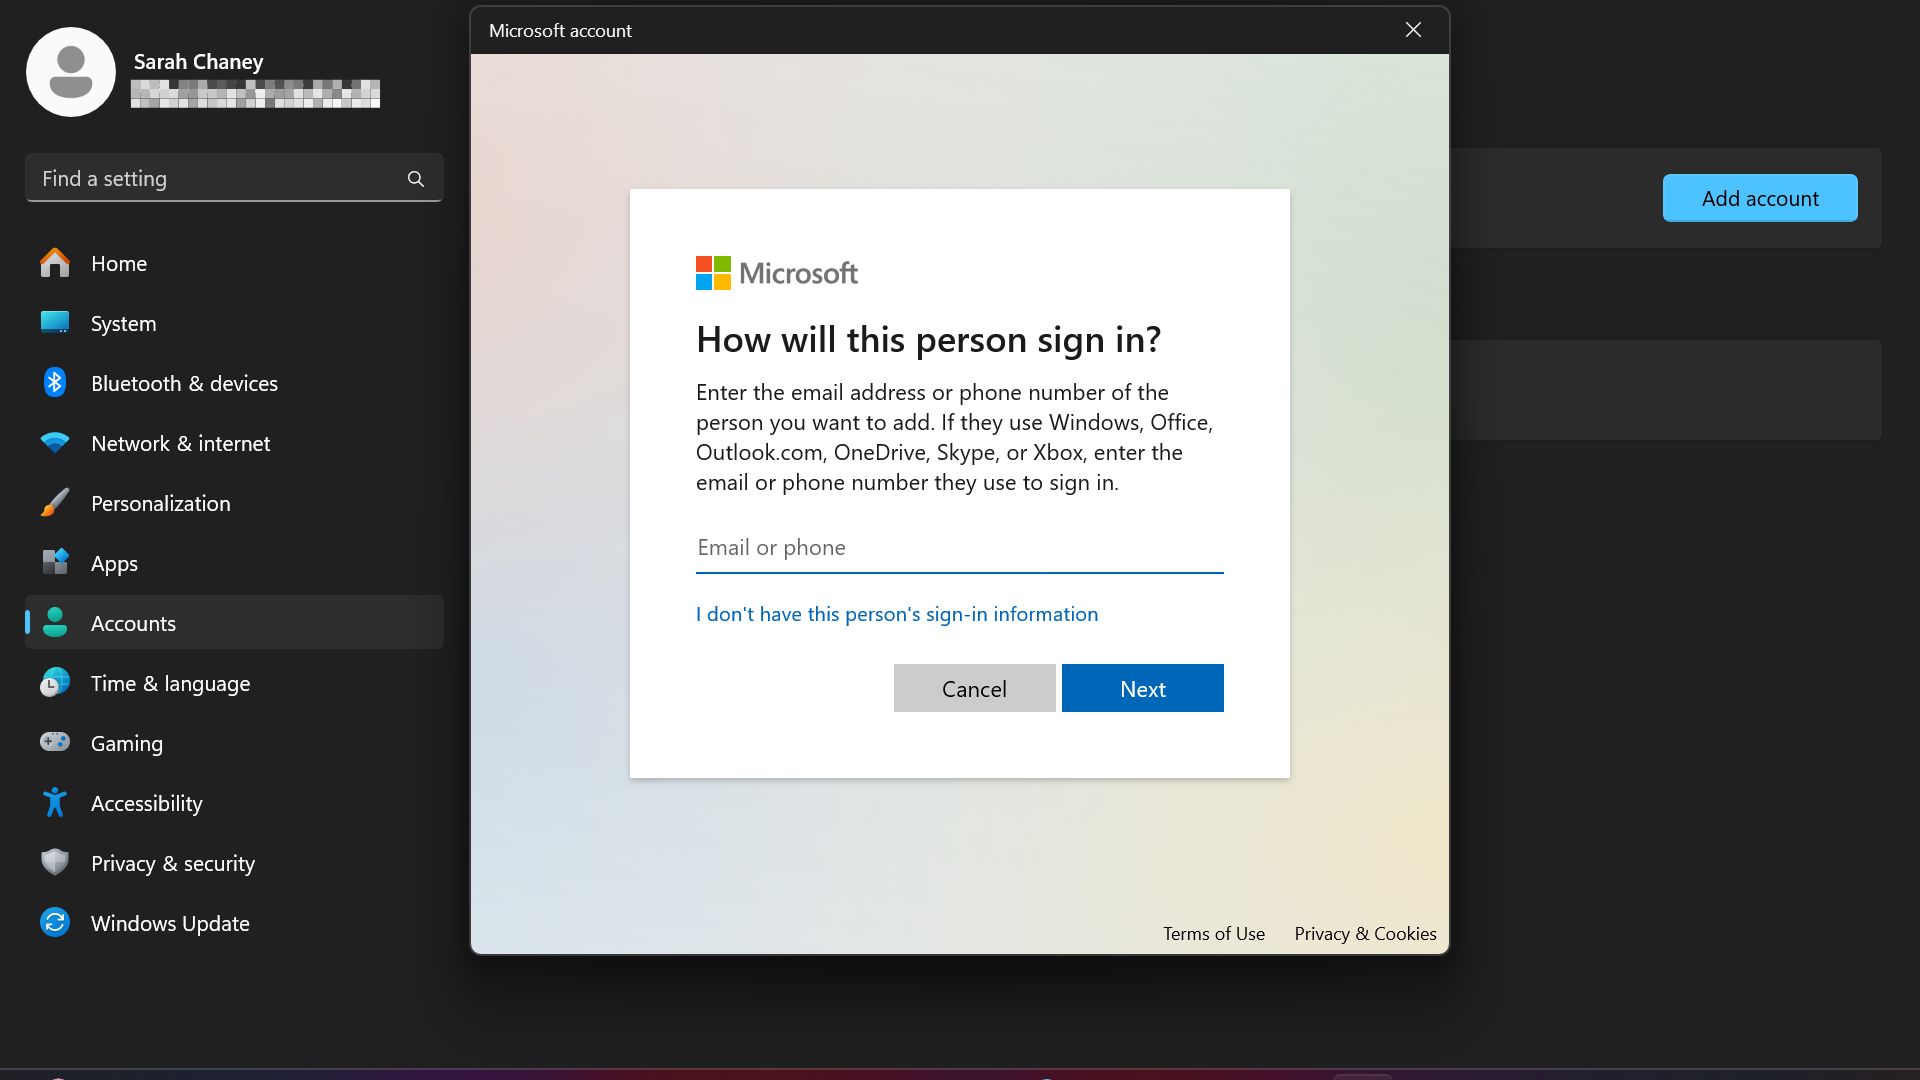
6. If you want to enter an email or phone number for the new user, you can do so here. Or, select I don't have this person's sign-in information to proceed without that info.
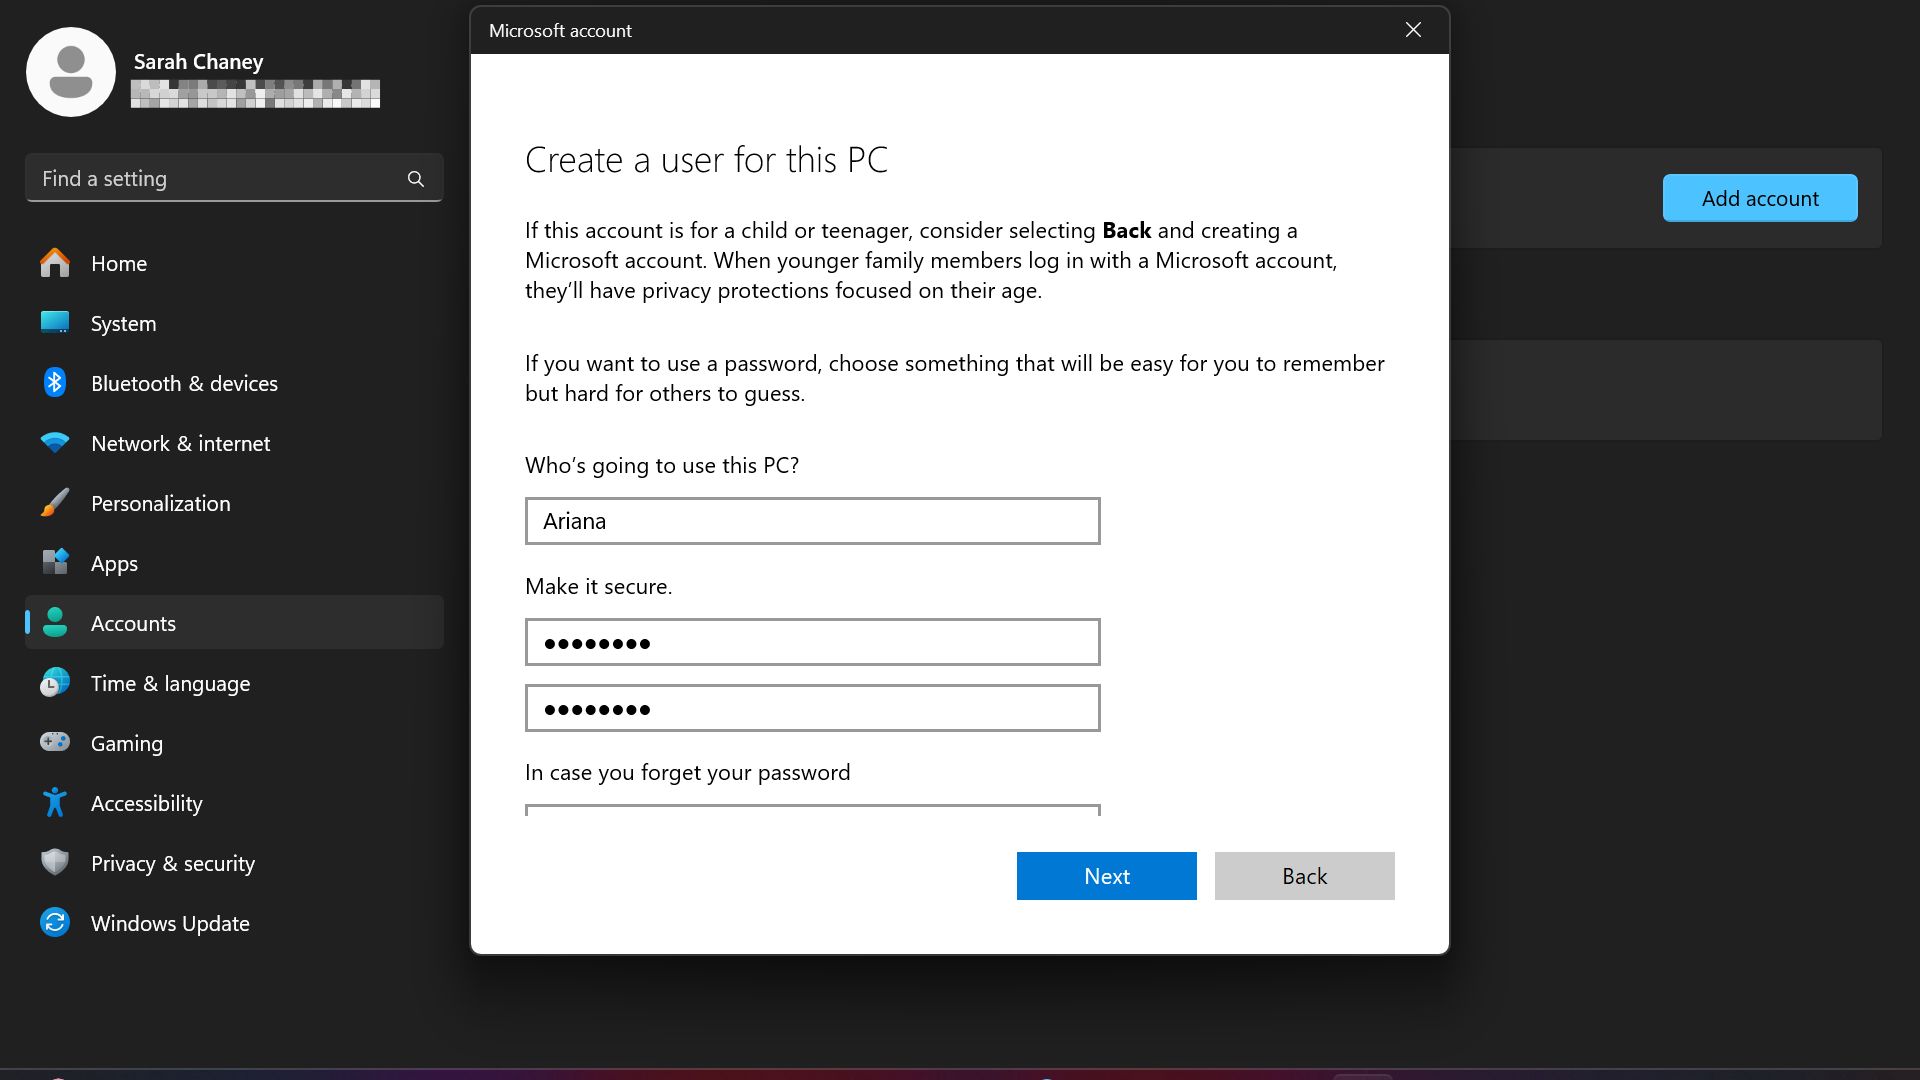
7. Enter the username for the person you're adding as a user, and create a password for them (or have them enter a password). There are also three security questions here that need to be selected and answered before proceeding. Click the blue Next button when you're done.
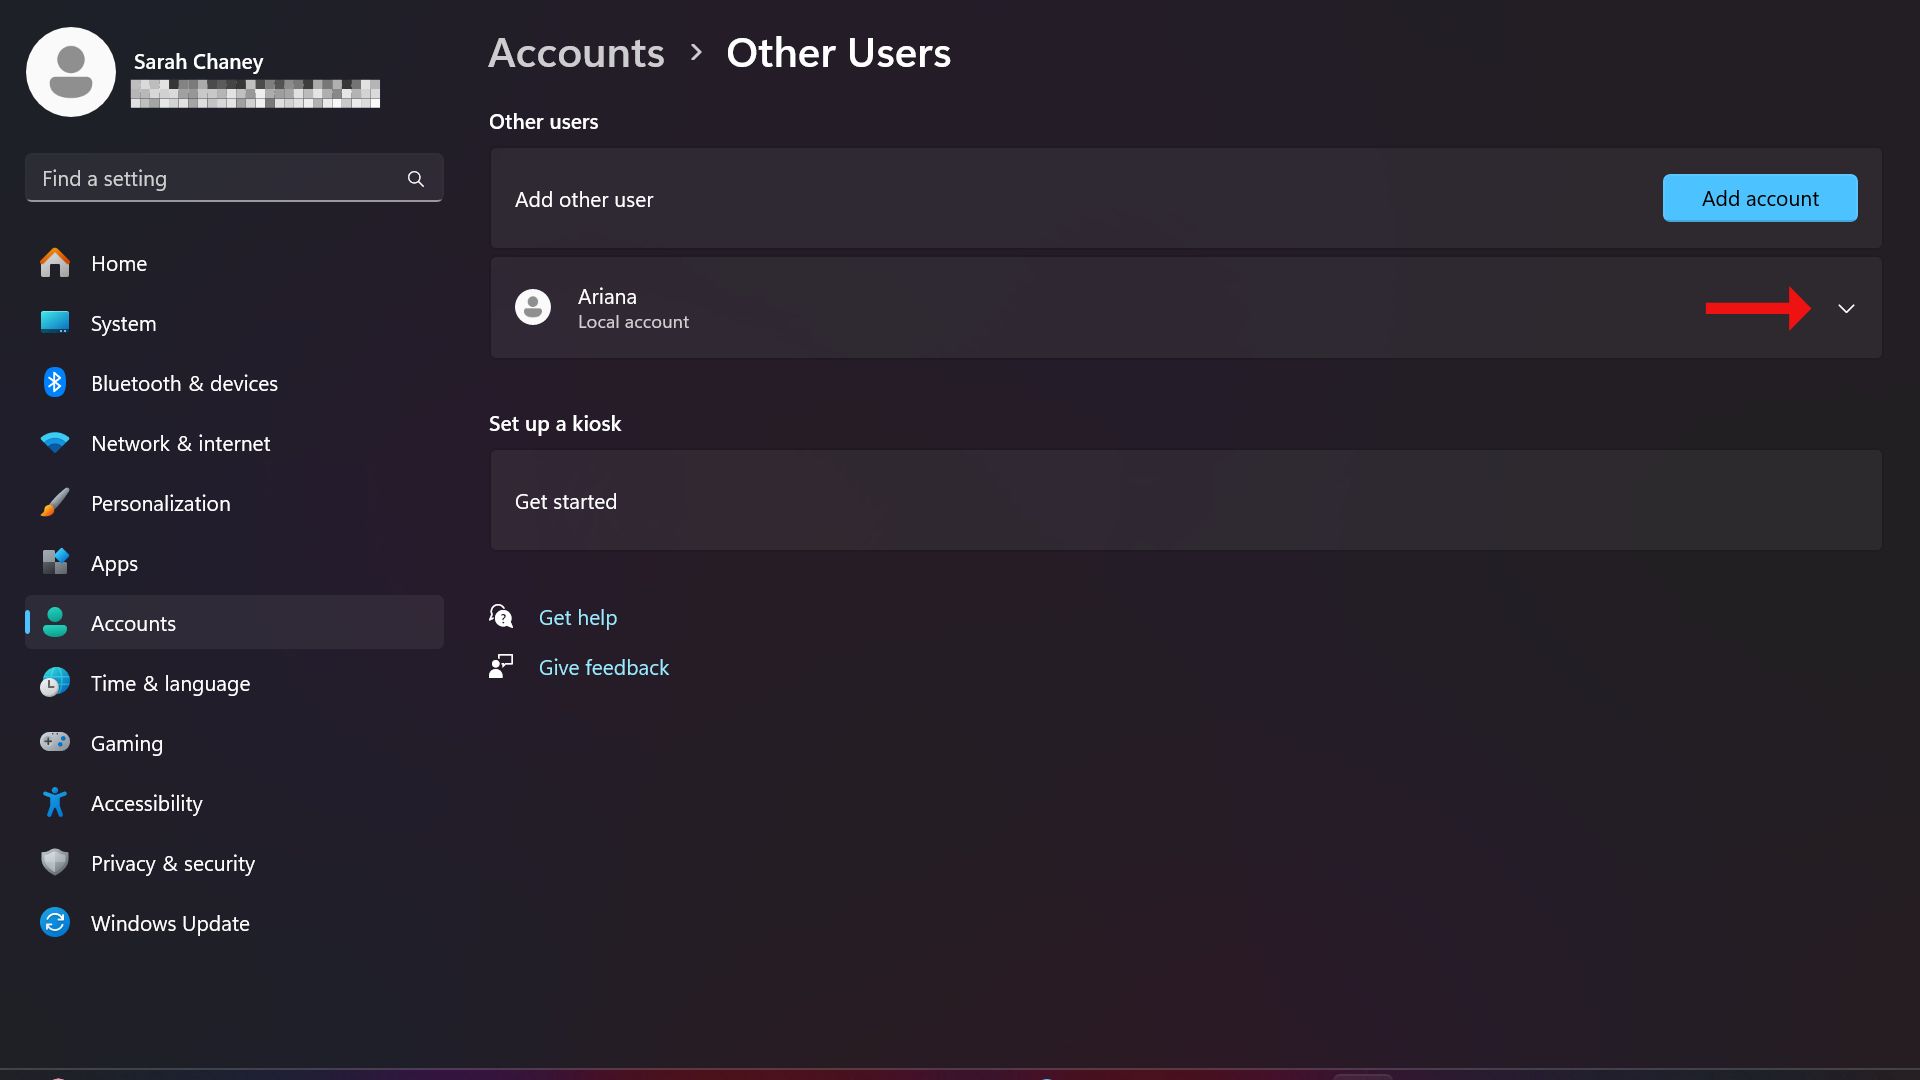
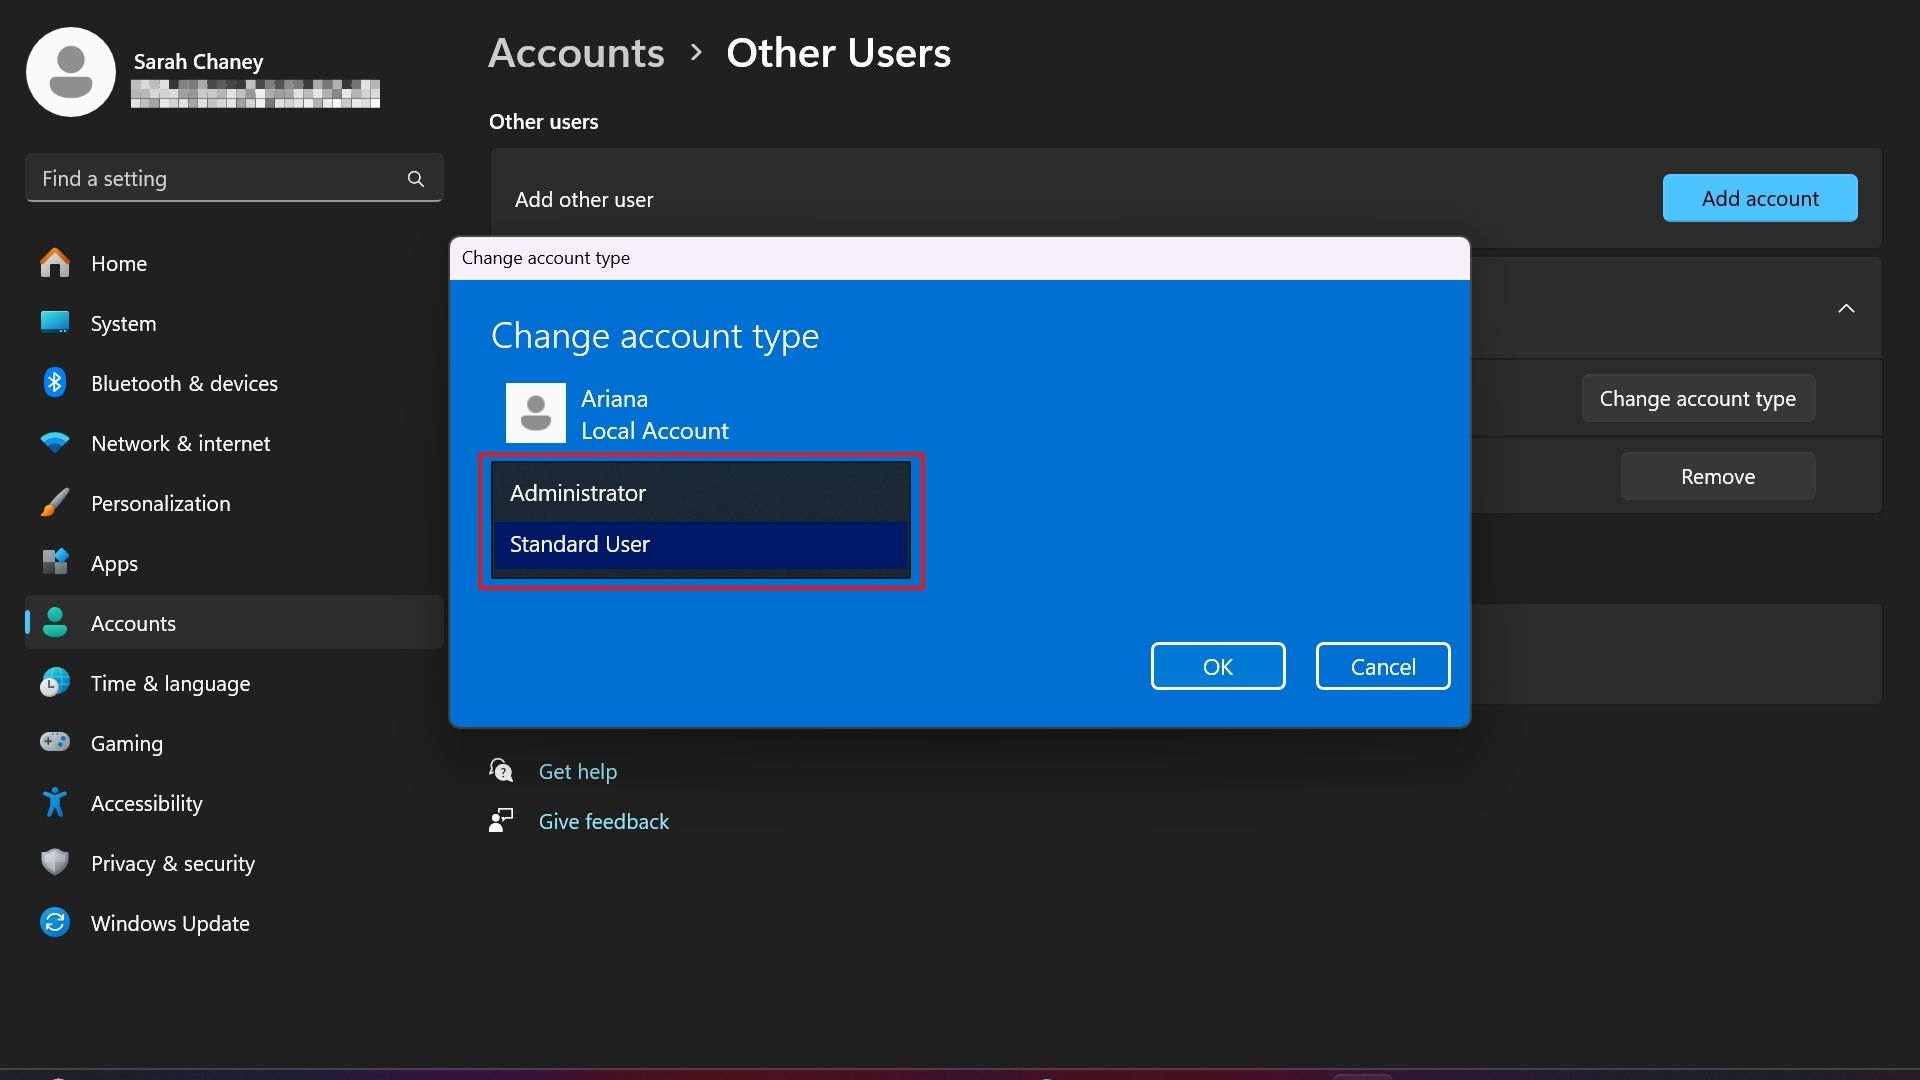
8. The user you just added should now appear under the Other users heading. If you want to change their account permissions from Standard User to Administrator, click the arrow to the right of their name to open the dropdown menu.
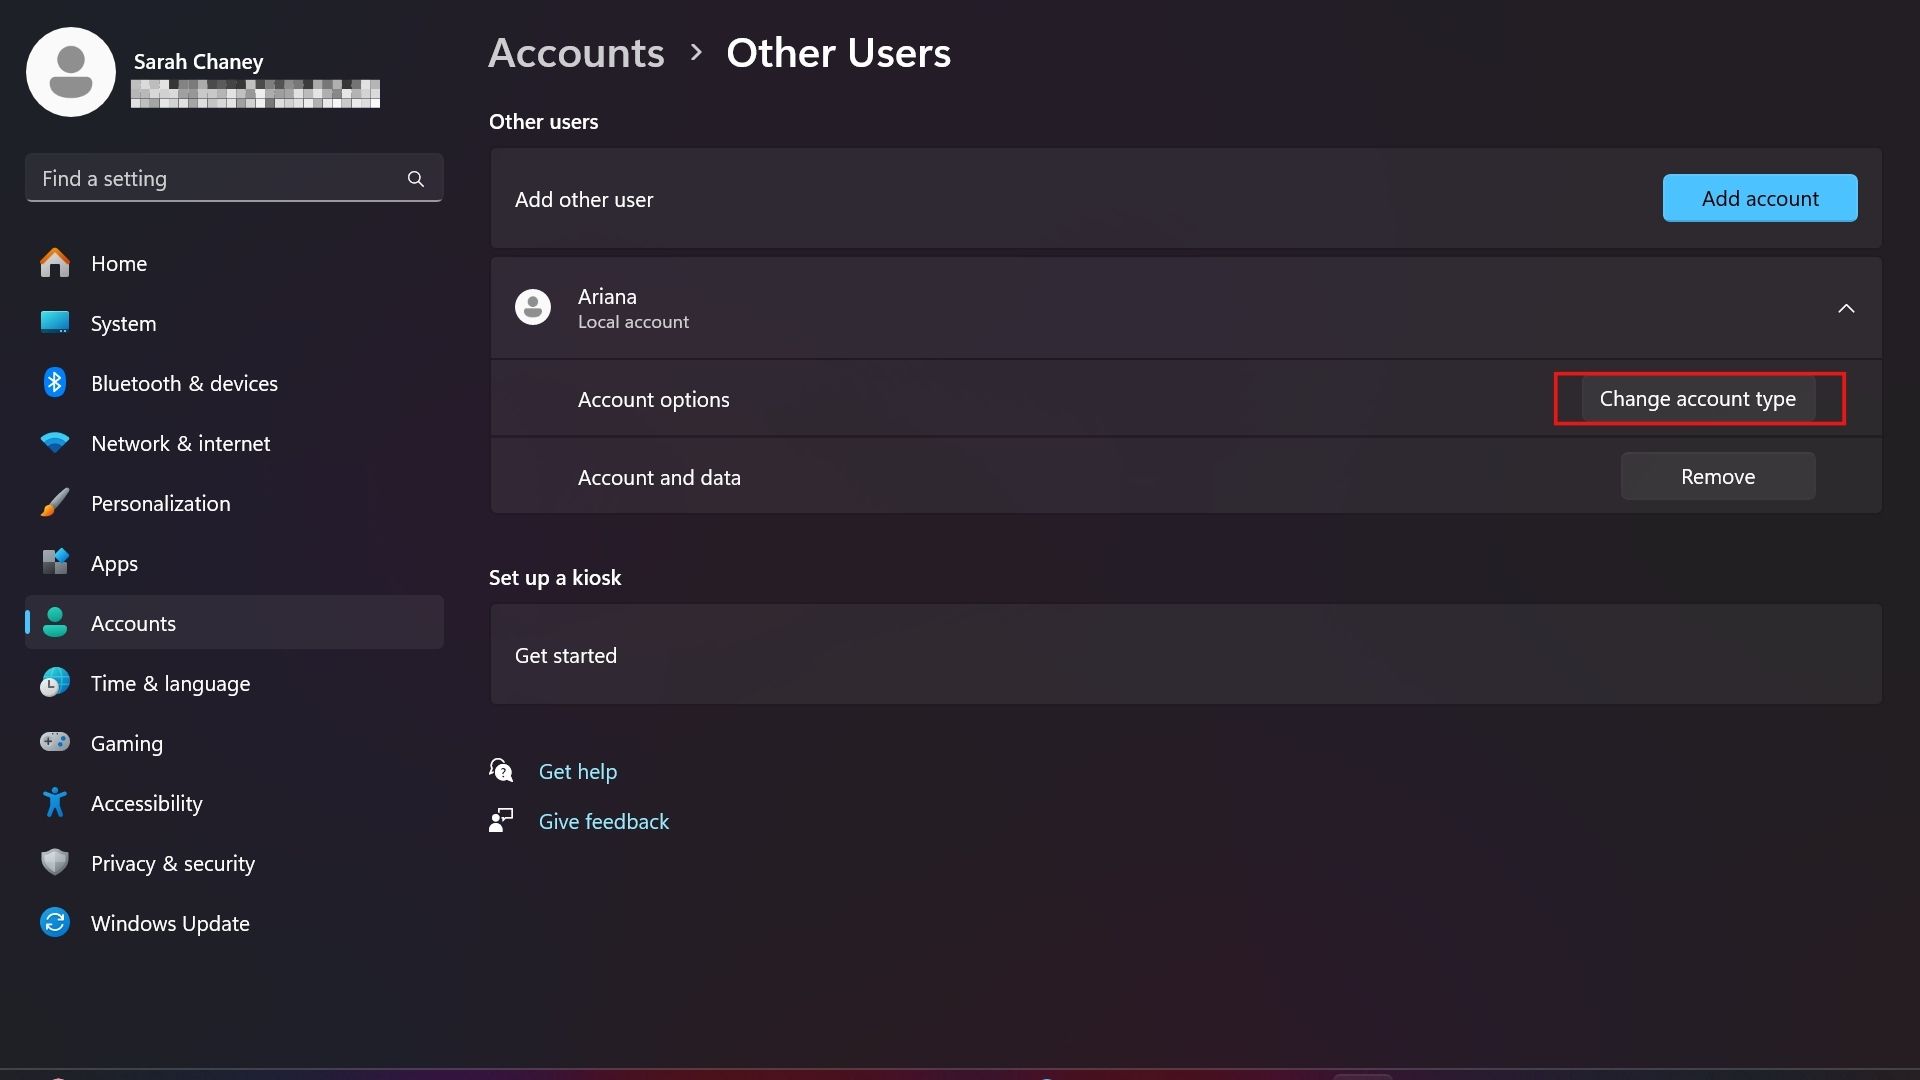
9. Click on Change account type.
10. In the pop-up, click on the box below their user icon and change permissions to Administrator if you want them to have full control to make changes and install software.
If you have any other users you want to add, repeat the process. Otherwise, you're good to go, and the new user can start customizing their Windows 11 settings.

Sarah Chaney is a freelance tech writer with five years of experience across multiple outlets, including Mashable, How-To Geek, MakeUseOf, Tom’s Guide, and of course, Laptop Mag. She loves reviewing the latest gadgets, from inventive robot vacuums to new laptops, wearables, and anything PC-related. When she's not writing, she's probably playing a video game, exploring the outdoors, or listening to her current favorite song or album on repeat.


