5 little-known tricks for using your iPhone Plus one-handed
The best tips and tricks for a more one-hand-friendly iPhone experience

Picking Apple’s Plus-sized iPhone 15 over the smaller model has its perks: it lasts nearly two days on a single charge and offers a more expansive screen that’s better suited for entertainment on the go.
But it comes at a cost. Especially for those coming from a compact phone like the iPhone mini, the iPhone 15 Plus can feel gigantic and impossible to operate with one hand. Luckily, there are a few ways to make the transition a little less grueling for your fingers.
On an iPhone, there are a host of customizations you can use to help you reach even the furthest corners of the screen with ease. You can place a virtual home button in an area your fingers don’t have to stretch for and through it, comfortably access several, routine functions like pulling down the notification shade.
Alternatively, you can drag the screen’s content halfway with a simple tap on the back. Here are the best options to ergonomically upgrade your iPhone experience.
Enable Reachability
By default, your iPhone comes enabled with what Apple calls “Reachability.” It’s a gesture that, once triggered, lowers the top half of the screen’s content down to the screen’s center. You can then tap whatever you were trying to reach with one hand. When you do, it will automatically go back up to its original position. However, it only works in the Portrait orientation.
There are a couple of methods to activate Reachability. The most common is to swipe down on the bottom edge of your screen or on the bottom white bar. Once you’re in the Reachability mode, you can push it back up either by swiping up in the same place, tapping on an element on the screen, or the blank space in the upper half. On models older than the iPhone X, you can double-tap the home button for Reachability.

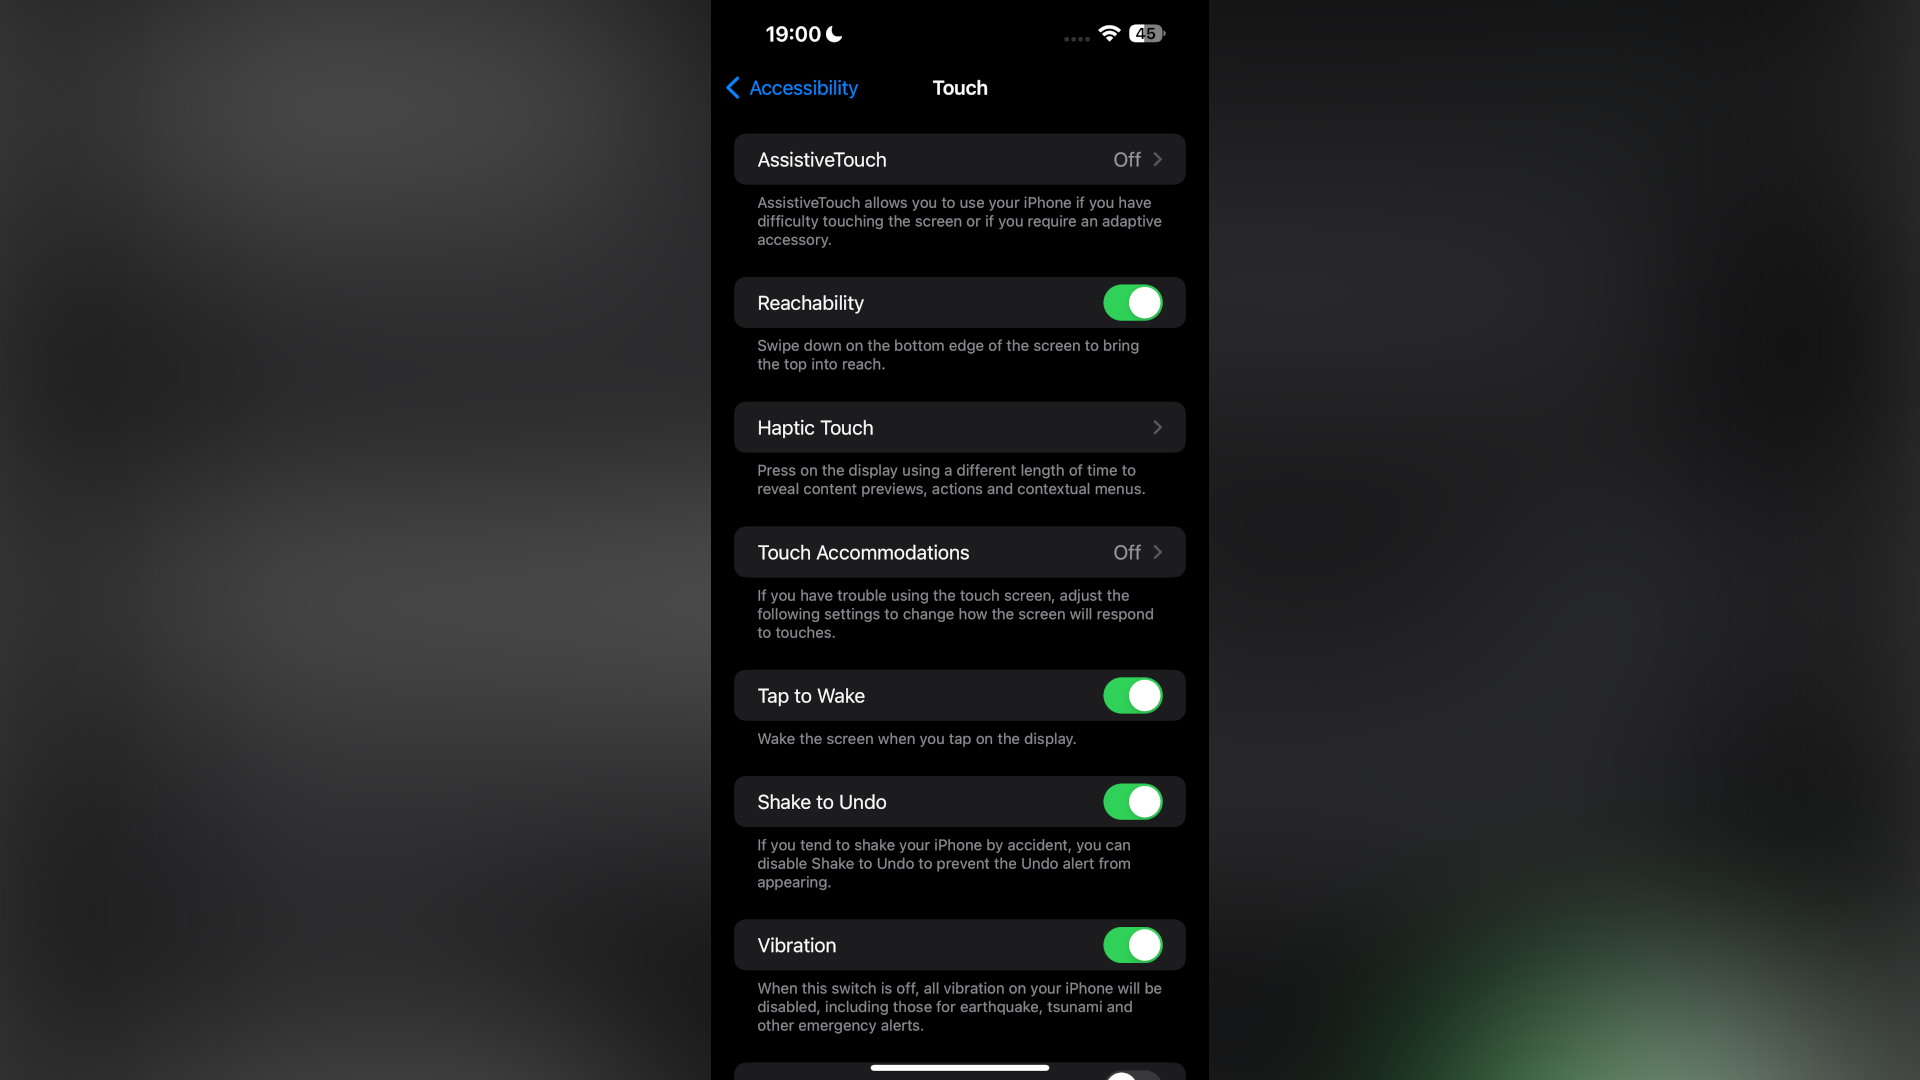
Reachability is enabled out of the box on iPhones, but in case that gesture doesn’t work on yours, you can manually switch it on from Settings > Accessibility > Touch > Reachability.
Stay in the know with Laptop Mag
Get our in-depth reviews, helpful tips, great deals, and the biggest news stories delivered to your inbox.
Holding a 6.7-inch iPhone, even performing the gesture to switch on Reachability can feel like a lesson in finger gymnastics. I’d instead recommend linking it to your iPhone’s back tap action.
Your iPhone allows you to do a whole bunch of things simply by tapping two or three times on its rear, and one of the actions you can assign it is Reachability. To do that, go to Settings > Accessibility > Touch > Back Tap. Select either “Double Tap” or “Triple Tap” depending on which gesture you want to link to Reachability. On the next screen, choose “Reachability” under “System.”
Toggle on AssistiveTouch
Another accessibility tool that can come in handy for one-hand use is AssistiveTouch. It overlays your screen with a virtual home button that you can personalize to access all sorts of actions including opening the App Switcher, Screenshot, and any other custom shortcut without ever stretching or readjusting your palm.
You can turn on AssistiveTouch from Settings > Accessibility > Touch. Once you do, there will be a new round floating button on your screen’s edge; You can move it around and place it at whatever height and position you are most comfortable with. Plus, you have the option to adjust how transparent it is from the “Idle Opacity” setting.

A single tap on the AssistiveTouch button will open a menu. By default, you’ll find a few common items there already, like going home and launching Siri. To decide which options are available in AssistiveTouch, tap “Customize Top Level Menu” and then select the icon you’d like to swap out for another action.
From the counter under it, you can also increase AssistiveTouch’s capacity from six options to eight. In addition, you can choose which action is triggered when you long-press or double-tap the AssistiveTouch button from the “Custom Actions” section.
Switch to a one-handed keyboard
Plus-sized iPhones are not only taller, but they’re also about 10% wider and 20% heavier. Typing, the activity we do most, can start to seem like a chore on a large-screen phone after a few minutes of punching in characters.
Extending your thumb to tap the letters on the furthest end of the board like the “A” key is not always practical, especially if you are standing in a subway during rush hour. Your iPhone’s built-in one-handed keyboard mode can put to rest most of these concerns.

Head over to Settings > General > Keyboards > One-Handed Keyboard and select to which side the keyboard should shrink. Alternatively, you can pull up the keyboard like you would normally, and hold the globe button at the bottom left corner, then tap the little keyboard icon with an arrow. To return to the normal-sized keyboard, just hit the arrow on the opposite end of your keyboard.
Make one-hand changes to iOS
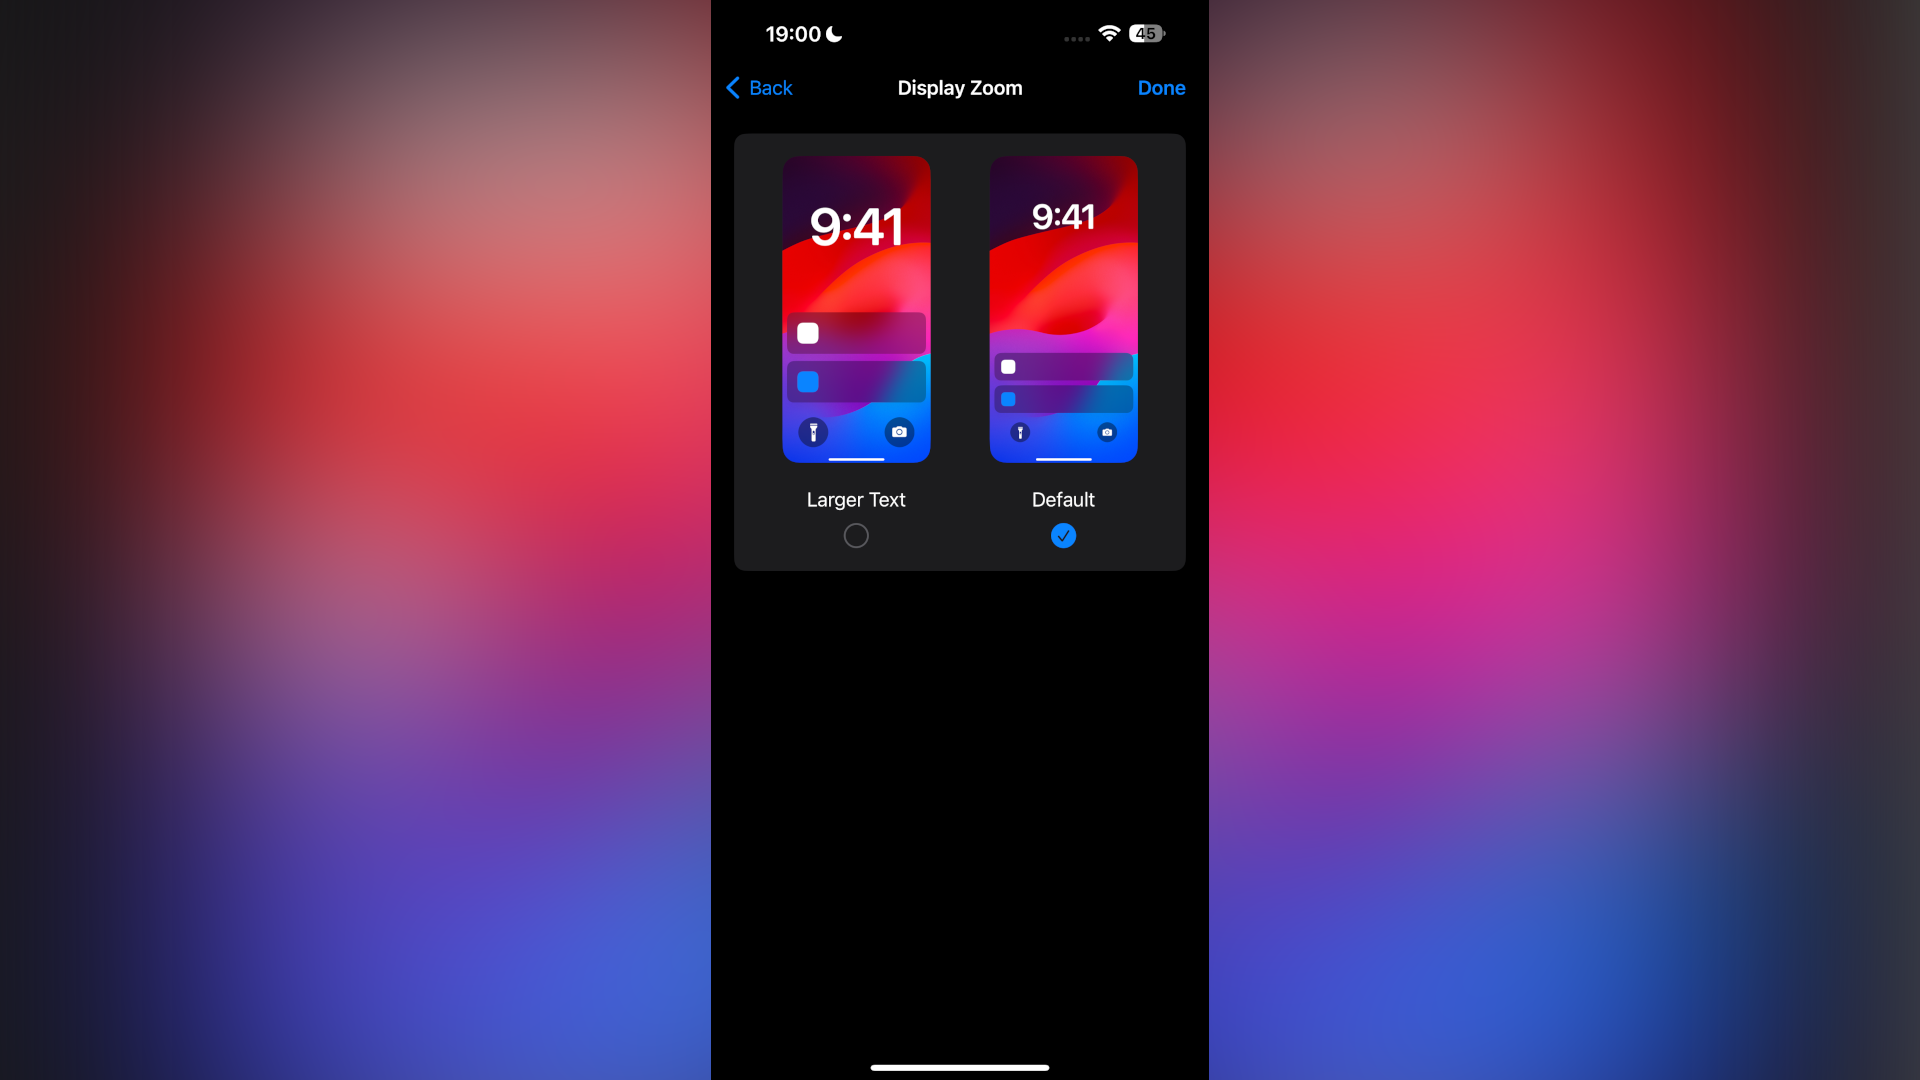
There are a couple more adjustments you can enroll in for a one-hand-friendly iPhone experience. You can, for example, enable Display Zoom (Settings > Display & Brightness), which would enlarge all iOS elements.

Fewer of them then will fit on one screen and their borders will be a little more forgiving so that you no longer have to stretch to touch that one, tiny button on the corner.
You can also modify your homescreen layout so that the apps you most frequently use are on your preferred thumb’s side. You can fill the rest of the space either with your usual widgets or with a blank/transparent one.
Get a case with an integrated grip
There’s only so much you can do via software. Ultimately, your fingers are still managing a near-tablet-sized iPhone with no external support. Enter, a case with an integrated grip.
You can grab iPhone cases which, as the name suggests, have a collapsible handle on their back for an added grip. While you operate the phone with a thumb, the rest of the fingers can securely hold onto the handle, and get rid of fears of dropping it when you try to touch a button on the top corner.
There are a variety of cases like this available online such as Otterbox’s Ottergrip cases, and others that come equipped with a PopSocket.
Shubham Agarwal is a freelance technology journalist from Ahmedabad, India. His work has previously appeared in Business Insider, Fast Company, HuffPost, and more. You can reach out to him on Twitter.
