How to make a GIF on iPhone — Apple makes it easy for you
Use Apple's built-in methods to create GIFs quickly

Sharing still photos and videos is fun enough on social media, but sometimes you want to spice things up with a GIF. However you choose to pronounce GIF, there's no denying how fun GIFs are to create and share.
Many people download the Giphy app to create their own GIFs or share ones made by other people, but iPhone users don't need to do this. Apple offers a few built-in methods that allow users to generate GIFs without needing any external apps. Here's how to make a GIF on iPhone in two different ways.
How to make a GIF using Live Photos on iPhone
Live Photos on iPhone are surprisingly versatile features. You can use Live Photos to customize your iPhone's wallpaper, as well as create unique GIFs. Here's how to save your live photos as GIFs in a few quick steps.
the live photo ➡️ gif feature is a gift pic.twitter.com/BYHqOpfCYIMarch 23, 2023
1. Open your Photos app.
2. Select a Live Photo you'd like to turn into a GIF. If you can't easily find one, you can select Albums at the bottom of the app and scroll down to a list of Media Types to find all your Live Photos.
3. With your Live Photo selected, drag it upwards until you see available effects and photo details pop up.
4. From the list of available effects, choose either Loop or Bounce.
Get The Snapshot, our free newsletter on the future of computing
Sign up to receive The Snapshot, a free special dispatch from Laptop Mag, in your inbox.
5. Your Live Photo is now a GIF. Under the Media Types mentioned earlier, you'll now find this under GIFs instead of Live Photos.
Alternatively, you can use Apple's Shortcuts app to turn a Live Photo or a video into a GIF.
How to make a GIF on iPhone via Shortcuts
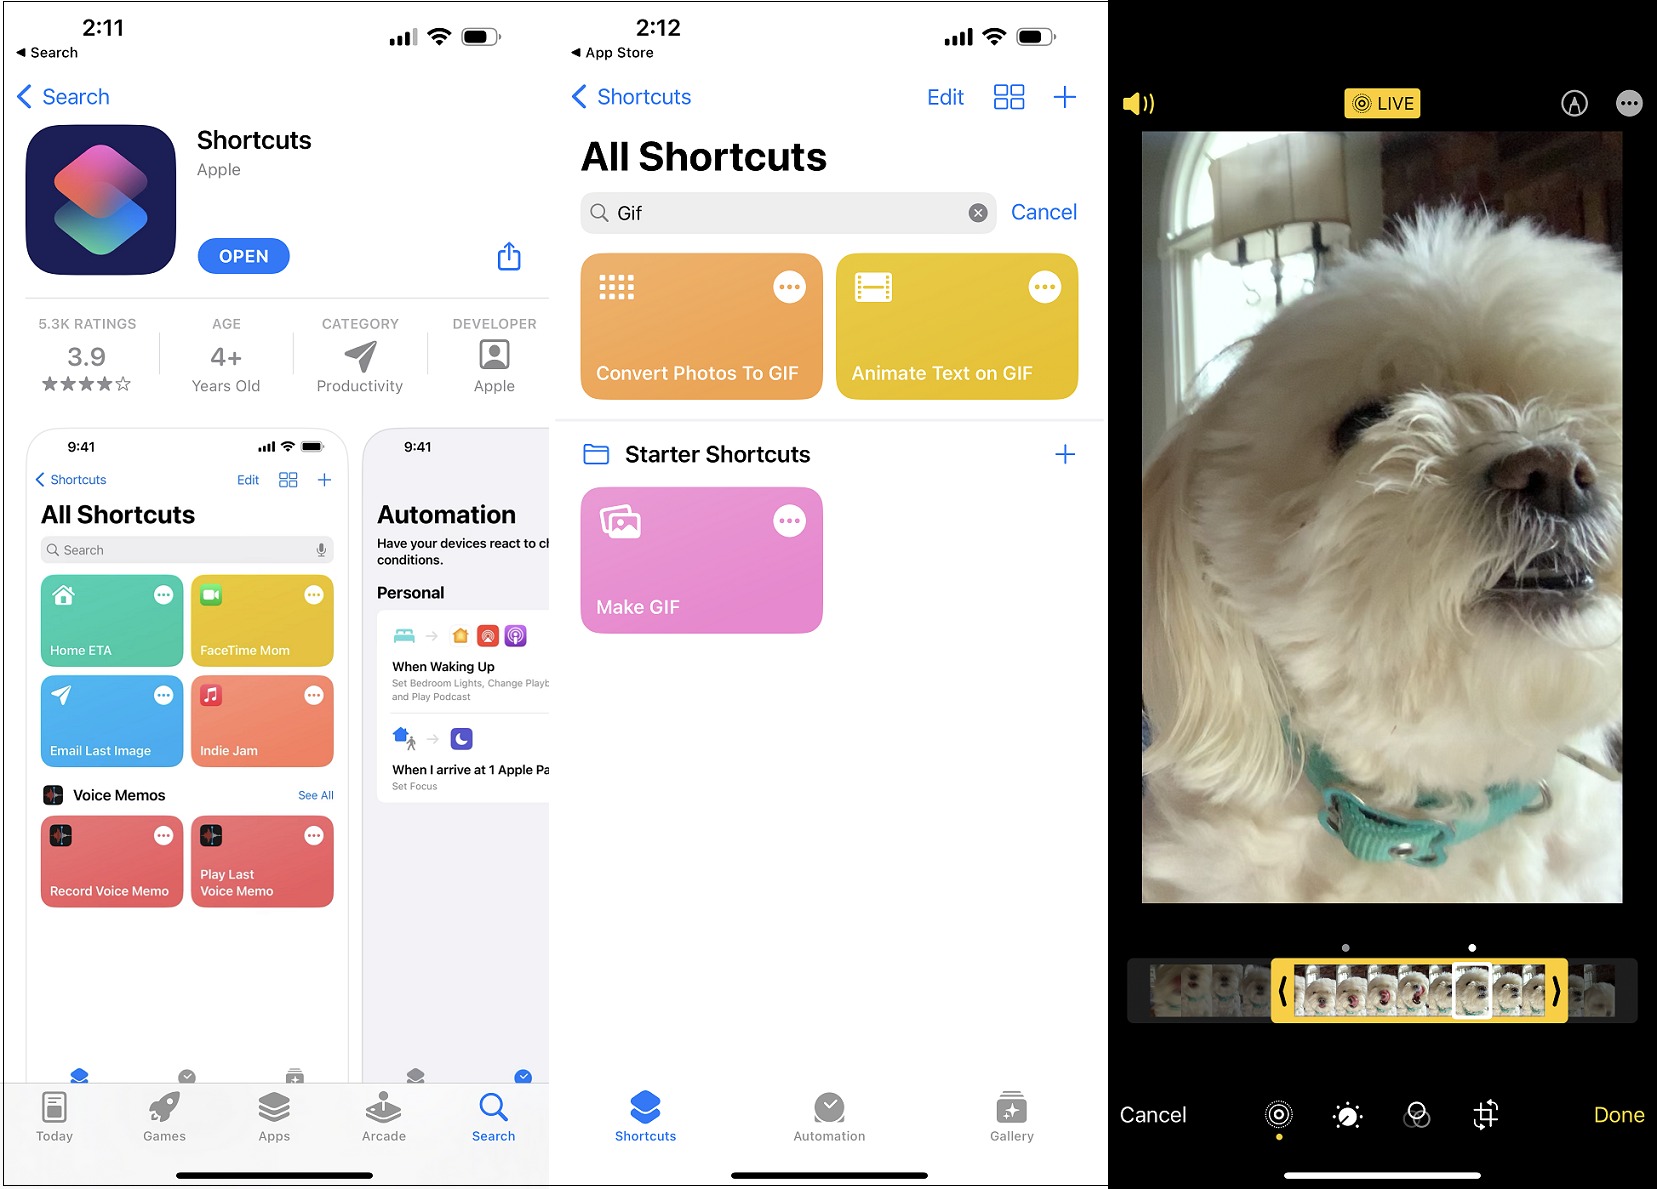
Apple's Shortcuts app comes pre-installed on any iPhone running iOS 13 or later, and it makes quite a few tasks easier, including creating GIFs. Using the Shortcuts app, you can transform a Live Photo, a video, or even burst photos into a GIF.

1. Open the Shortcuts app.
2. At the top of the app, search "GIF" and select the Make GIF shortcut.
3. From your photo library, choose a Live Photo, a video, or a photo with the Bounce or Loop effect in place.
4. After the app converts your selected photo or video into a GIF, you'll see a preview of the GIF.
5. Tap Done, and the GIF will be saved in your Camera Roll for you to easily share at any time.
Now that you know how to make your own GIFs on iPhone, you can start using GIFs in Instagram comments or sending them to friends and family. You can also check out these other built-in iPhone-only features that'll make you love your phone even more.

Sarah Chaney is a freelance tech writer with five years of experience across multiple outlets, including Mashable, How-To Geek, MakeUseOf, Tom’s Guide, and of course, Laptop Mag. She loves reviewing the latest gadgets, from inventive robot vacuums to new laptops, wearables, and anything PC-related. When she's not writing, she's probably playing a video game, exploring the outdoors, or listening to her current favorite song or album on repeat.
