How to turn off Copilot in Windows 11 — keep it AI free
It's pretty easy to ditch Window's AI Copilot if you don't want it

When Microsoft Copilot finally started rolling out on Windows 11 at the end of September 2023, it was met with mixed reviews. There are certainly ways Copilot improves the Windows experience, but Microsoft also dropped the ball with Copilot in a few ways.
If you're tired of seeing Copilot all the time, you can remove its icon from the taskbar just like you would any other app. Or, if you don't want to ever use Copilot or you don't want AI tech on your computer, you can fully remove Copilot from Windows 11 in just a few steps.
How to remove Copilot on Windows 11 Home
Anyone using a non-Pro version of Windows 11 will need to follow this method to disable Windows Copilot. You'll need to use the Registry Editor on your computer, which is a slightly advanced process, so proceed at your own risk and stop if you ever feel like you're in over your head.
1. Click inside the Search box at the bottom of your screen, and type "Registry Editor."
2. Open the Registry Editor app. If the User Account Control box pops up asking to allow the app to make changes to your device, select Yes.
3. With the Registry Editor app open, click on the navigational bar at the top, delete the existing text, and copy in the following string: HKEY_CURRENT_USER\Software\Policies\Microsoft\Windows
Press Enter to complete navigation.
Get The Snapshot, our free newsletter on the future of computing
Sign up to receive The Snapshot, a free special dispatch from Laptop Mag, in your inbox.
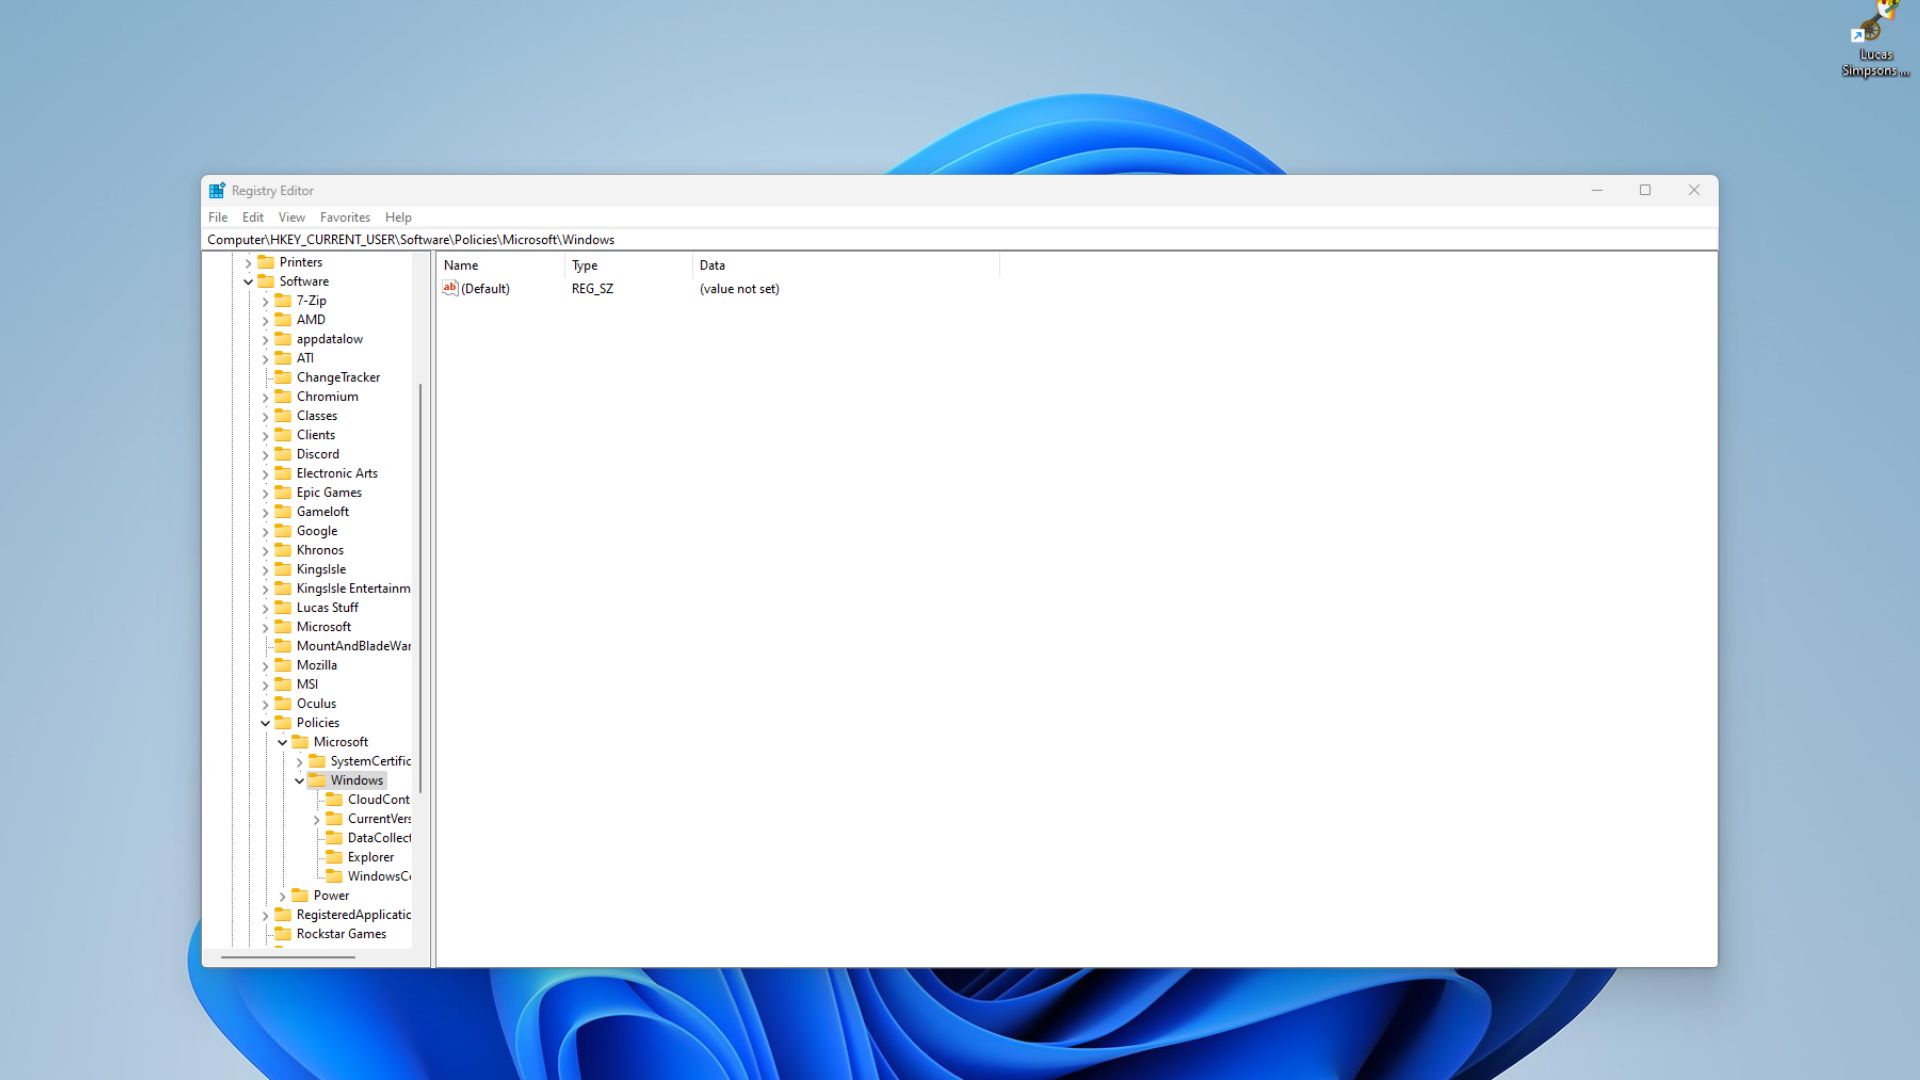
4. From this screen, select Edit from the top menu, then choose New > Key and type in "WindowsCopilot" when prompted to name it.
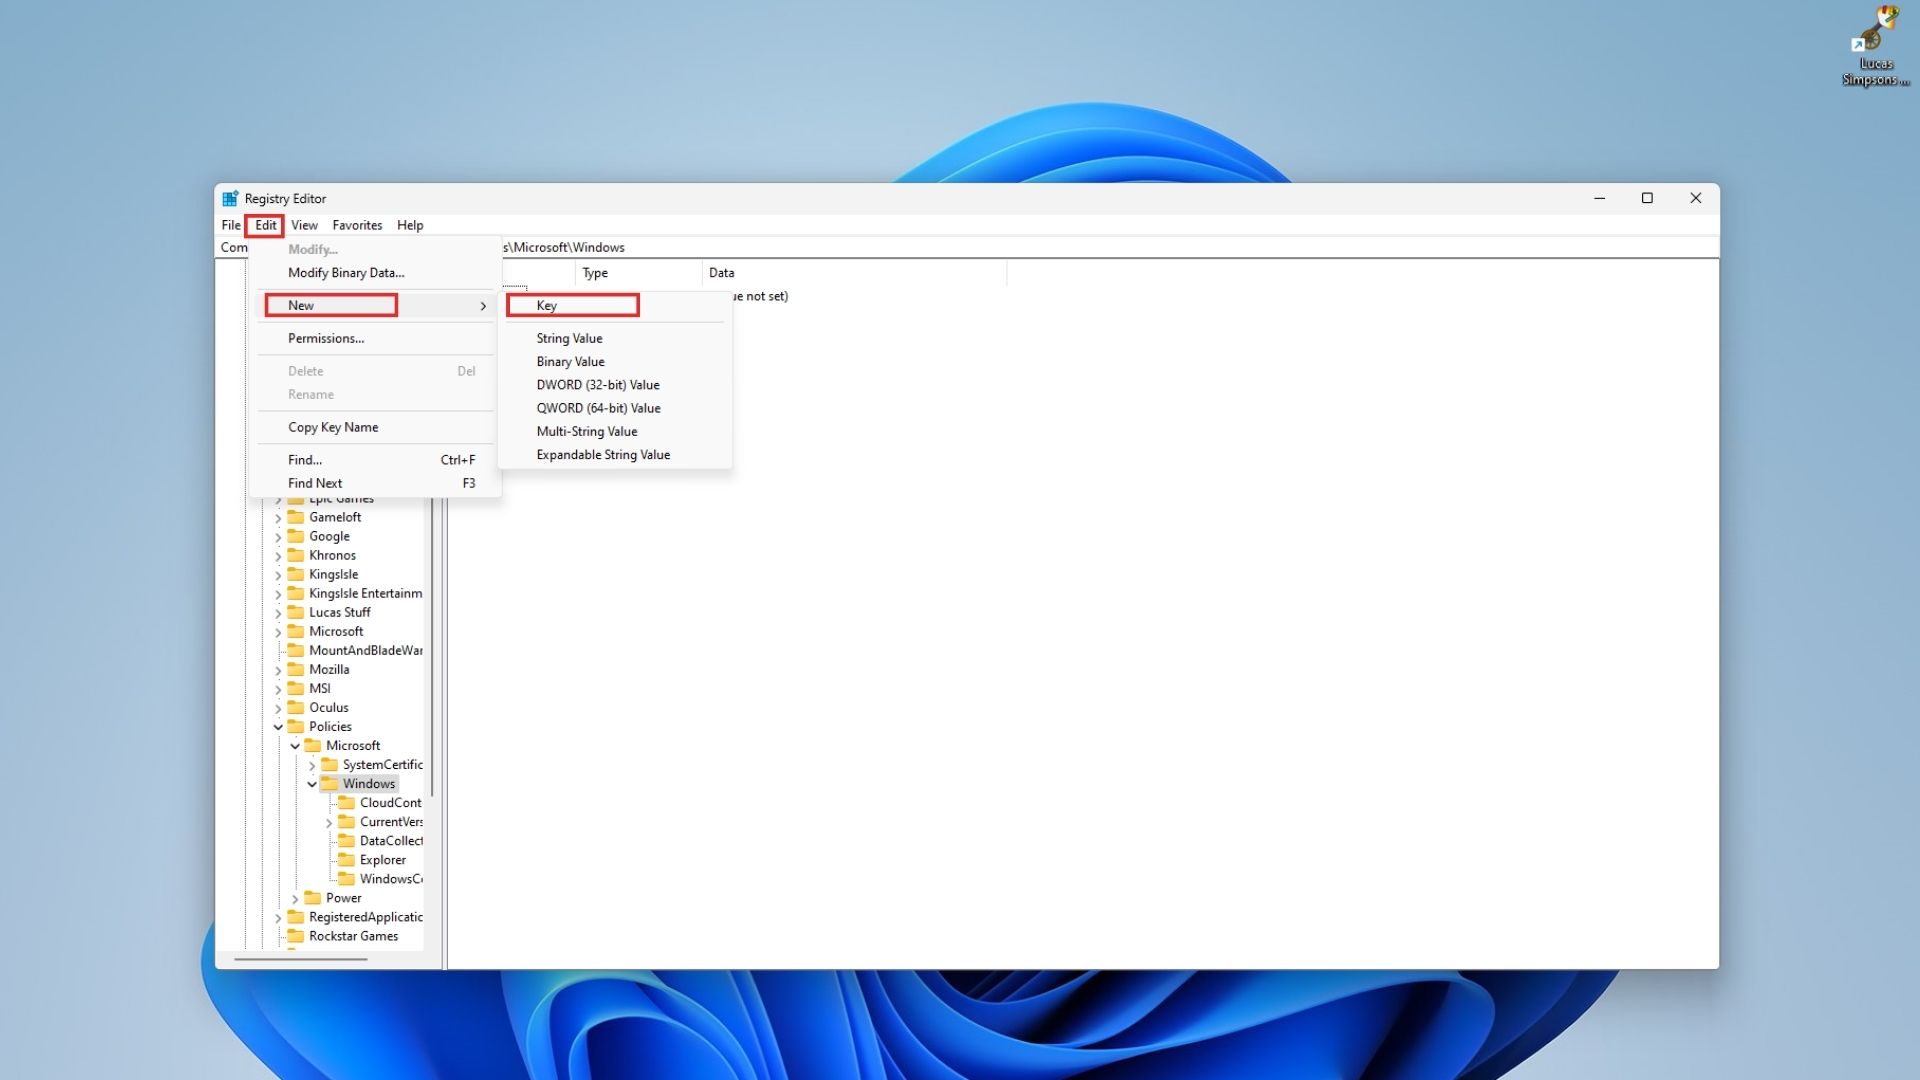
5. Select Edit again. This time, choose New > DWORD (32-bit) and type "TurnOffWindowsCopilot" when prompted to name it.
6. Double-click on "TurnOffWindowsCopilot" to open a menu. Set the Value data to 1 and make sure the Base is set to Hexadecimal.
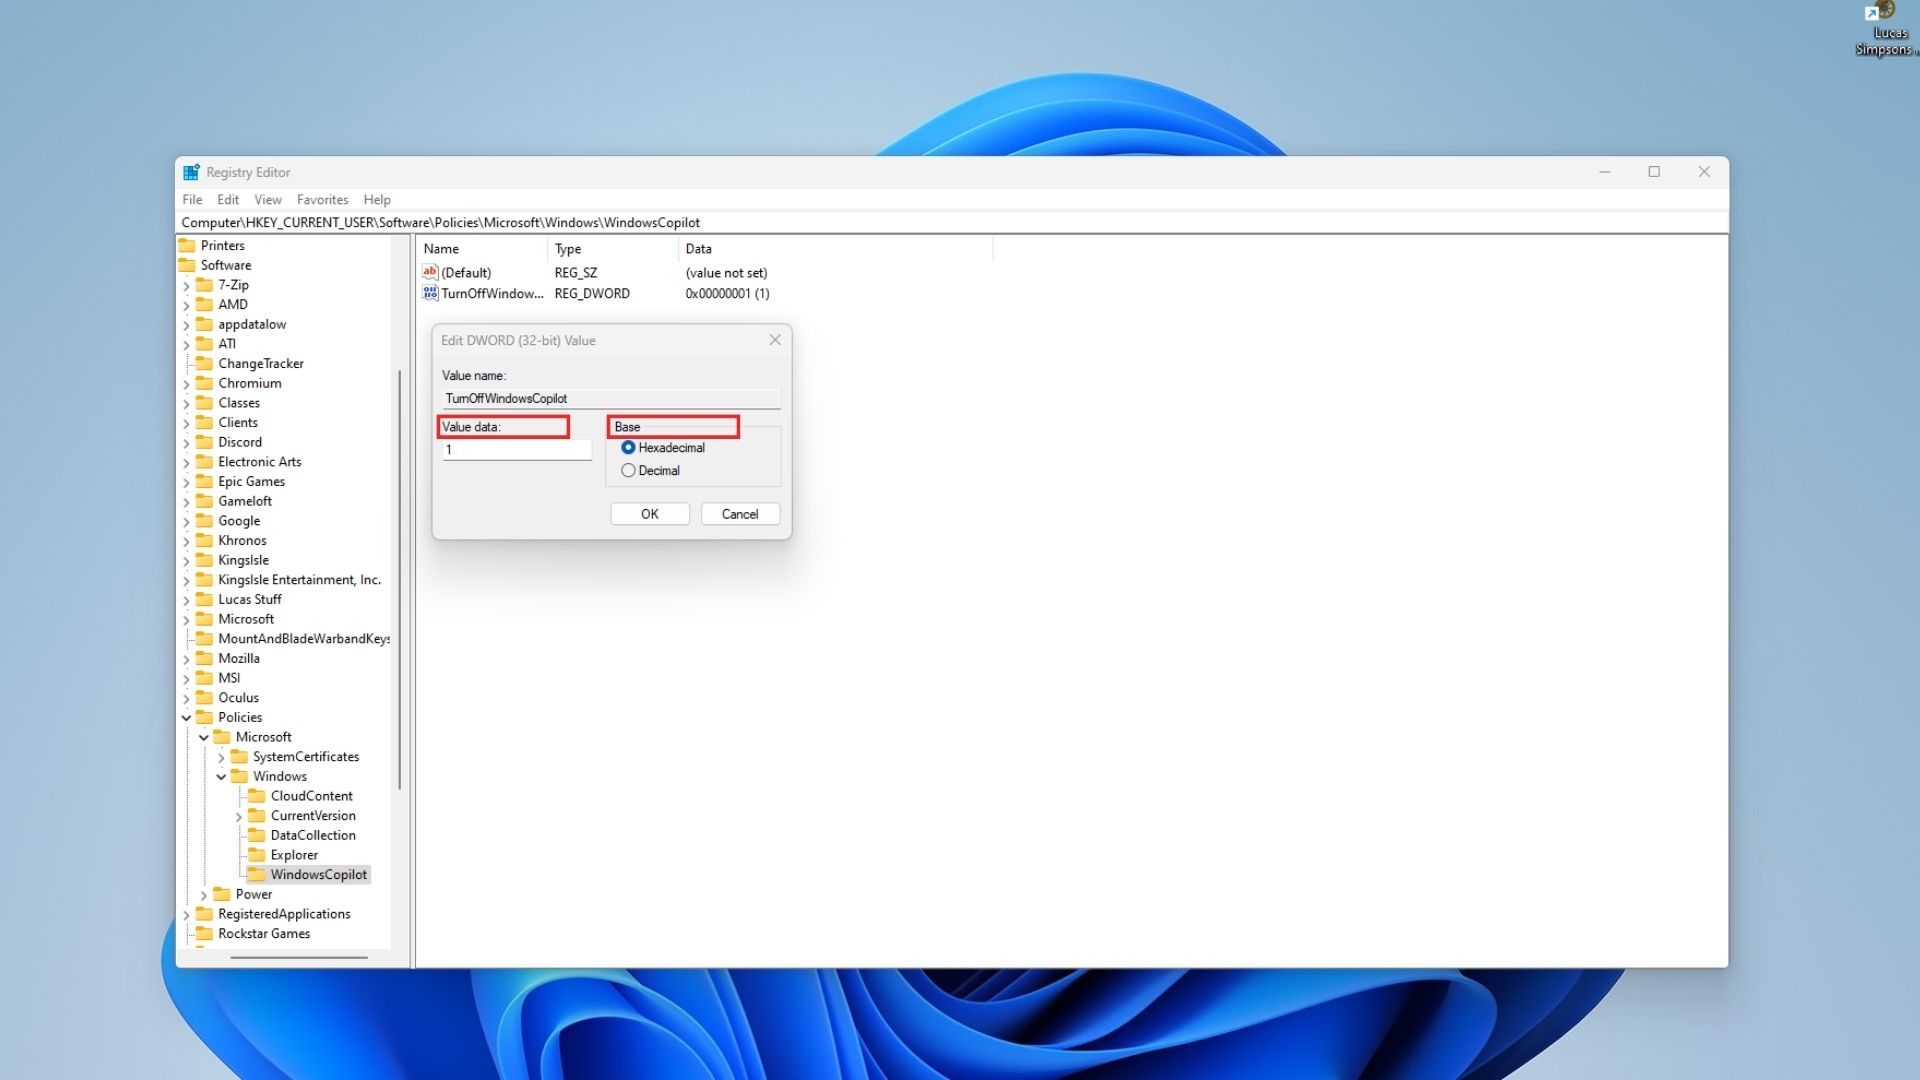
7. Head up to the navigation bar one more time and delete the existing navigational string. Then, copy: HKEY_LOCAL_MACHINE\SOFTWARE\Policies\Microsoft\Windows
Paste this into the navigation bar and press Enter.
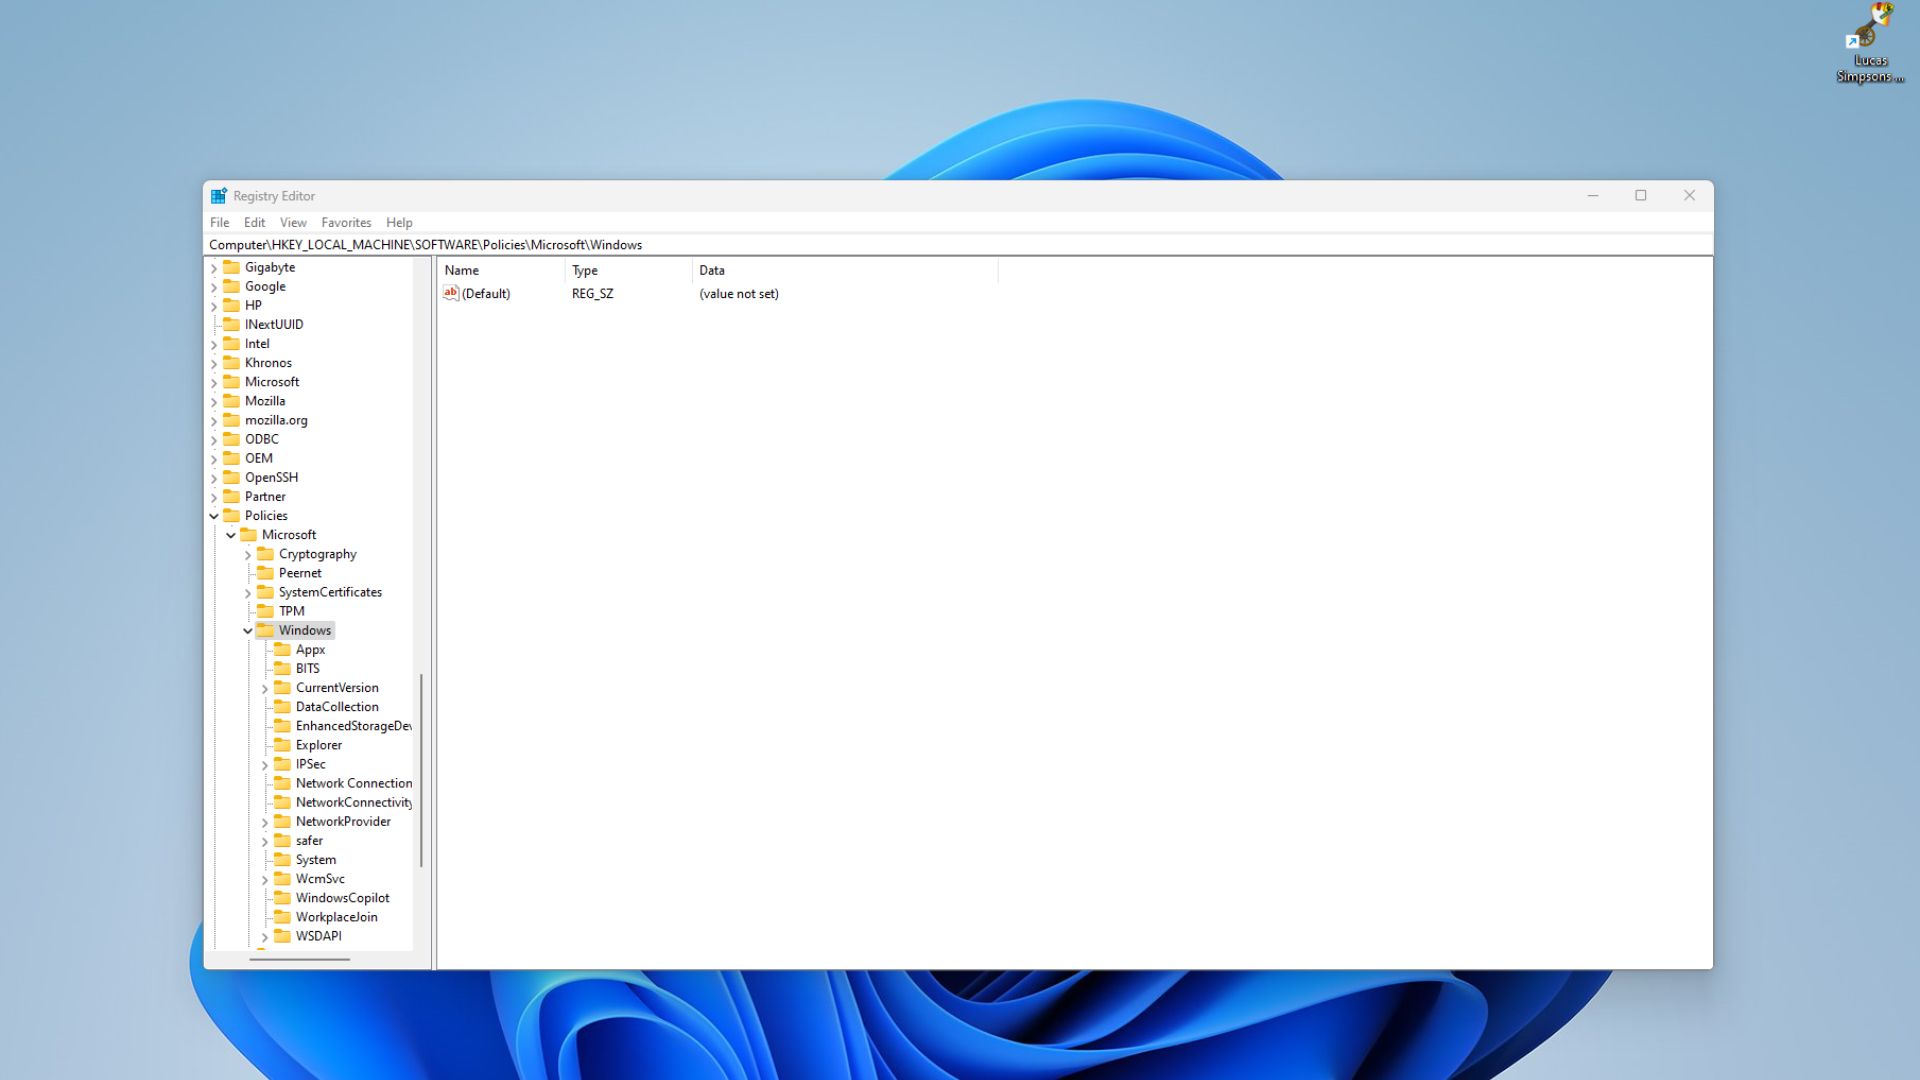
8. From this new screen, repeat steps 4, 5, and 6 to add a new "WindowsCopilot" Key and "TurnOffWindowsCopilot" DWORD (32-bit) value.
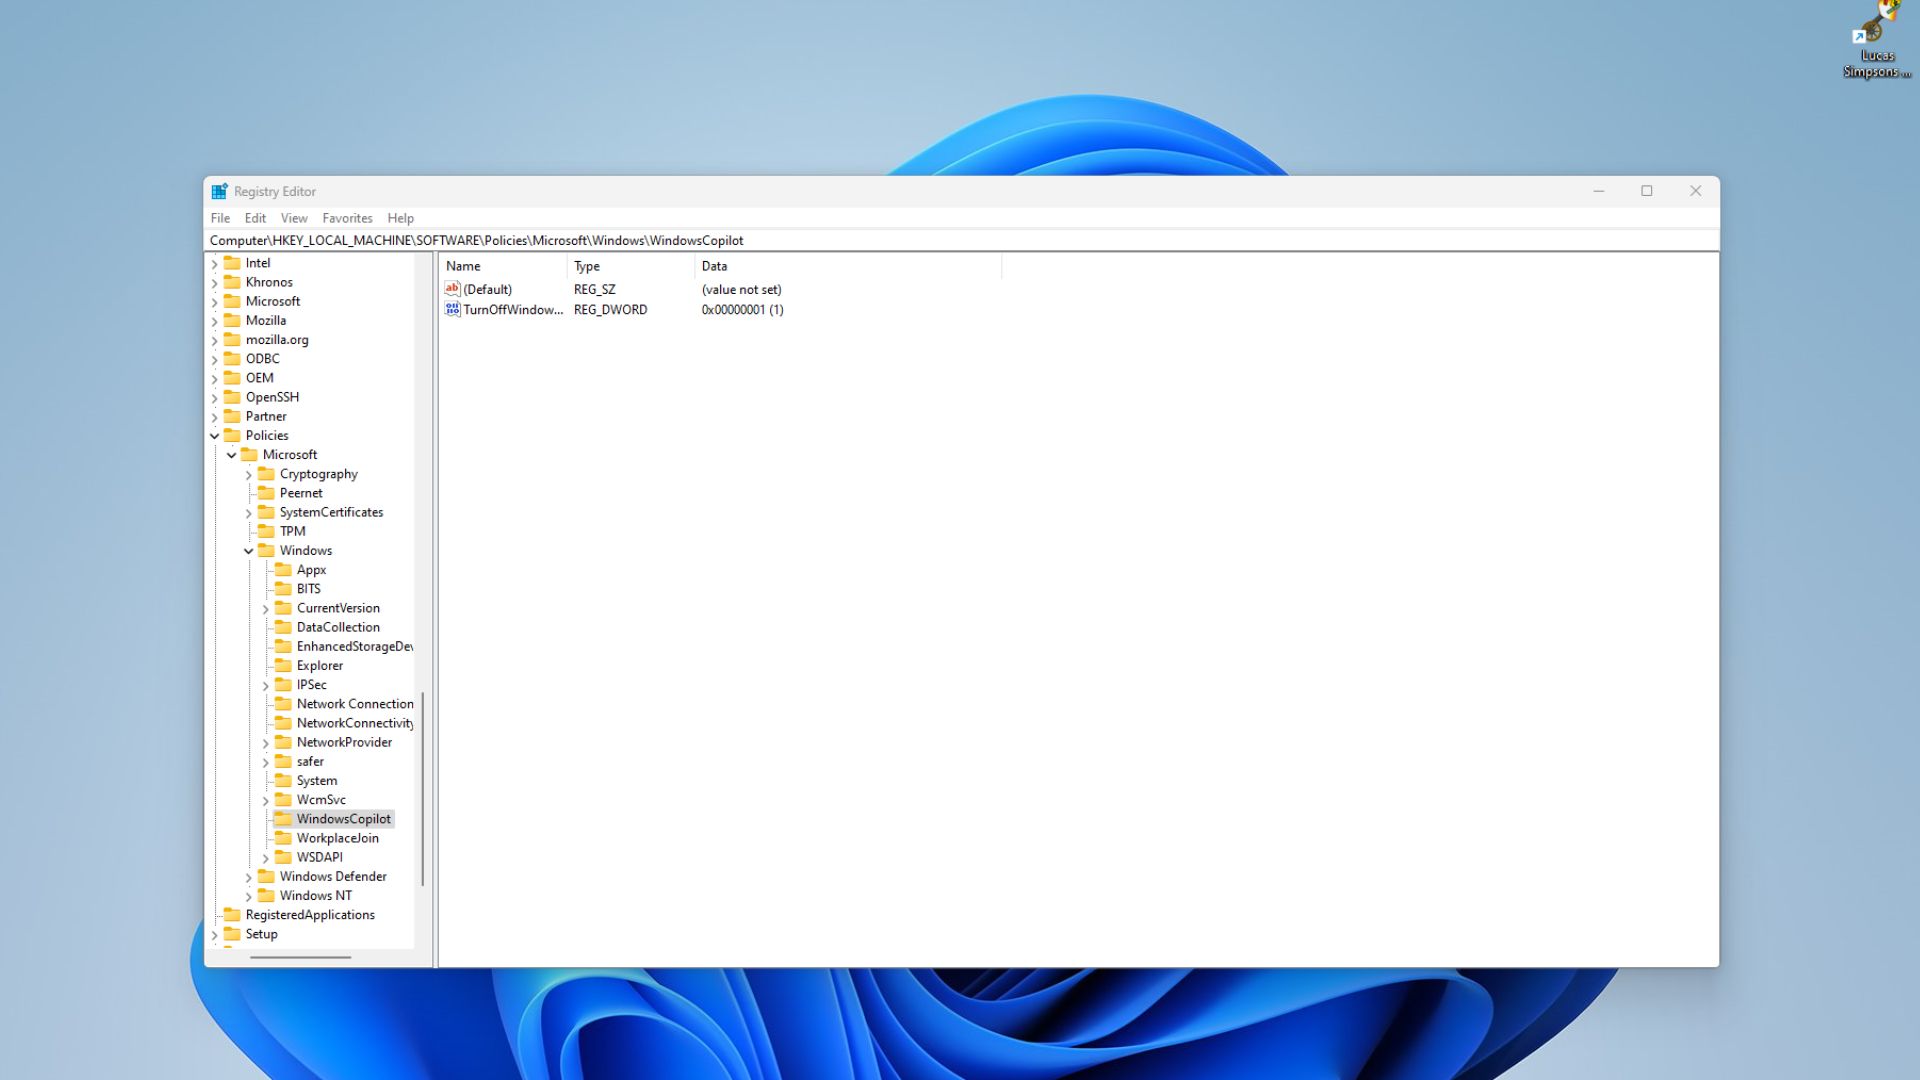
9. Restart your computer to finalize the changes. When your computer turns back on, Windows Copilot should be removed.
How to turn off Copilot in Windows 11 Pro
If your computer is running Windows 11 Pro, the process of removing Copilot is much simpler because you can use the Group Policy Editor to do so.
1. In the Search bar at the bottom of your screen, type "Group Policy Editor."
2. Click on Edit group policy to open the Group Policy Editor.
3. In the menus, double-click on User Configuration > Administrative Templates > Windows Components > Windows Copilot.
4. Double-click on Turn off Windows Copilot to edit it. Click the button next to Enabled in the top left corner, and press OK at the bottom of the screen to finalize your changes.
After you've completed all the steps, Windows Copilot will be disabled on your system and its icon will be removed from the taskbar.
In the future, you might decide you want to reverse your decision to disable Copilot on your computer, especially with Microsoft potentially adding a Copilot key to the Windows keyboard. All you'd need to do is delete the keys and DWORD values you created in this process.

Sarah Chaney is a freelance tech writer with five years of experience across multiple outlets, including Mashable, How-To Geek, MakeUseOf, Tom’s Guide, and of course, Laptop Mag. She loves reviewing the latest gadgets, from inventive robot vacuums to new laptops, wearables, and anything PC-related. When she's not writing, she's probably playing a video game, exploring the outdoors, or listening to her current favorite song or album on repeat.


