29 Tips to Make You a Facebook Master

Facebook has woven its way into the fabric of everyday personal and business life. And the social network has had to adapt in response to challenges from a variety of upstarts. Foursquare, Google+, Groupon, and Twitter are all trying to give Facebook a run for its money. But the service shows no signs of slowing down, with Facebook recently surpassing 750 million users. Mark Zuckerberg and friends are constantly rolling out new features, from Skype video calling to a new landing page for businesses.
Given Facebook's rapid pace of innovation, chances are that you don't know about all of the sites features. Use this guide to become a power user overnight.
Facebook for Play
If you're an average Facebook user, you have 130 friends; log into the social network every other day; are connected to 80 pages, groups, and events; and add 90 pieces of content (photos, vidoes, comments, links) to the site each month. Use these tips and tricks for making the most of your social network.
Messaging
No feature embodies the essence of Facebook better than messaging. While there's no way to unsend something (yet), the social network is constantly enhancing the messaging aspect of its service. Here's how to take advantage.
1. Make Video Calls
Stay in the know with Laptop Mag
Get our in-depth reviews, helpful tips, great deals, and the biggest news stories delivered to your inbox.

With this new feature, Facebook and Skype really have made video calling a mainstream activity. To talk face to face:
- From your Facebook Friends window on the right side of your screen, click on a friend with a green circle next to his or her name.
- Click the video camera button at the top of the pop-up screen.
- Click "Save" in the new pop-up window to download an applet called Facebook VideoCallSetup.
- Run the downloaded file.
- Your video call will start as soon as your recipient repeats a similar process and accepts the call. If your friend does not answer, you'll be given the option to leave a video message.
2. Claim your Facebook E-mail Address
With a Facebook e-mail address, people can send you messages through traditional e-mail and the information will be delivered to your Facebook Messages. That means you can receive Facebook Messages from contacts not yet on the social-networking bandwagon. When you send an e-mail to an external address, it will appear as a regular Facebook message with your name, your profile picture, and your message.
To claim your address, go to the Messages tab and click the "Claim your Facebook email" link. Your address will match your public username (www.facebook.com/username = username@facebook.com). If you don't have a username yet, you can chooose one when you create your e-mail address.

3. Reply to a Comment Through E-mail
When you receive an e-mail alerting you to a comment someone has made on Facebook, you can add your own comment by replying to the e-mail notification. Your reply will then show up automatically posted after that person's comment.
Groups
Groups (similar to Google+ Circles) are an easy way to communicate with a specific set of people, instead of sharing everything with everyone all the time.
4. Create a Group
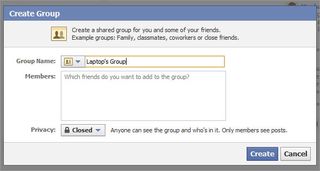
It really is as simple as clicking Create Group in the left column of the Facebook homepage. Doing this will cause a pop-up box to appear, which will ask you to give your group a name, add members, and select the privacy setting for that group. Click Create Group when you are finished.
Once a group is created, you can click Edit Group at the top right of that page to add a description, set up a group e-mail address, and add a photo.
5. Chat with a Group
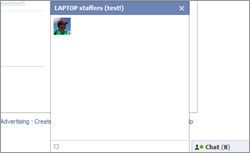
Once you have joined or created a group, you can communicate directly with group members. All members of a group can interact in group chat, regardless of whether they are your friends on Facebook. You can only chat with group members who are online at the time. To start, go to the group and click Chat With Group on the upper-right corner of the page.
6. Share Documents with a Group

Similar to Google Docs, Facebook Docs allows members of a group to write and edit content through the social network. To create a doc, go to your group and click Create Doc on the right. This opens a clean new text-input window with a few simple formatting tools at the top of the page. Select Create Doc, and Facebook will publish the doc to your group. To edit or delete it later, simply click on the document.
7. Poll Members of a Group
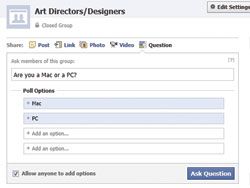
In exactly the same way that you create a poll for all Facebook users, you can ask a question to members of a group. Click on the Question icon above your Status window. This will bring up a window where you can ask your question. Then click Add Poll Options to fill in the possible answers. To prevent people from adding their own answers, uncheck the "Allow Anyone to Add Options" box. Then click Ask Question to publicize it to the group.
8. Control Who Can Join a Group
Administrators of a group can personally approve any member who has been added to the group.
- Click Edit Group on the right.
- Check "Only admins can approve requests to join."
- Click Save Changes.
To remove a member of the group:
- Select Edit Group on the right.
- Click the Members tab on the left.
- Search for a specific person.
- Click the X next to their name. Removed members can be re-added later.
- Check the box for Ban Permanently to remove them forever.

Credits
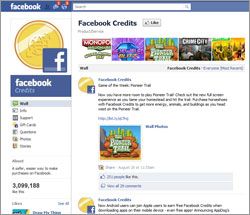
Facebook Credits can be used to buy virtual goods, such as a virtual greenhouse in Farmville or clothes in Pet Society. You can buy Credits with your credit card, PayPal, and mobile phone. It's easy to check your balance in the Payments tab under Account Settings.
9. New Ways to Get Facebook Credits
- Watch Ads: By viewing ads embedded in Facebook apps by CrowdStar, Digital Chocolate, Zynga, and others, you can earn one Credits (one Credit per ad).
- Receive a gift card: Go to Facebook.com/FacebookCredits, click on Gift Cards, and use the store locator to find where you can buy gift cards (stores include GameStop and Walmart).
- Exchange gift cards: Turn unwanted or partially used gift cards into credits by going to apps.facebook.com/plasticjungle. Once you connect to the app, it will ask for your gift card information and offer a prepaid mailing label. After the company receives your card, credits are added to your account. The exchange rate equals up to 92 percent of a card's balance. You get 10 Facebook Credits for every dollar in trade-in value.
- Cash in Kickbucks: First visit www.shopkick.com/download to download the free iPhone app. Then when you walk into a participating retailer, such as Best Buy, Macy's, or Target, the app connects to the in-store transmitter to record your check-in. You then earn Kickbucks that can be converted to Credits from within the app. 25 Kickbucks equals one Credit.
10. Use Facebook Credits to Watch Movies or TV Shows
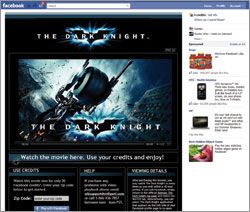
For those who prefer to watch longer-form video, Warner Bros. offers 48-hour rentals of several movies on Facebook. The first option was Batman: The Dark Knight at www.facebook.com/darkknight. In the middle of that page, you'll find a big Watch Now button. Clicking that sends a request for permission for the app to have access to your basic information. Selecting Allow takes you to a new page where you can spend 30 Credits ($3) to start playing. Other movies currently available include Harry Potter and the Sorcerer's Stone, Harry Potter and the Chamber of Secrets, Inception, Life as We Know It, and Yogi Bear.
By liking the Doctor Who page on Facebook, you are presented with a variety of epsides available for 48-hour rental through BBC Worldwide. When you click on a specific episode, you're sending a request for permission to let Doctor Who/Video On Demand access your information and post to your wall. Once connected, you can spend the $1.50 (15 Credits) to watch.
Security/Privacy
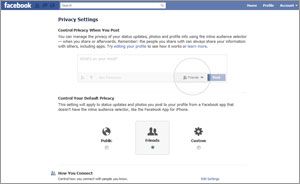
Just because you share your thoughts with your Facebook friends doesn't mean you want to share them with the entire world. So Facebook's security features are essential to know and learn.
11. Opt Out of Suggested Tagging
Thanks to new facial-recognition technology, Facebook is semi-automating photo tagging. To stop the service from suggesting photos of you to be tagged by your friends, go to Account > Account Settings > Privacy > Customize Settings > Things Others Share. Then disable "Suggest photos of me to friends."
12. Report Offensive or Inappropriate Content
With Facebook's social reporting tool, you can notify a member of your community, as well as Facebook, when you see something you think is inappropriate or offensive.

To report a Wall Post/Comment:
- Click the small X to the right of a post.
- Select "Report Post or Spam" from the pop-up window. This removes the post from your wall/news feed and generates a report to Facebook that something is amiss.
To report a Picture:
- Open the photo.
- Click Report This Photo on the bottom left.
- Select the reason for filing the report. If it is a photo of you, you can tell Facebook you don't like the photo or that the image represents harrassement of you or one of your friends. If the photo is not of you, you can designate the image as spam, pornography, graphic violence, hate speech/symbolism, or illegal drug use.
- Click Continue. Facebook will pop up a "Thank you for Reporting" note.
To report a Video:
- Open the video.
- Click Report Video from the bottom right .
- Select the reason for filing the report as either spam, hate speech, violent, or sexual. If you select hate speech or violence, additional drop-down menus will appear.
- Click Submit. Facebook will pop up a thank-you note, with a qualification that a report will not guarantee the video will be removed from the site.
13. Control What Information About You Appears in Bing Facebook Recommendations
When you're logged into Facebook and you visit Bing, you'll see what your friends have liked. To control whether your likes and interests appear in that space, go to Account > Privacy Settings. Click on View Settings at the top of the page. Next to "See your likes, activities and other connections," you'll see a drop-down menu to restrict that access to specific people.

14. Edit Whose News Feed You See
- Scroll to the bottom of your news feed.
- Click Edit Options.
- You can set it to see all your friends' feeds, or just the people you interact with most.
- You can get more advanced by removing a person or a story from your feed by hovering over that post in question and clicking the X that appears. A drop-down menu appears to offer personalization options such as "Hide all by [person's name]" or Mark as Spam.
15. Stop Facebook Spam and Malware
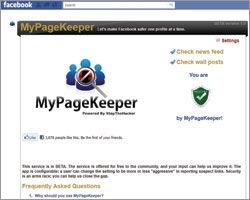
Visit apps.facebook.com/mypagekeeper to add a free app designed to protect your Facebook wall and personal information from malware and spam. Called MyPageKeeper, the app scans and monitors all content posted on your wall and in your news feed. To lock down your profile, click the + button at the top of the app's Facebook page. Then check Allow to enable the app to run in the background.
16. Remove a Malware-Filled App
Malware often enters a Facebook account when you enable an infected app. To review your apps and look for possible problems:
- Go to Account > Privacy Settings.
- Click Edit Your Settings beneath Apps and Websites on the bottom left.
- Next to Apps You Use, click Edit Settings.
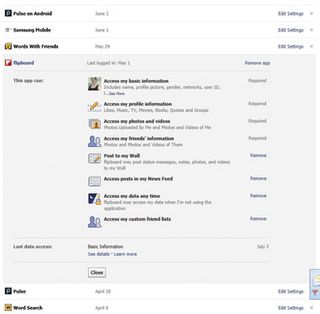
- In this window, you can delete or edit the specific settings for the apps that are enabled to work with your account. Some settings in an app may be removed without disabling the app itself. You can also see when the app was added to the account and when it was last accessed.
17. Recover Your Account from a Hack
If your account is hacked or taken over by someone else, one method for recovering it is to ask for a little help from your friends. From the Forgot Your Password link on the login page, you can designate a few trusted folks to receive a unique security code and instructions on how to help you out. You'll need to call your friends to get these specific series of letters and numbers, which help verify that you are who you say you are because you are in contact with the friends you designated. Enter the codes, then you'll need to wait 24 hours before Facebook will allow you to log back in as yourself.
Facebook for Work
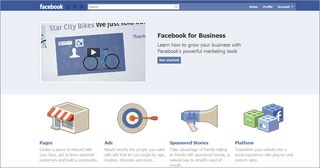
To find new customers and keep current ones, you must go where the people are. By increasing Facebook fans, you'll be creating advocates for your brand. These fans will increase your search engine placement, raise customer awareness, and help you offer better customer service. So it's a no-brainer to get your business up and running with its very own Facebook Page.
To help get you started Facebook recently consolidated all the information you need in one place (www.facebook.com/business). But if you don't want to surf through tons of info, read our list of the essentials to help your business become a power Facebook brand.
Pages Administration
Pages offers a great opportunity for companies and organizations to broadcast information to their fans. You can create and manage a Facebook Page for your organization from your personal account, but only an official representative of a business can create a Page.
18. Moderate Comments
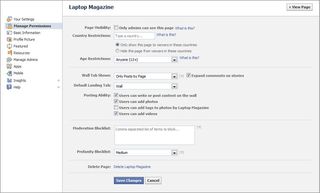
You can control what comments appear on your Page by creating a list of red-flag words. While logged into your page, click Edit Page. At the bottom of the Manage Permissions section, you'll see a Moderation Blocklist area. Add keywords (separated by commnas) here to prevent those words from appearing on your Page and to mark those comments as spam.
19. Ban a Fan
If a fan of your Page has repeatedly attempted to post spam, has posted offensive wall posts, or left unsavory comments, you can prevent that person from remaining a fan. Here's how:
From the Page:
- Click People Like This.
- Click the X next to the person's name.
- Check the Ban Permanently box and click Okay.

From a Wall post:
- Click the X next to the person's name.
- After you remove the post, click Report.
- Select the reason for the report from the drop-down menu.
- Then check the box "Permanently ban this person from this Facebook Page and remove all content they have posted."
From a Comment:
- Click Flag next to a comment.
- After the comment has been flagged, click Report.
- Select the reason for the report from the drop-down menu.
- Then check the box "Permanently ban this person from this Facebook Page and remove all content they have posted."
20. Set Up a Storefront
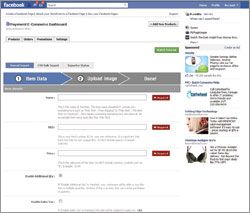
To sell goods through your Facebook Page, you'll need a little help from an app. The leading free option is called Shopping Mall Powered by Payvment. This free beta app lets you accept credit cards and PayPal payments and can work out sales tax and shipping costs for you. More than 60,000 brands use this app, including Gibson and Warehouse Skateboards. You can even offer discounts to those who like your Page.
To get started, go to apps.facebook.com/payvment and click Download App. You'll need a PayPal account to receive your payments. Once it's set up, you can add products one at a time, including name, SKU, and price, or you can mass upload through a CSV file. Under the Settings tab, connect your store to your Page, add an About Us description, and include other admins.
21. Know Your Fans
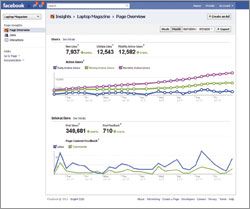
Without data, it's impossible to know how your Facebook community is helping your business. That's why Facebook Insights is so helpful. At a glance, this tool can tell you how many people are actively commenting, how quickly your fan base is growing, and how many page views you're getting. Recently, the social network's analytics app added real-time data to its features.
22. Export Insights Data

Sometimes it's necessary to get the data about your fans' engagement off of Facebook and into Excel.
- Click View Insights from the right side of your Page.
- Select Export.
- Set a time frame for the data you want to export from the pop-up window.
- Determine if you want the data sent an Excel file or CSV.
- Click Export.
23. Require a Like to Access Content

Pagemodo can help you customize the look and feel of your Page. This app can even add a Like Gate, which requires visitors to like your page in order to access its content. For $13.25 a month, the Pro package gives you access to this feature, as well as the ability to add video to your Page.
Ads
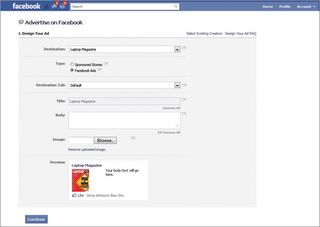
Spending on Facebook ads has grown at a pace of 64 to 69 percent during the last year, and that number is projected to rise. At www.facebook.com/ads/create, it's simple to start promoting your brand on Facebook. However, there are a few key steps and decisions you'll need to make.
24. When to Choose CPC vs CPM
Cost Per Click (CPC) advertising allows you to specify a certain amount that you are willing to pay each time a user clicks on your ad. This is the way to go for businesses that are primarily interested in people clicking through to a website. The minimum CPC is $0.01.
The other way to pay for ads on Facebook is Cost Per Thousand Impressions (CPM) advertising, which allows you to specify how much you are willing to pay for 1,000 views of your ad. This model works best for brands that are focused on spreading awareness rather than counting clickthroughs. The minimum CPM is $0.02.
25. Schedule Ads
In the creation process of an ad-at step 3-the default is for ads to run continuously starting that day. By unchecking that box, you can set a beginning and ending date and time for when your ads will appear.
26. Pay for Facebook Ads with Membership Rewards Credits
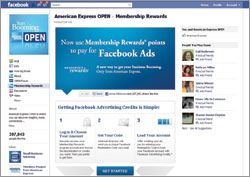
In an industry first, American Express Membership Rewards cardmembers can redeem points for Facebook Ads.
- Visit www.facebook.com/open.
- Access your Membership Rewards account and choose Facebook Ads as the denomination of the payment of your reward's cash. For each $6,750 spent on your card, you can redeem $50 worth of Facebook advertising.
- American Express will send a unique Facebook redemption code to you via e-mail.
- Create your ad and enter your Membership Rewards redemption code to pay.
27. View Reports to Track Effectiveness
When it comes to your Facebook advertising strategy, it's important to review what's working and what's not. From www.facebook.com/ads/manage, click on the Reports tab along the left navigation. There are three types of reports in the Report Type drop-down menu: Advertising Performance, Responder Demographics, and Conversions by Impression Time. Each can be downloaded as CSV, Excel, or HTML sheets. Advertising Performance includes such statistics as impressions, clicks, clickthrough rate (CTR), and spend.
Responder Demographics offers information on who is seeing and clicking on your ads. The Conversions by Impression Time shows the length of time between a user's view or click on the ad and the conversion (i.e., 0 to 24 hours, 1 to 7 days, 8 to 28 days).
Locations

Any brick-and-mortar store, bar, or restaurant can be a Place on Facebook. The Places feature lets Facebook users share where they are with and who is with them with friends. From a business perspective, every time someone checks in at your location, that's free advertising.
28. Claim Your Business
If your business doesn't show up in a search of Facebook, you'll first need to create it as a Place:
- Visit the business's physical location with your smartphone.
- Access Places within your Facebook app.
- Click Check In.
- Click Add.
- Name your business and add a brief description.
- Click Add > Check In.
If your business is discoverable through a search by business name on Facebook:
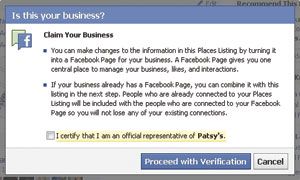
Search for your business and click on it.
- Click the link to the left that says "Is this your business?"
- Add your name as the business owner.
- Fill in information about the business, including phone number and website.
- Facebook may contact you to verify your identity over the phone and may also ask for further documentation.
29. Post a Check-In Deal
Offering an incentive to customers can bring them in the door-and keep them coming back.
- From your Place, select Deals from your administration panel on the right.
- Select the type of deal you want to offer: Individual (simple discounts for checking in), Friend (rewards for group check-ins), Loyalty (gifts for a number of check-ins), or Charity (a pledge that you will donate a specified amount when someone checks in).
- Define your offer in clear and simple language. You have 50 characters to descibe what the discount, reward, or gift might be. You also have 100 characters to explain how to claim your deal. The more appealing the deal, the more people it will bring in the door.
- Specify when the deal will start (create it 48 hours ahead of time, at least) and when it will end (a week minimum is recommended).
- Set how many people can redeem the deal before it is stopped, and whether someone can claim the same deal each day or just once a year.
- Click Save. Once your deal is approved (within 48 hours), you can promote it through a status update or a Facebook ad.
- Inform your employees. Tell them how the deal can be redeemed and how long it will be running. Be sure to set up a system to record the number of redemptions.


