How to Enable Do Not Track in Microsoft's Edge Browser
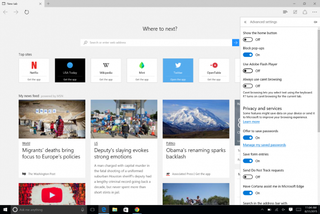
You might not realize it, but you're being constantly stalked on the Web. Many websites, and the third-party content they host, track your browsing behavior, such as the links you click, the pages you visit and the products you buy.
You can try to opt out of this by telling websites that you don't want to be monitored by setting your browser to send Do Not Track requests. By default, most browsers, including Microsoft's new Edge browser, built into Windows 10, do not send such requests, meaning websites are free to collect information about you.
To be fair, websites are not obligated to honor such requests, but having DNT turned on will at least let the outlets that do recognize it know to stop tracking you. Here's how to turn on DNT in Edge.
1. Open Edge.

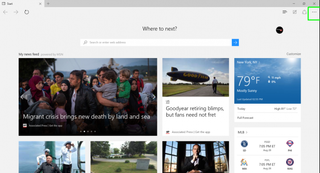
2. Press the three-dot menu button on the top right of the screen.
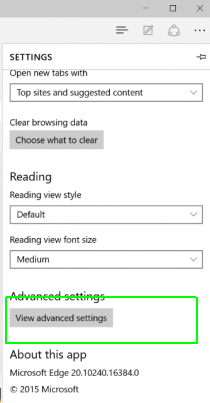
3. Scroll down and tap Advanced Settings.
4. Tap the Send Do Not Track Requests toggle to turn it on.
Stay in the know with Laptop Mag
Get our in-depth reviews, helpful tips, great deals, and the biggest news stories delivered to your inbox.
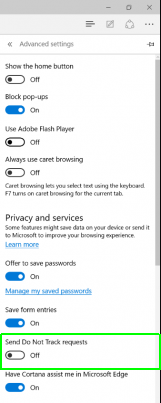
Now the websites you visit will know that you don't want to be monitored.
Edge Browser Tips
- Share a Web Page
- Disable Flash
- Change Download Folder
- Send a Web Note
- Disable or Enable Cookies
- Stop Restoring Tabs After a Crash
- Change Search Engine to Google
- Pin a Website to Windows 10’s Start Menu
- Enable Do Not Track
- Set Homepage (or Homepages)
- Enable Dark Theme
- How to Enable Do Not Track in Microsoft Edge Browser
- How to Import Favorites into Edge From Another Browser
- Clear Your History and Cookies in Microsoft Edge
- Print in Microsoft Edge
- Add a Page to the Reading List in Microsoft Edge Browser
- Rename a Favorite in Microsoft Edge Browser
- How to Add a Favorite Site/Bookmark in Microsoft Edge
- How to Open an InPrivate Window in Microsoft Edge
- Turn On Reading Mode in Microsoft Edge
- Enable and Use Cortana in Microsoft Edge
- Block Pop-ups in Microsoft Edge Browser
- Manage or View Saved Passwords
- Set Aside Tabs
- Increase Your Privacy
- All Windows 10 Tips


Microsoft doesn't want to tell you how to uninstall Microsft Edge
There are now 3 great reasons to switch from Google Search to ChatGPT Search
