How to find your MAC Address in Windows 10
Are you trying to find the MAC address of your PC? We can help
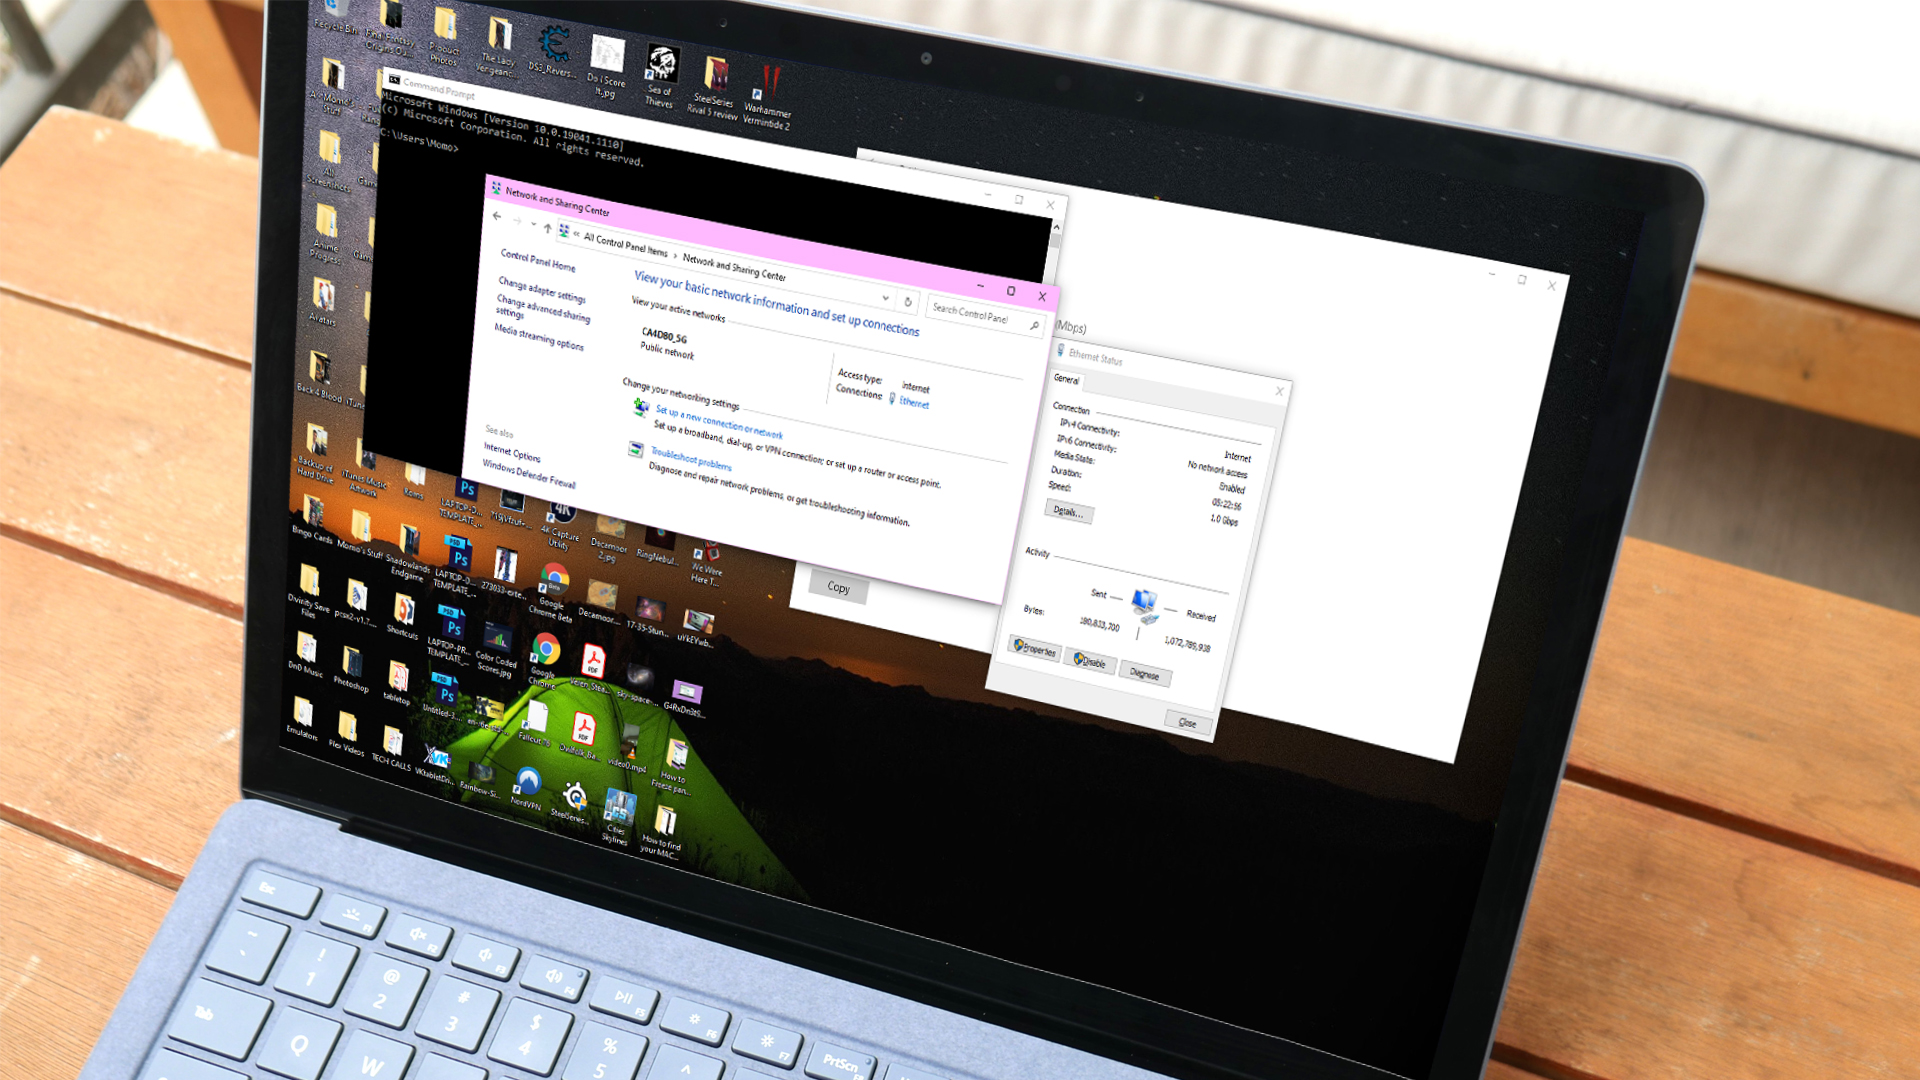
There are a few reasons why you might want to find your MAC address: perhaps you're setting up a router and would like to filter certain devices out of your network for extra security. Maybe your router lists connected devices by their MAC address and you want to figure out which device is which. Or there's a chance you'll need to know your PC's MAC address to diagnose or resolve some computer network errors.
Regardless, we can help you find your PC's MAC address on Windows 10 by using a few different methods. And, if you're wondering how to password protect a folder in Windows 10, or how to enter the BIOS on Windows 10, we've got you covered.
What is a MAC address?
A MAC address is a unique, alphanumeric hardware identifier for a device that connects to the internet. Every network device or interface, such as your laptop's Wi-Fi adapter, has a MAC (or "media access control") address.
A MAC address is assigned by manufacturers and embedded into the device's network interface card -- it's permanently tied to the device, which means that a MAC address cannot be changed.
The MAC address is listed as a series of 12 digits across six pairs (00:1A:C2:7B:00:47, for example).
A MAC address is essential in order for your device to interact with other local network devices. When your device detects a router, it sends out its MAC address to initiate a connection. This is where the IP address comes in -- your router will assign you an IP address so that you can connect to the internet.
So what's the difference between a MAC address and an IP address? In part, MAC addresses are permanently burned into your device while IP addresses can change depending on your location. MAC addresses are used in the local network while IP addresses can be used to identify network devices all around the world.
Stay in the know with Laptop Mag
Get our in-depth reviews, helpful tips, great deals, and the biggest news stories delivered to your inbox.
Method 1: How to find your MAC address in Windows 10 with command prompt
The quickest way to find the MAC address is through the command prompt.
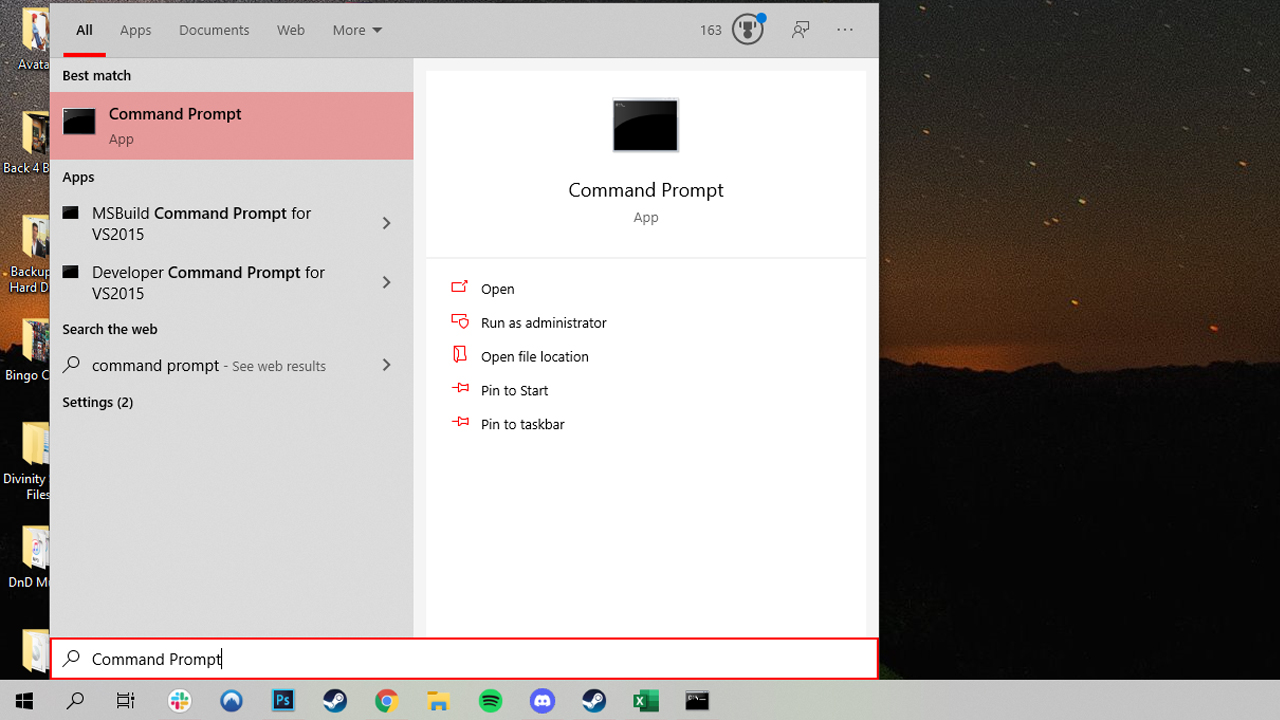
1. Open the command prompt. Search "Command Prompt" in the taskbar, or if you have an older version of Windows, you can right-click on the Start button and select Command Prompt from the menu.
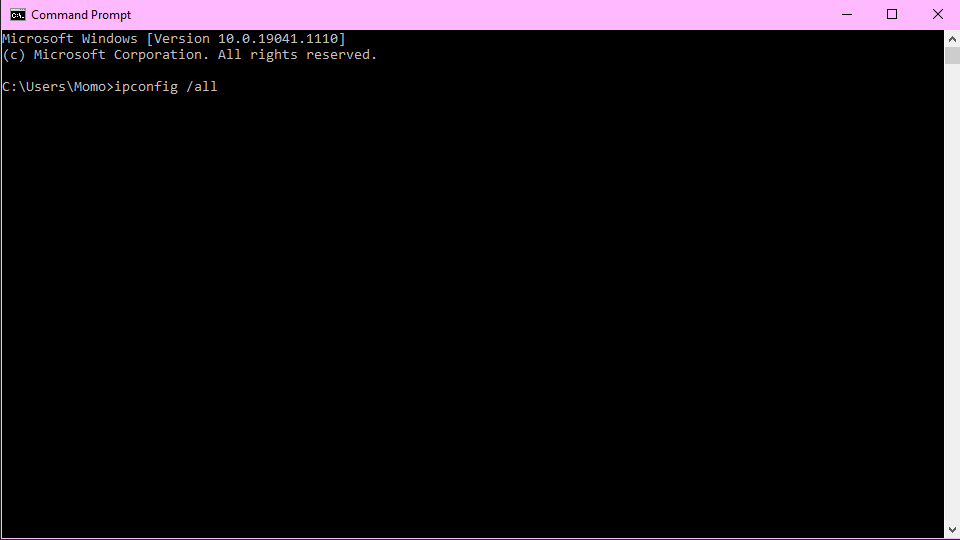
2. Type in ipconfig/all and press Enter. This will display your network configuration.
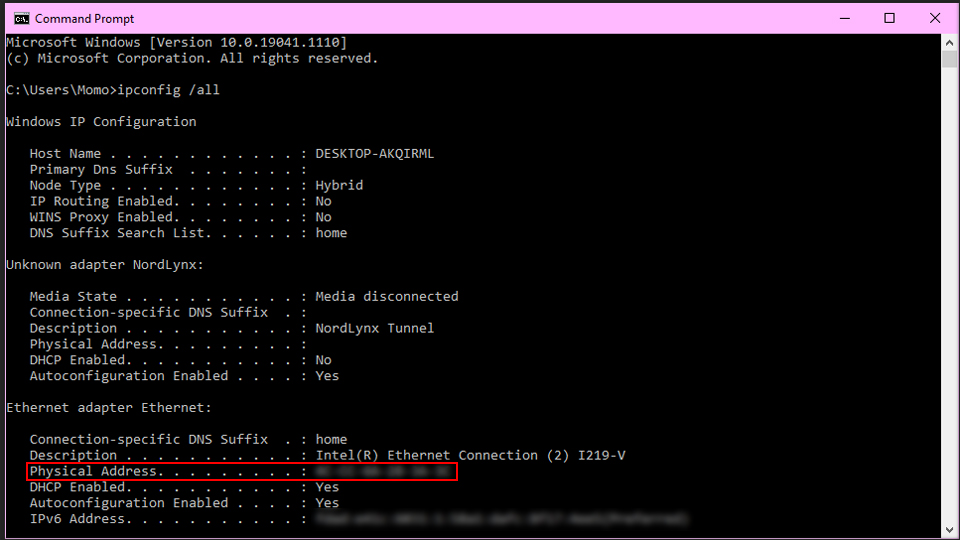
3. Find your adapter's physical address. Scroll down to your network adapter and look for the values next to "Physical Address," which is your MAC address.
How to find your MAC address in Windows 10 without using Command Prompt
Perhaps you don't want to mess around with command prompt for some reason or another. Here are some ways you can snag a MAC address without accessing command prompt.
Method 2: How to find your MAC address in Windows 10 in the network connection settings
You can also find the MAC address by looking at the details of your network adapter in Windows.
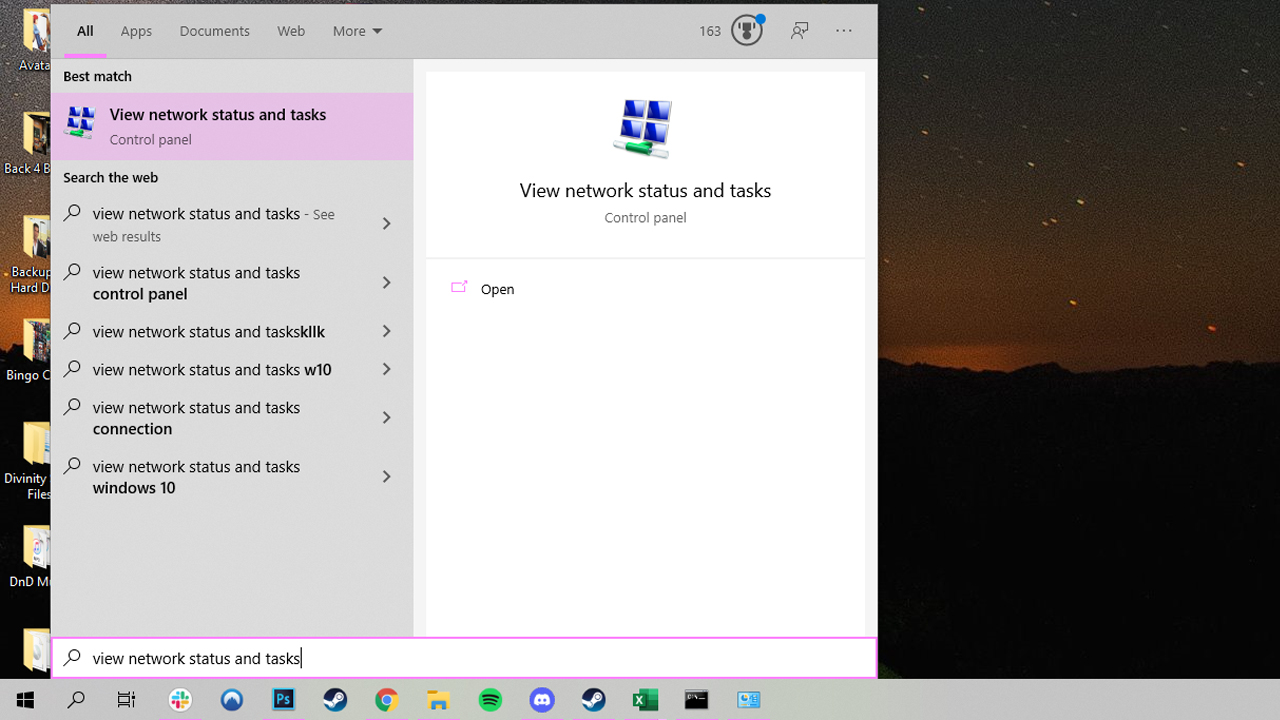
1. Search "View network status and tasks" in the taskbar and click on it. (Or navigate to Control Panel > Network and Internet > Network and Sharing Center)
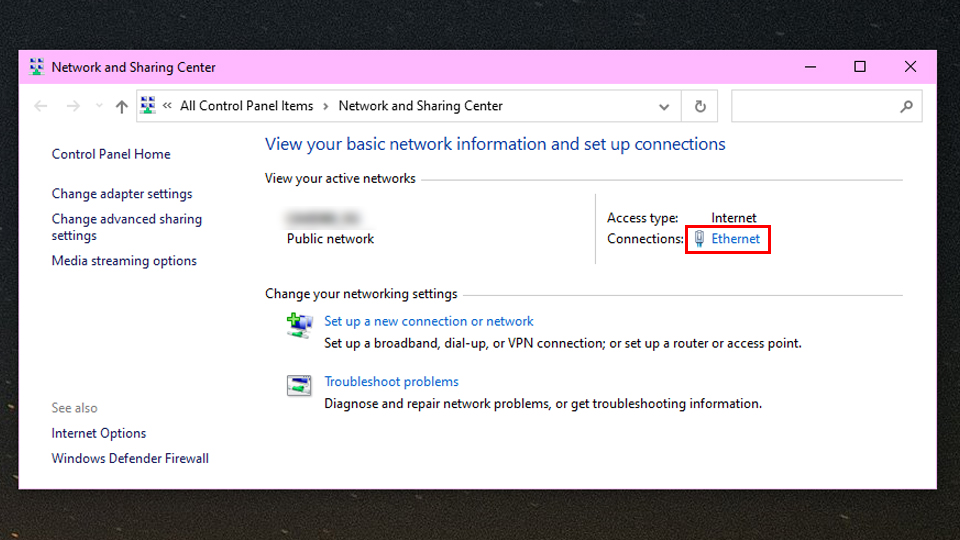
2. Click on your network connection.
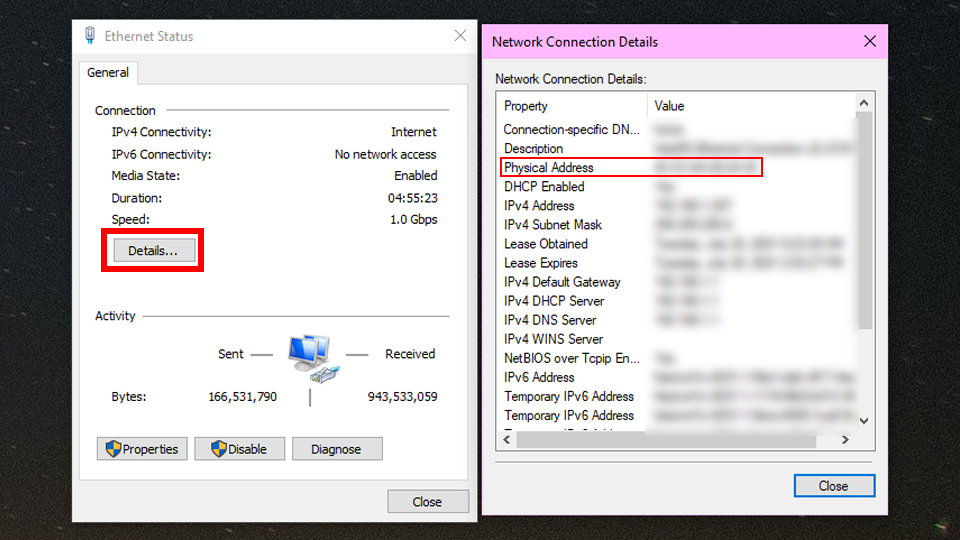
3. Click the "Details" button.
4. Locate the Physical Address. The value for the physical address in the Network Connection Details window is your MAC address.
Method 3: How to get your MAC address by accessing your taskbar
Another avenue that you can use to find your device's MAC address is by clicking on an icon on your taskbar to quickly navigate to your PC's hardware identifier.
1. Click on the network icon on your Windows 10 taskbar. It should be next to the clock.
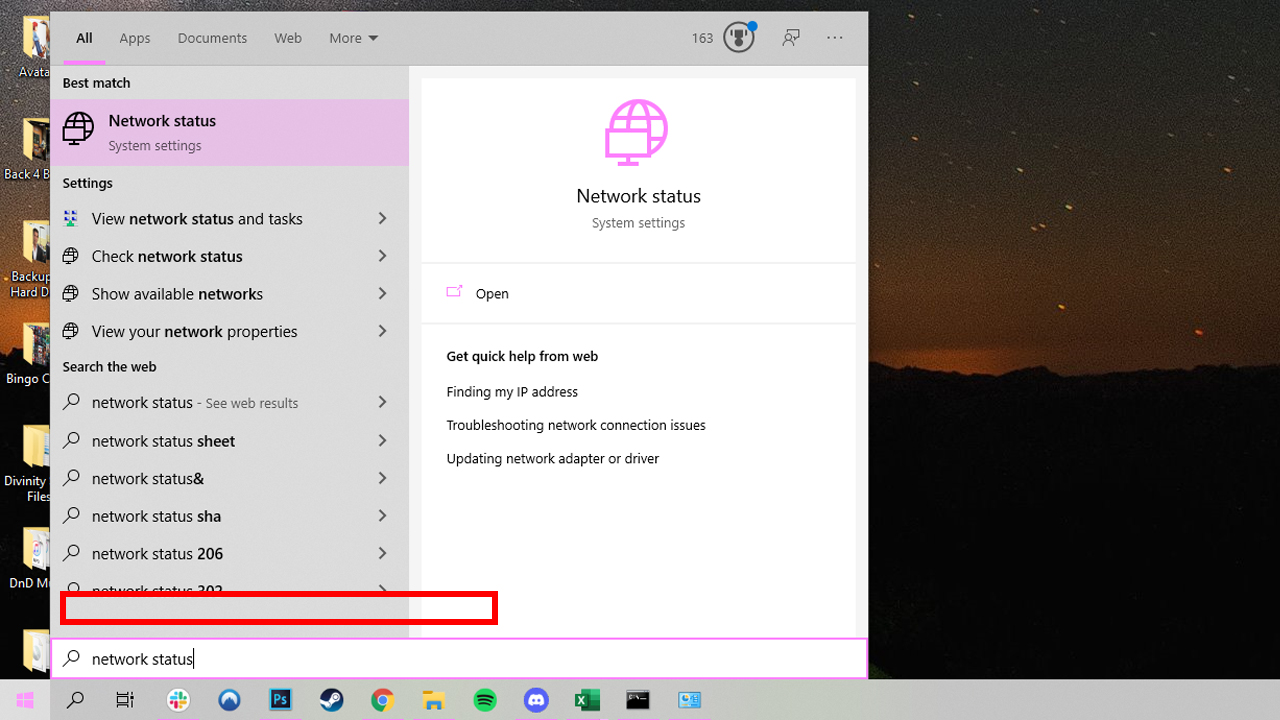
2. Click on "Properties" on your connection. This will open your network's settings window.
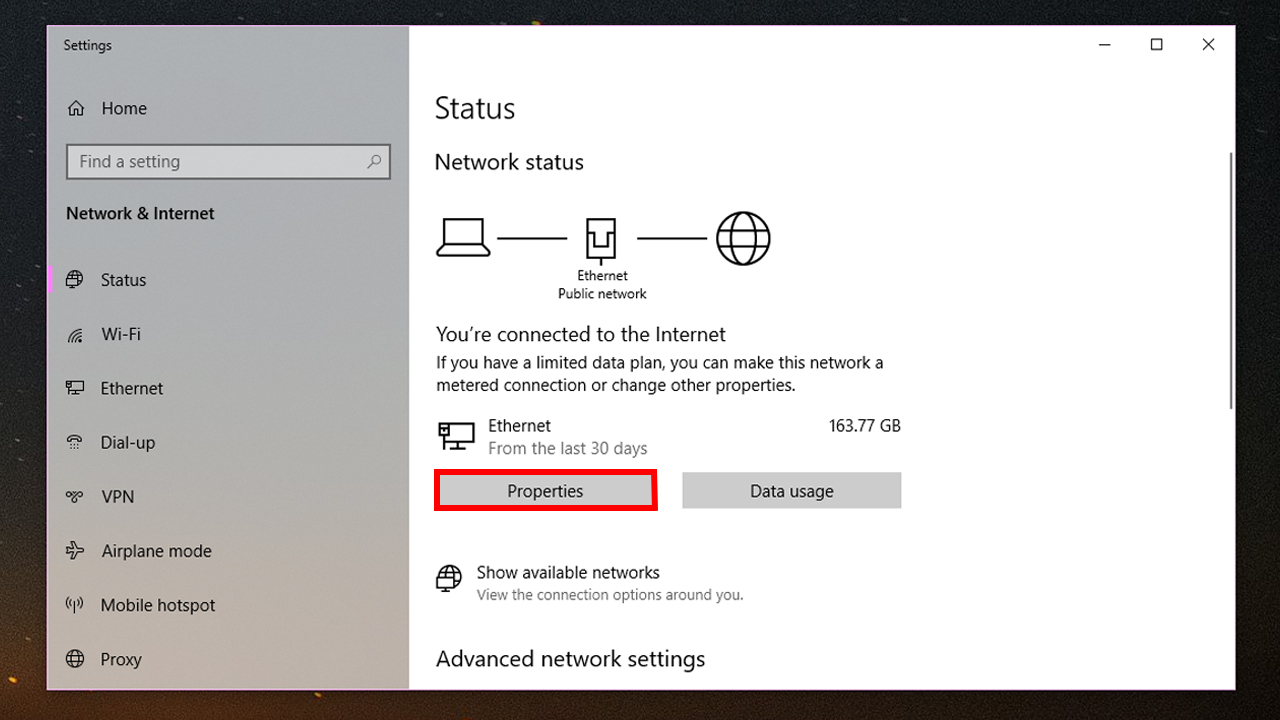
3. Scroll down to the Properties section. Your MAC address should be right next to the words "Physical address."
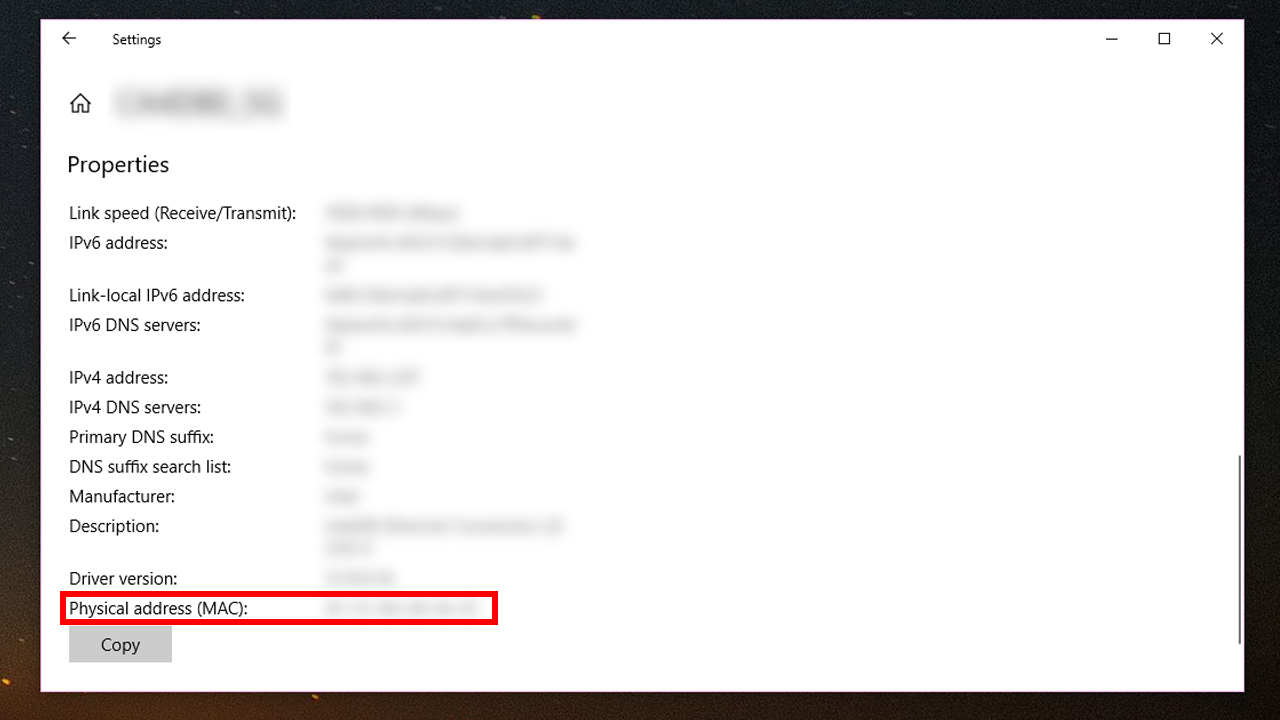
Voila! You now know your MAC number. Upgraded to Windows 11? Check out how to check VRAM in Windows 11, how to move the Start Menu back to the left on Windows 11, and these handy Windows 11 tricks.
