How to Play Demanding Games on the Dell XPS 13
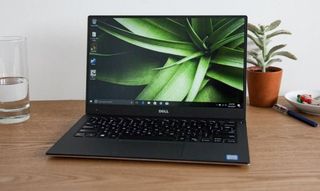
Laptop Mag's favorite laptop overall, the Dell XPS 13 packs the strong performance of an Intel 8th Gen Core CPU and speedy PCIe SSD into an attractive, light-weight package with over 16 hours of battery life.
Because the XPS 13 has only integrated Intel UHD graphics, you might think that it can't play demanding games. However, with some small tweaks, you can actually run many of today's top titles and get decent frame rates.
Our Test Config
To see how well the XPS 13 can play games, we performed all the steps below on a 2017 model with a Core i7-8550U CPU, a 1080p non-touch screen, 8GB of RAM and a 256GB PCIe SSD. The steps below should boost performance on any XPS 13, but you'll get faster speeds from the latest hardware.
Settings Changes That Help in Every Game
While each game is a little different, making the following changes to your XPS 13 will help across the board.
- Download all Windows updates: Go to Settings->Update & Security to make sure you have the latest and that Windows isn't wasting cycles downloading as you game.
- Kill all background tasks.
- Cap the FPS: If the XPS 13 gets too warm, it may throttle performance, resulting in an unstable game. If you deliberately the limit the frames-per-second to 60 fps on lighter games and 30 fps on more-demanding titles, you can avoid overtaxing the laptop.
- Lower the Screen Resolution: The XPS 13's display is either 1080p or 3200 x 1800, but it may not be able to push all those pixels in high-end games. Dropping the game down to 720p or even lower can help, provided that the game supports it.
Below, we show how to get the best performance in several popular games when playing on the Dell XPS 13. Let’s start with some of the lighter games that you can expect to play on the XPS 13 without much trouble.
Games We Played
- Counter Strike Global Offensive
- Rocket League
- Overwatch
- Grand Theft Auto V
- Doom (2016)
- Destiny 2
- Crysis 3
- Fallout 4
- The Elder Scrolls V: Skyrim Special Edition
- PlayerUnknown's Battleground
- Games We Tested, But Won't Play
Counter Strike Global Offensive
Originally released in 2012, the multiplayer shooter continues to have a strong player base and is one of the most important games in e-sports scene.
Setting a limit to the FPS is as simple as enabling the dev console in the game options, assigning a button to the console in the keyboard options, opening it in game and typing fps_max 60.
Stay in the know with Laptop Mag
Get our in-depth reviews, helpful tips, great deals, and the biggest news stories delivered to your inbox.
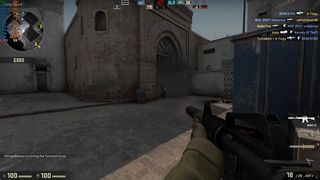
On the lowest settings and a resolution of 1080, the Intel UHD was able to keep up with the 60 FPS target with no obvious drops. Counter Strike Global Offensive's lowest settings are not particularly bad looking, so you will get an acceptable graphical experience for a game released on 2012.
Rocket League
Originally released in 2015, this football-meets-rocket cars classic is still very actively played by a large number of both casual and competitive players. Rocket League allows you to limit the framerate on the graphic settings screen using a convenient slider.
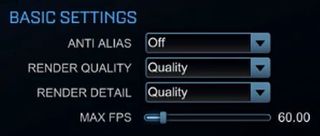
Using a resolution of 720 and a mixture of performance and quality settings the game maintained a strong 60 fps during test matches, while looking reasonably well. The lack of antialiasing is very notable but not detrimental to the gaming experience.

Overwatch
Originally released in 2016, this multiplayer shooter remains one of the most popular games around. Similar to Rocket League, this game places the FPS limiter right on the settings screen, where you can set it to (almost) any number.

Using the lowest settings -- an external resolution of 720p and an automatic internal resolution of 50% -- we saw a typical frame rate of 60 fps, with it dropping down to a still-playable 40 fps under intense pressure.
It's not possible for the XPS 13 to play Overwatch at 1080p, but even on lowest resolutions the game is perfectly legible and playable. The low internal resolution will make pixelation on lines more pronounced but otherwise the game is still visually pleasant.
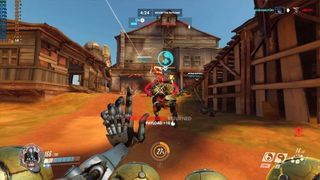
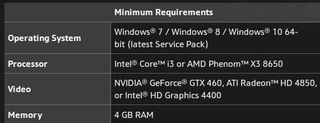
It is worth nothing that Overwatch is known for its GPU optimization on low end computers, only asking for a modest Intel HD 4400 in its minimum requirements, but it is still impressive to see that the XPS 13 is able to maintain a high level of performance on such a modern, popular title.
Grand Theft Auto V
The PC release of GTA V, from 2015, still boasts one of the most dynamic, largest open worlds in gaming. Its benchmarking tool remains a valid way of testing the gaming capabilities of a laptop, especially on a laptop with an integrated GPU.
Apart from lowering all the ingame settings, dropping the external resolution to 720p and internal resolution to 75%, this game needs a few more settings to tweaks to offer a truly good experience.
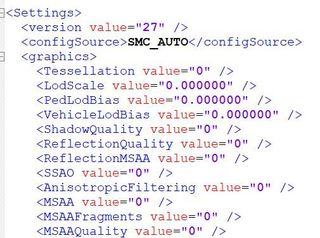
GTA V stores its settings in a file called settings.xml located on the documents folder, Rockstar Games, GTA V. One line in particular, ShadowQuality can be set to 0 in order to disable all in game shadows for a significant boost in performance.
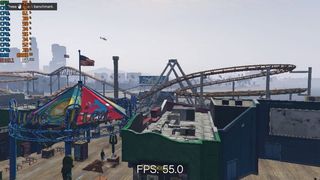
With this change, the GTA V was able to maintain close to 60 fps on most sections of its benchmark, only dropping to around 30 to 40 fps during the very intense chase scene at the end. It is worth noting that the benchmark (and some parts of the game) use a lot of RAM and some of these performance issues at the end might be blamed on the game running out of memory. Upgrading your XPS 13 to 16GB of RAM may help.
GTA V has two main vsync modes, one that locks the screen’s refresh rate (60 in our case), and one that locks to half the refresh rate (30). On the XPS 13 we tested (8th Gen Core i7), a normal refresh rate limited to 60 fps is good for most situations, but you might need to use a half refresh rate mode for older models.
Doom (2016)
The 2016 reboot of Doom was released to rave reviews and many people started using it as an example of the graphic level you can achieve when fully utilizing the resources of a proper gaming computer. It is not the kind of game you would expect to run on Intel UHD graphics but in the case of XPS 13, Doom becomes an interesting example due to its use of Vulkan.
In a nutshell, Vulkan is a render API (like DirectX 11 or OpenGL) which is used by a game to render graphics without having to rewrite the entire game for each specific GPU. Vulkan was introduced as the successor to the widely used OpenGL and it allows developers to reduce overhead and work much closer to the GPU for increased performance.
Doom was one of the first large game releases to incorporate Vulkan (via an update to the game in July 2016). Vulkan compatibility on Nvidia and AMD GPUs goes back all the way to devices released on 2012, but in the case of Intel HD Vulkan is only compatible with integrated GPUs newer than Skylake.
The Intel UHD in the XPS 13 falls into this category, so Vulkan can be enabled on the game's settings screen .

With Vulkan, the lowest settings, external resolution of 720 and the internal resolution to 50% the game maintains something between 40 and 60 fps while roaming around most levels.
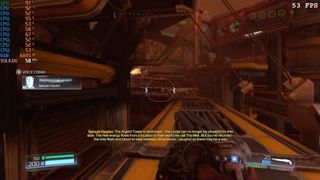
In the case of combat, a bit of extra help might be needed to make the game playable. While the game is running you can open the dev console using the button in the upper left corner of your keyboard, under ESC (usually tilda “~”). Once in the console, you can type r_shadowAtlasWidth 32 to disable most of the game’s dynamic shadows for a quick performance boost.

Sadly, there does not seem to be any current way of making this permanent, but you can apply this command quickly when needed by using TAB to autocomplete to the nearest variable every time a new letter is typed.
After removing shadows, I was able to jump into some of the most frenetic battles in the game without ever dropping under 39 FPS, and averages were closer to 45 FPS. Not bad for once of the most intense shooters out there!
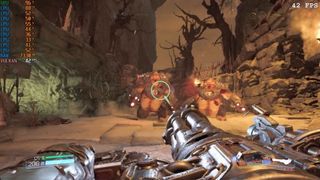
Doom has an option for adaptive vertical sync. Adaptive will limit the game to 60 or 30 fps dynamically depending on the game's performance, or will automatically disable vsync when performance is somewhere in the middle to avoid stuttering.
It is generally recommended that you enable Adaptive vsync.
Destiny 2
I have previously written about some of the steps you can take to get started on Destiny 2 on a laptop with Intel UHD graphics, but some of the quick measures you can take are:
- Configure the battle.net launcher so it closes as soon as you open the game.
- Disable local shadows by going to USERNAME]\AppData\Roaming\Bungie\DestinyPC\prefs\cvars.xml and set local_light_shadows to 0.
- Limit FPS to 30 using the Vsync option on the game.
- Reduce internal resolution in the game's configuration screen.
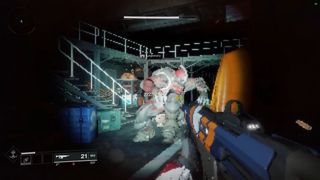
These changes proved effective on the XPS 13, although I was forced to drop the internal resolution all the way down to 25% in order to maintain a playable frame rate of 30 fps.
Long distance visibility was affected by the low resolution, but the design of the game allows combat to still be possible.
Crysis 3
Crysis games have a historic reputation for requiring a powerful computer to play and Crysis 3, from 2013, is still regularly used a benchmark on modern systems.
Even after dropping all the settings to the lowest and resolution to 1366x768 there are still a lot of things that can be reduced to make this feat possible. Most game variables are located in a file in the installation directory of the game called autoexec.cfg.
Here is the configuration file I used for this test.
; AUTOGENERATED CONFIGURATION BELOW HERE
; Explosion Blur
g_radialBlur = 0
; Color Grading
r_ColorGrading = 0
; Depth of Field
r_DepthOfField = 0
; Volumetric Water Shadows
r_FogShadowsWater = 0
; Real-time Global Illumination
e_GI = 0
; Particle Collisions
e_ParticlesObjectCollisions = 0
; Sharpening
r_Sharpening = 0.00
; Texture Pool Size (MB)
r_TexturesStreamPoolSize = 192
; Shadow Casting Light Scale
e_ShadowsResScale = 0.1
; LOD distance ratio
e_LodRatio = 0
; View distance ratio (Vegetation)
e_ViewDistRatioVegetation = 21
; Chromatic Aberration
r_ChromaticAberration = 0.0
; Bloom amount
r_HDRBloomRatio = 0.000
; Ambient Occlusion Method
r_ssao = 0
r_ssdo = 0
; Sun Shadow Map Size
e_ShadowsMaxTexRes = 8
e_ShadowsPoolSize = 8
e_ViewDistRatioVegetation = 19
e_ViewDistRatioDetail = 19
e_ViewDistRatio = 19
r_MotionBlur 0
r_sunshafts 0

This file will lower everything to the absolute minimum, reduce the render distance of shadows and details, and (when present) reduce the framerate of grass animations to lower its performance impact. Game models will have a lot less detail and a visibly smaller polygon count.
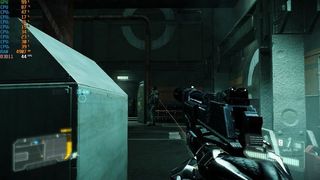
The good news is that the game was able to maintain between 30 and 40 fps in my short test, only dropping under 30 during intense scenes that contained explosions.
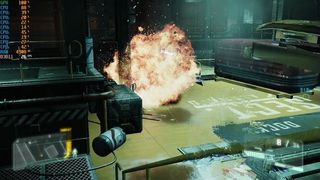
You can also add the sys_MaxFps = 60 (or another number) variable to the configuration file in order to limit the FPS of the game to any number you want.
Fallout 4
Released in late 2015, the latest entry in the Fallout series features a large open world with hundreds of location to visits and cities packed with characters.
Even after lowering all the launcher settings to the lowest some extra help will be needed to maintain acceptable performance. You will find the main configuration file for Fallout 4 in your Documents folder, My Games, Fallout 4, Fallout4Prefs.ini. If the file is not there make sure to at least launch game once.
Before changing the file, make note of a variable called sD3DDevice and remember its value. In our case this is "Intel(R) UHD Graphics 620", but if you have a different version of the XPS the value might be different. If the value in the file does not exactly match your GPU the game will reset the configuration file to its default.
With that said, here is the configuration file I used:
[Display]
flocalShadowMapHalveEveryXUnit=750.0000
focusShadowMapDoubleEveryXUnit=450.0000
fShadowBiasScale=1.0000
fDirShadowDistance=10.0000
fShadowDistance=3000.0000
uiOrthoShadowFilter=1
uiShadowFilter=1
iShadowMapResolution=0
uPipboyTargetHeight=700
uPipboyTargetWidth=876
iVolumetricLightingQuality=0
bVolumetricLightingEnable=1
bSAOEnable=1
iDirShadowSplits=2
bVolumetricLightingForceCasters=0
iTiledLightingMinLights=40
bComputeShaderDeferredTiledLighting=1
iMaxFocusShadowsDialogue=4
iMaxFocusShadows=1
bForceIgnoreSmoothness=1
fBlendSplitDirShadow=0.0000
bSinglePassDirShadow=1
bEnableWetnessMaterials=0
fTessFactorMaxDistanceScale=50.0000
sAntiAliasing=
fLeafAnimDampenDistEnd=2600.0000
fLeafAnimDampenDistStart=1600.0000
fMeshLODFadePercentDefault=1.2000
fMeshLODFadeBoundDefault=256.0000
fMeshLODFadeScalar=1.0000
fMeshLODLevel2FadeTreeDistance=2.0000
fMeshLODLevel1FadeTreeDistance=1844.0000
fInteriorMeshLODLevel2FadeDist=1300.0000
fInteriorMeshLODLevel1FadeDist=1600.0000
fMeshLODLevel2FadeDist=1600.0000
fMeshLODLevel1FadeDist=4000.0000
iMaxAnisotropy=0
iPresentInterval=1
bTopMostWindow=0
bMaximizeWindow=0
bBorderless=1
bFull Screen=1
iSize H=540
iSize W=960
bAllowShadowcasterNPCLights=0
iScreenShotIndex=0
fMaxFocusShadowMapDistance=450.0000
bPrecipitationOcclusion=1
iMaxSkinDecalsPerFrame=0
iMaxDecalsPerFrame=0
sD3DDevice="Intel(R) UHD Graphics 620"
iTexMipMapSkip=2
bEnableRainOcclusion=0
iAdapter=0
[Imagespace]
bDoDepthOfField=1
bScreenSpaceBokeh=0
bMBEnable=0
bLensFlare=0
[Pipboy]
fPipboyEffectColorB=0.0900
fPipboyEffectColorG=1.0000
fPipboyEffectColorR=0.0800
[VATS]
fModMenuEffectHighlightPAColorB=0.4100
fModMenuEffectHighlightPAColorG=0.8200
fModMenuEffectHighlightPAColorR=1.0000
fModMenuEffectPAColorB=0.4100
fModMenuEffectPAColorG=0.8200
fModMenuEffectPAColorR=1.0000
fModMenuEffectHighlightColorB=0.0824
fModMenuEffectHighlightColorG=1.0000
fModMenuEffectHighlightColorR=0.0706
fModMenuEffectColorB=0.4200
fModMenuEffectColorG=0.9900
fModMenuEffectColorR=0.4900
[MAIN]
fSkyCellRefFadeDistance=50000.0000
bCrosshairEnabled=1
fHUDOpacity=1.0000
bSaveOnPause=1
bSaveOnTravel=1
bSaveOnWait=1
bSaveOnRest=1
[LightingShader]
bScreenSpaceSubsurfaceScattering=0
bScreenSpaceReflections=0
[General]
bGamepadEnable=1
bPipboyCompanionEnabled=0
iStoryManagerLoggingEvent=-1
bEnableStoryManagerLogging=0 uGridsToLoad=5
[Interface]
bDialogueSubtitles=0
bGeneralSubtitles=0
iHUDColorB=21
iHUDColorG=255
iHUDColorR=18
bDialogueCameraEnable=1
bShowCompass=1
uHUDActiveEffectWidget=2
[Controls]
fMouseHeadingSensitivity=0.0300
fGamepadHeadingSensitivity=0.6667
bAlwaysRunByDefault=1
bInvertYValues=0
bGamePadRumble=1
[GamePlay]
iDifficulty=2
bShowFloatingQuestMarkers=1
bShowQuestMarkers=1
[Particles]
iMaxDesired=200
[SaveGame]
fAutosaveEveryXMins=10.0000
[AudioMenu]
fAudioMasterVolume=1.0000
fVal7=1.0000
uID7=0
fVal6=1.0000
uID6=0
fVal5=1.0000
uID5=0
fVal4=0.6500
uID4=138006
fVal3=0.6500
uID3=1007612
fVal2=1.0000
uID2=94881
fVal1=0.6500
uID1=466532
fVal0=0.6500
uID0=554685
[Water]
bUseWaterDisplacements=1
bUseWaterRefractions=1
bUseWaterReflections=1
bUseWaterDepth=1
[TerrainManager]
fTreeLoadDistance=12500.0000
fBlockMaximumDistance=100000.0000
fBlockLevel2Distance=75000.0000
fBlockLevel1Distance=25000.0000
fBlockLevel0Distance=15000.0000
fSplitDistanceMult=0.5000
bShowLODInEditor=0
[Grass]
fGrassStartFadeDistance=0.0000
fGrassMaxStartFadeDistance=0.0000
fGrassMinStartFadeDistance=0.0000
[Decals]
uMaxDecals=0
bDecals=0
bSkinnedDecals=0
uMaxSkinDecals=0
uMaxSkinDecalsPerActor=0
[LOD]
fLODFadeOutMultSkyCell=1.0000
fLODFadeOutMultObjects=1.0000
fLODFadeOutMultItems=1.0000
fLODFadeOutMultActors=3.0000
[NVHBAO]
bEnable=0
fBackgroundAOViewDepth=750.0000
bBackgroundAOEnable=1
fDepthThresholdSharpness=100.0000
fDepthThresholdMaxViewDepth=500.0000
bDepthThresholdEnable=0
iDepthClampModeEnum=0
fCoarseAO=1.0000
fDetailAO=0.6500
fBlurSharpnessProfileBackgroundViewDepth=1.0000
fBlurSharpnessProfileForegroundViewDepth=0.0000
fBlurSharpnessProfileForegroundSharpnessScale=4.0000
bBlurSharpnessProfileEnable=0
fBlurSharpness=16.0000
iBlurRadiusEnum=1
bBlurEnable=1
fPowerExponent=2.5000
fBias=0.1000
fRadius=0.6500
[NVFlex]
bNVFlexEnable=0
iQuality=0
iMaxNeighbors2=64
iMaxNeighbors1=48
iMaxNeighbors0=32
iMaxParticles2=32768
iMaxParticles1=16000
iMaxParticles0=6000
fKillRadius2=4000.0000
fKillRadius1=3000.0000
fKillRadius0=2000.0000
bNVFlexInstanceDebris=1
bNVFlexDrawDebris=1
[BlurShaderHDR]
bDoHighDynamicRange=0
[BlurShader]
bUseBlurShader=0
[Launcher]
uLastAspectRatio=1
[Bethesda.net]
uPersistentUuidData3=1743441601
uPersistentUuidData2=3089942883
uPersistentUuidData1=1343507567
uPersistentUuidData0=2542409591
This file will tweak the draw distance of most of the world's objects to make sure they are only rendered when very close to the player. It will also disable shadows, some lighting effects and particles and reduce resolution to 960x540.
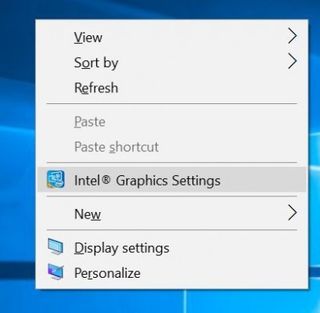
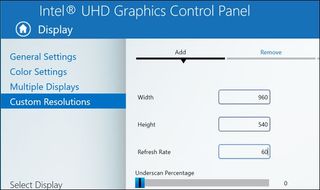
In order for custom resolutions to work on this game, they need to be added to the GPU's control panel. This can be accessed by right-clicking anywhere on the desktop and selecting "Intel Graphics Settings".
Go the display section, and then custom resolutions. Here you will be able to add 960x540 at 60 Hz as a resolution.
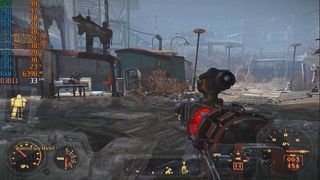
With this done the game will be able to launch, performing at close to 30 fps on crowded areas.
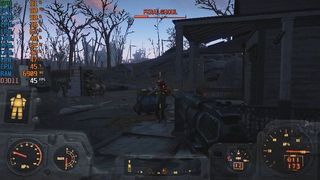
The impact of dropping the internal resolution of the game is less obvious on the XPS 13's small screen than it would be on a larger laptop or a desktop. While the low draw distance of some of the game objects can take some time to get used to, enemies are still visible with enough distance to fight effectively.
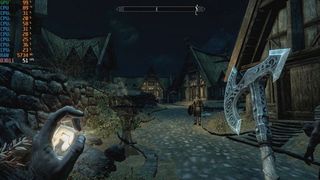
The Elder Scrolls V: Skyrim Special Edition
The 2016 re-release of the highly successful fantasy open world game uses the same Engine as Fallout 4, so a lot of the changes can easily be reused.
For Skyrim SE the configuration file is located in the Documents Folder, My Games, Skyrim Special Edition, SkyrimPrefs.ini.
Here is a copy of the configuration file I used:
[Display]
fShadowDistance=10.0000
iNumFocusShadow=1
fInteriorShadowDistance=10.0000
ffocusShadowMapDoubleEveryXUnit=450.0000
iShadowMapResolution=64
fDynamicDOFBlurMultiplier=0.8000
fProjectedUVNormalDetailTilingScale=0.8000
fProjectedUVDiffuseNormalTilingScale=0.2000
bEnableProjecteUVDiffuseNormals=0
bUseTAA=0
bIndEnable=0
bSAO_CS_Enable=0
bToggleSparkles=0
bSAOEnable=0
bScreenSpaceReflectionEnabled=0
bIBLFEnable=0
bUse64bitsHDRRenderTarget=0
iSaveGameScreenShotHeighWSt=192
iSaveGameScreenShotWidthWS=320
iSaveGameScreenShotHeight=192
iSaveGameScreenShotWidth=256
iShadowMaskQuarter=4
bVolumetricLightingEnable=0
iVolumetricLightingQuality=0
bEnableImprovedSnow=0
fLightLODStartFade=1500.0000
bFXAAEnabled=0
fLeafAnimDampenDistEnd=1600.0000
fLeafAnimDampenDistStart=1600.0000
fTreesMidLODSwitchDist=0.0000
fMeshLODFadePercentDefault=1.2000
fMeshLODFadeBoundDefault=1.0000
fMeshLODLevel2FadeTreeDistance=1048.0000
fMeshLODLevel1FadeTreeDistance=1844.0000
fMeshLODLevel2FadeDist=600.0000
fMeshLODLevel1FadeDist=1000.0000
fGamma=1.0000
bBorderless=0
bFull Screen=1
iSize H=720
iSize W=1280
iScreenShotIndex=0
bTreesReceiveShadows=0
bUsePrecipitationOcclusion=0
bDrawLandShadows=0
iMaxSkinDecalsPerFrame=25
iMaxDecalsPerFrame=100
iAdapter=0
iNumSplits=2
uBookRatio=2
bForceCreateTarget=0
iReflectionResolutionDivider=2
iVSyncPresentInterval=1
[Imagespace]
bDoDepthOfField=1
bLensFlare=0
[General]
fLightingOutputColourClampPostSpec=1.0000
fLightingOutputColourClampPostEnv=1.0000
fLightingOutputColourClampPostLit=1.0000
iStoryManagerLoggingEvent=-1
bEnableStoryManagerLogging=0
uLargeRefLODGridSize=5
[MAIN]
fSkyCellRefFadeDistance=1000.0000
bGamepadEnable=1
bCrosshairEnabled=1
fHUDOpacity=1.0000
bSaveOnPause=0
bSaveOnTravel=1
bSaveOnWait=1
bSaveOnRest=1
[Interface]
fMouseCursorSpeed=1.0000
bDialogueSubtitles=0
bGeneralSubtitles=0
bShowCompass=1
[GamePlay]
bShowFloatingQuestMarkers=1
bShowQuestMarkers=1
iDifficulty=2
[Controls]
fMouseHeadingSensitivity=0.0125
fGamepadHeadingSensitivity=0.6667
bAlwaysRunByDefault=1
bInvertYValues=0
bGamePadRumble=1
bUseKinect=0
[Particles]
iMaxDesired=20
[SaveGame]
fAutosaveEveryXMins=15.0000
[AudioMenu]
fAudioMasterVolume=1.0000
fVal7=1.0000
uID7=0
fVal6=1.0000
uID6=0
fVal5=1.0000
uID5=0
fVal4=1.0000
uID4=0
fVal3=0.5000
uID3=466532
fVal2=0.8000
uID2=554685
fVal1=0.8000
uID1=1007612
fVal0=1.0000
uID0=94881
[Clouds]
fCloudLevel2Distance=144.0000
fCloudLevel1Distance=168.0000
fCloudLevel0Distance=184.0000
fCloudNearFadeDistance=100.0000
[Water]
bUseWaterDisplacements=0
bUseWaterRefractions=0
bUseWaterReflections=0
bUseWaterDepth=0
[TerrainManager]
fTreeLoadDistance=500.0000
fBlockMaximumDistance=1000.0000
fBlockLevel1Distance=100.0000
fBlockLevel0Distance=100.0000
fSplitDistanceMult=0.5000
bShowLODInEditor=1
[NavMesh]
fObstacleAlpha=0.5000
fCoverSideHighAlpha=0.8000
fCoverSideLowAlpha=0.6500
fEdgeFullAlpha=1.0000
fEdgeHighAlpha=0.7500
fEdgeLowAlpha=0.5000
fTriangleFullAlpha=0.7000
fTriangleHighAlpha=0.3500
fTriangleLowAlpha=0.2000
fLedgeBoxHalfHeight=25.0000
fEdgeDistFromVert=10.0000
fEdgeThickness=10.0000
fPointSize=2.5000
[Trees]
bRenderSkinnedTrees=0
uiMaxSkinnedTreesToRender=40
[Grass]
fGrassStartFadeDistance=0.0000
fGrassMaxStartFadeDistance=0.0000
fGrassMinStartFadeDistance=0.0000
[Decals]
bSkinnedDecals=0
bDecals=0
uMaxSkinDecals=0
uMaxDecals=0
iMaxDecalsPerFrame=0
iMaxSkinDecalsPerFrame=0
[LOD]
fLODFadeOutMultSkyCell=1.0000
fLODFadeOutMultObjects=1.0000
fLODFadeOutMultItems=1.0000
fLODFadeOutMultActors=2.0000
[Launcher]
sD3DDevice="Intel(R) UHD Graphics 620"
uLastAspectRatio=1
[Bethesda.net]
uPersistentUuidData3=1439206873
uPersistentUuidData2=2926617060
uPersistentUuidData1=61819062
uPersistentUuidData0=314777538
Once again, you need to make sure the sD3DDevice line is set to the appropriate GPU in your XPS.
Since Skyrim SE is significantly lighter than Fallout 4, the resolution is set to 720 and the game manages to pull as high as 50 fps on the larger towns. Once again, it can take a bit of effort to get used to the low draw distance, but the game is still very navigable and usable.
PlayerUnknown's Battleground
Otherwise known as PUBG, PlayerUnknown's Battleground took the gaming world by storm this year and has quickly become the biggest multiplayer games in the world.
The game received its full 1.0 release on the 20th of December along with an optimization patch that increased the game's performance.
However, to have any chance to play this game on this laptop we need to drop all the settings to the lowest and then tweak the internal resolution a fair bit.
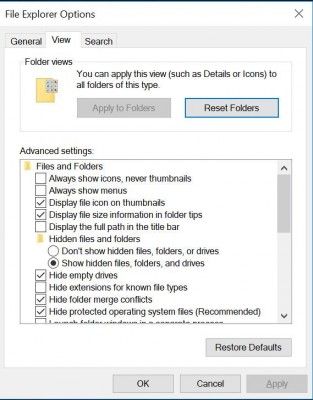
The configuration file for PUBG is located on your User folder, AppData, Local, TslGame, Save Config, WindowsNoEditor, GameUserSettings.ini. If you do not see the AppData folder you might need to enable hidden folders in Windows.
Two variables here control the Internal Resolution, sg.ResolutionQuality and ScreenScale. Both must be set to the same value.
During my test, I dropped the internal resolution to 30 and was surprised to discover that the game could maintain between 25 and 30 fps on open areas and often close to 40 fps on closed spaces.
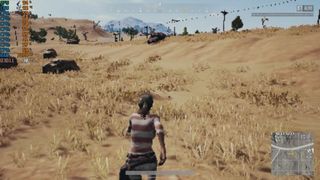
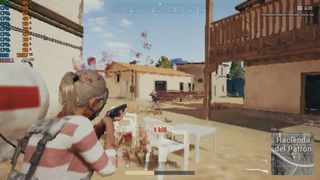
Unlike Destiny, PUBG is not designed with any super low resolutions in consideration so this will make it difficult to fight other human players over long distances.
Fighting players up close is still possible and quite effective.
Games that did not run on the XPS 13
Sadly, not every game is efficient or tweakable enough to be played on this laptop. Here is where we mention some of the experiments that did not work out.
- Star Wars Battlefront 2: As explained in its dedicated article, this game tends to be playable as long as you have a dedicated GPU. The current version of the game maxes out the CPU on integrated graphics to the point of unplayability.
- Assassin's Creed Origins: The latest entry in the Assassin's Creed series has some hefty minimum requirements. Even while forcing the internal resolution to its lowest, its performance on the XPS 13 is not acceptable.
- Wolfenstein 2: the New Colossus: the newest entry in the Wolfenstein series currently holds the honor of having the highest GPU requirements I have seen on a game on the lowest settings. On the XPS 13, the game is not even able to start, exiting with an error.
Bottom line
The XPS 13 is a powerful and small computer for the day to day user, and its integrated Intel UHD is actually able to provide a fair amount of gaming value. You might want to do some small adjustments in order to increase the fps of some of the heavier titles to acceptable levels, but afterward you are left with a lot of potential for a great gaming experience.
Laptop Guide
- Laptop Buying Guide: 8 Essential Tips
- The Best & Worst Laptop Brands
- Laptop Tech Support Showdown: Undercover Report
- Should I Buy a Chromebook? Buying Guide and Advice
- Laptops with the Longest Battery Life
- Chromebooks vs. Windows 10 Laptops: What Should You Buy?
- Why You Shouldn't Buy a Touch-Screen Laptop
- Out of the Box Tips: Set Up Your New Laptop Like a Pro
- The Best Time to Buy a Laptop
- Chromebook vs. Tablet: Which Should You Buy?
- Laptop Buying Tips for Students
- 10 Key Features to Look for in Your Laptop
- How to Buy a 2-in-1 Laptop Hybrid
- USB Type-C FAQ: Everything You Need to Know
- How to Get Rid of Your Old Laptop
- Laptop Warranties: What They Cover
- Which CPU is Right For You?
- Which Laptop Features Are Worth the Money?
- Gaming Laptop Buying Guide: Find the Right Rig
- 10 Reasons Why Consumers Should Buy Business Laptops
- Which MacBook is Right for You?
- 5 Things to Look For in Your Next Laptop Keyboard
- How to Configure Your Laptop: Specs That Matter
- Which Graphics Card Do You Need?
- The Perfect Laptop? Here’s What It Should Have
- Why 78 Percent of Laptop Screens Suck
- A Guide to Computer Ports and Adapters
- 13 Ways to Make a Slow Laptop Faster
- How to Tell If You Can Upgrade Your Laptop
- Laptop Locks Guide: Do You Need One?
- 10 Features You Can Skip to Save Money
