How to Install and Delete Fonts in Windows 10
Microsoft's operating system only comes with a limited selection of fonts. Some desktop publishing and graphics applications will install a few of their own typefaces, but if you really want to make your artwork and documents stand out, you'll need to add some on your own. Here's how to install, delete and find new fonts for Windows 10.
Where to Find a Font
Windows 10 can work with the three major font formats today: TrueType, OpenType and PostScript. There are a lot of sites that list fonts, but our favorite is Google Fonts because it has so many free type faces. Many of the best fonts do cost money, but you can find a lot of them at Fonts.com and Microsoft's typography site.
How to Install a Font
1. Download your fonts (from Google Fonts or elsewhere) and save them to a folder on your hard drive. If they are in a .zip file, be sure to unzip them.
2. Type "fonts" into the Cortana search box.

3. Click the Fonts control panel icon, which appears in the result list.
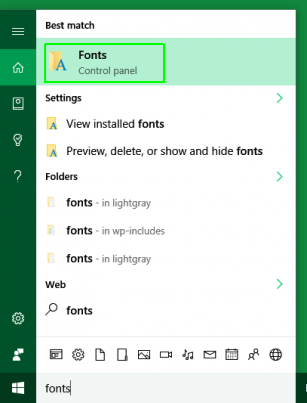
A control panel window filled with fonts appears.
4. Open the folder where you downloaded your uninstalled fonts. If it's your Downloads folder, you can get there easily by hitting Windows + E to open Explorer and selecting Downloads from the left menu.
Stay in the know with Laptop Mag
Get our in-depth reviews, helpful tips, great deals, and the biggest news stories delivered to your inbox.
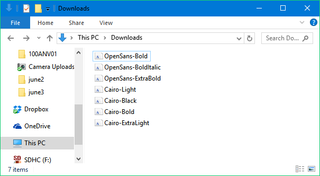
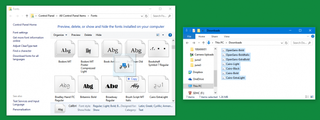
5. Drag the fonts into the control panel fonts window. Note that you cannot drag folders full of fonts. You can only select and drag the fonts themselves.
How to Delete Fonts
If you don't want a font taking up space on your hard drive and in your menus, it's very easy to delete it.
1. Open the Fonts window. As above, you get there by typing "fonts" into the Windows search box and selecting "Fonts: control panel."
2. Select the font or font family you wish to delete. If you just want one font, it may be listed within a "font family" that you have to double click to open. For example, Cambria Bold is located within the Cambria family.
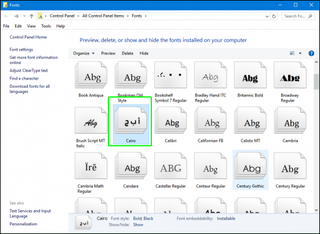
3. Hit the delete key.
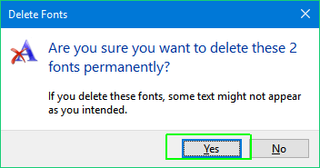
4. Click Yes when prompted with a warning.
Customize Windows 10
- Create Custom Keyboard Shortcuts
- Make Windows 10 Look and Feel Like Windows 7
- Change the Default Windows Font
- Turn Off Notification and System Sounds
- Change Your Desktop Background in Windows 10
- Change the Icon Size
- Give Windows 10 a Dark Theme
- Make Your Own Windows 10 Theme
- Hide Your Name on the Login Screen
- Add Another Column to the Start Menu
- Get Mac-Like File Previews
- Add My Computer Icon to Desktop
- Edit Photos to Fit as Backgrounds
- Add Accent Colors
- Customize Autoplay Menu
- Install and Delete Fonts
- Customize the Action Center
- Disable Transparency Effects
- Get Classic Solitaire and Minesweeper
- Change the Look of Windows 10 Books
- Add a URL Field to the Taskbar
- Add Clocks from Multiple Time Zones
- Get the Old Volume Control Back
- Disable Windows 10 Startup Delay
- Add Quick Contacts to the Start Menu
- Show Hidden Files and Folders
- Enable Spatial Sound
- Best Themes
- All Windows 10 Tips
- Change the Login Screen Background
- Install New Desktop Themes

