How to Make Windows 10 Look and Feel Like Windows 7
Windows 10 offers a number of benefits over its predecessors, including improved boot and wake-from-sleep times, the ability to run Universal apps, the Cortana voice assistant and Xbox game streaming. It even has a Start Menu, a key feature that is infamously missing from Windows 8. But what if you like the improved performance and features of Windows 10, but you prefer the look and feel of Windows 7? While you can't make everything look identical to Microsoft's old operating system, you can change many key elements, including the Start Menu, wallpaper and taskbar.
I. Install a New Start Menu
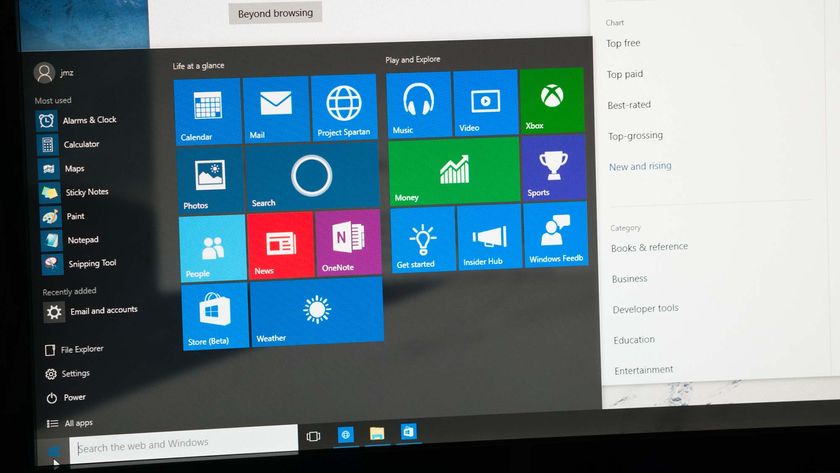
Windows 10 brings back the Start Menu . . . sort of. While there is a Start Menu, it's very different from the one in Windows 7 and you may not like the differences. Instead of providing a list of icons and folders, the new Start Menu has a set of flashy, but space-wasting, live tiles on its right side and a list of frequently used apps on the left side. You can add live tiles, but you cannot pin a simple icon to the left side like you could in Windows 7 and XP. Fortunately, you can install a third-party Start Menu that looks and functions the way you want it to. There are a couple of Windows 10-compatible Start apps out there, but we like Classic Shell, because it's free and very customizable.
1.
Download and install Classic Shell version 4.2.2 or higher. As of this writing is 4.2.2 is in beta and available for download from the Classic Shell forums. Earlier versions don't work properly with Windows 10.
2.
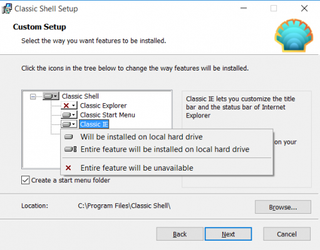
Deselect Classic Explorer and Classic IE during the install process. You can try those programs if you want, but we didn't find them particularly useful.
3.
Stay in the know with Laptop Mag
Get our in-depth reviews, helpful tips, great deals, and the biggest news stories delivered to your inbox.
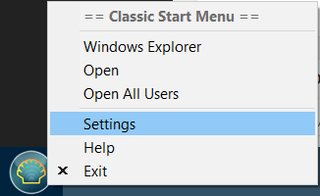
Open Classic Start Menu settings. If Classic Shell is already running, you will see a Shell icon in the lower right corner and can right click it and select settings. Otherwise, you can search for "Classic Start Menu Settings."
4.
Check Show All Settings if it is not already checked.

5.
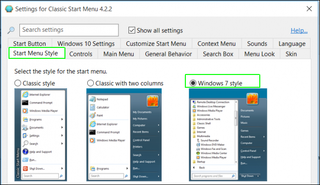
Navigate to the Start Menu Style tab and select Windows 7 Style if it is not already selected.
6.
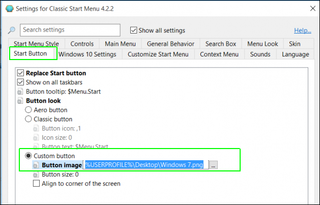
Download the Windows 7 Start button image from this thread if you want your Start button to look authentic. There are several custom buttons available. Then navigate to the Start Button tab, select Custom button and browse to the image. If you don't see a Start Button tab, make sure Show All Settings is checked.
7.
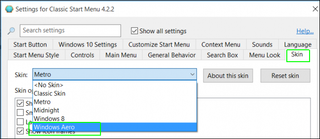
Navigate to the Skin tab and select Windows Aero from the pulldown menu.
8.
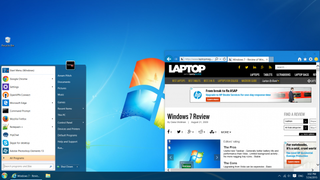
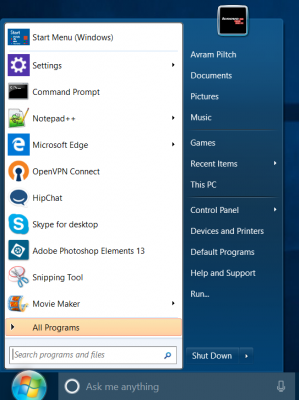
Click Ok. Your Start Menu should look something like this.
II. Hide the Cortana / Search Box
On its taskbar, Windows 10 has a prominent search box which invokes Cortana when you click in it. While this box is actually quite useful, it doesn't exist in Windows 7 so you may want to get rid of it. Besides, if you install Classic Shell or another Start Menu replacement, that will come with its own built-in search box. To hide the Cortana box:
1.
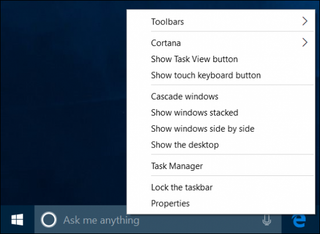
Right click on the search box. A context menu appears.
2.
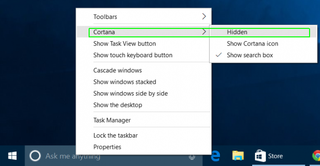
Select Hidden from the Cortana menu.
III. Get Rid of the Lock Screen
The Windows 10 lock screen you get when you boot up or wake from sleep looks attractive but wastes your time. You have to click or swipe to get rid of it, and then you still get hit with the login prompt. In Windows 7, you boot straight to login prompt and you can do the same in Windows 10 if you make a simple registry edit.
1.
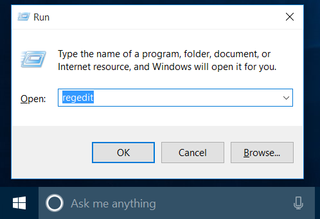
Hit Windows +R to bring up the Run dialog.
2.
Type "regedit" and hit Enter.
3.
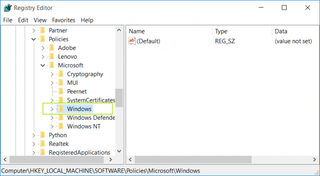
Go to HKEY_LOCAL_MACHINE\SOFTWARE\Policies\Microsoft\Windows in the registry tree.
4.
Right click in the right pane and select New > Key. A new key (looks like a folder) appears in the left pane.

5.
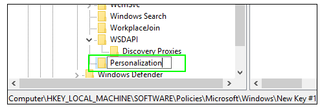
Rename the key to Personalization and select it.
6.
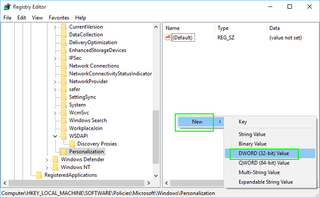
Right click and select New > DWORD (32-bit) Value in the right pane.
7.
Rename the new value to "NoLockScreen."
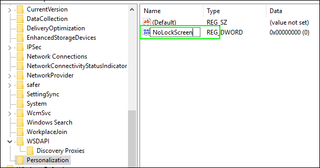
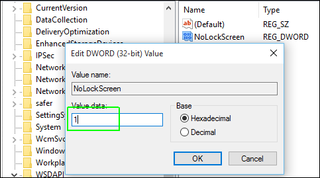
8. Double click on it, set the value to 1 and click Ok.
IV. Add Windows 7 Wallpaper
Nothing makes a computer look like Windows 7 more than using the default Windows 7 wallpaper with the bright blue background and the giant Windows logo in the middle.
1.
Acquire the Windows 7 wallpaper. Windows 10 doesn't come with the old wallpaper, but you can get it a couple of ways. If you still have access to a computer with Windows 7 on it, you'll find the wallpaper at C:\Windows\Web\Wallpaper\Windows\img0.jpg. You can also download the wallpaper from various places that have posted it online, including here.
2.
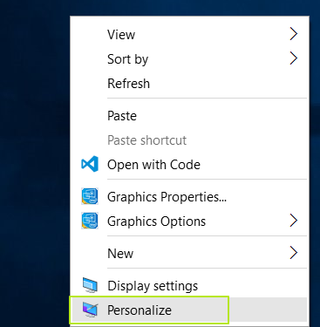
Right click on your desktop and select Personalize.
3.
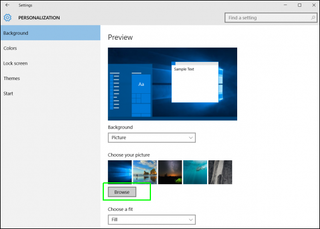
Click the Browse button and select the wallpaper file.
V. Give the Window Bars Colors
Windows 10 allows applications to select their own title bar colors, but most programs don't have a custom color set and end up with a depressingly bland white bar. While you can't get back the transparent aero effect in title bars, you can make them show a nice Windows 7 blue. Here's how.
1.
Right Click on the desktop and select Personalization.
2.
Select Colors from the left pane.
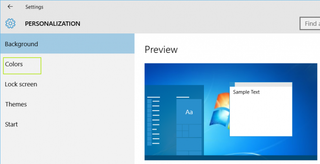
3.
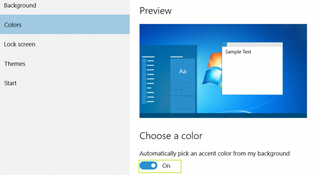
Toggle "Automatically pick an accent color from my background" to off if you want to choose a custom color. Or leave it / toggle it to on to have it change colors based on your wallpaper.
4.
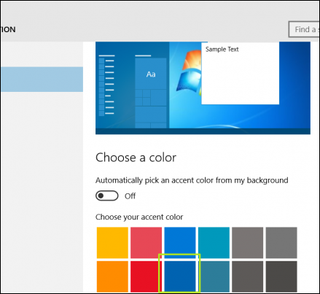
Select a color if you chose to pick a custom color. We recommend the dark blue in the second row for the most Windows 7-like shade.
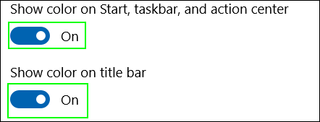
5. Make sure "Show color on title bar" and "Show color on Start..." are toggled to on.
VI. Replace Edge with Internet Explorer
Windows 7 came with Internet Explrorer as its default browser, with the IE icon pinned to the taskar. If you don't like Edge browser, Chrome or Firefox, you can easily go back to using Internet Explorer as your default browser in Windows 10.
1.
Right click on the Edge browser taskbar icon and select Unpin.

2. Search for Internet Explorer in the search bar. By the time you type Internet, you should see the icon for it.
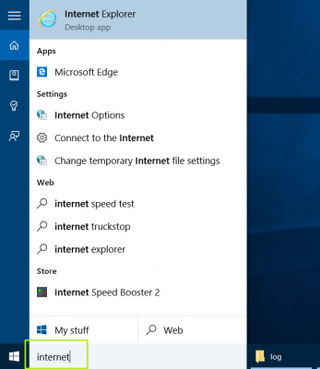
3.
Right click on the Internet Explorer icon and select Pin to Taskbar. The IE logo will appear on your taskbar. You might want to drag it to the left so it sits next to the Start button.
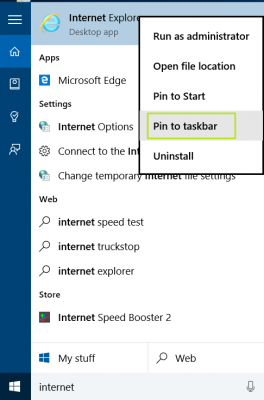
4.
Launch Internet Explorer.
5.
Select Internet Options from the menu.
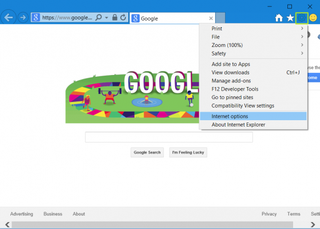
6.
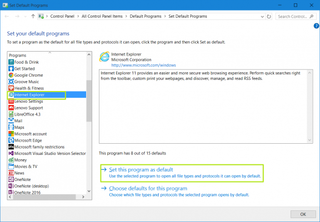
Navigate to the Programs tab and click "Make Internet Explorer the default browser." A new window opens with a list of programs.
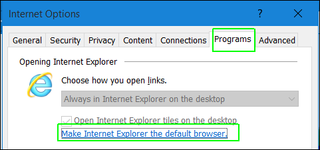
7.
Select Internet Explorer in the left pane and click "Set this program as default."
8. Click Ok.
Customize Windows 10
- Create Custom Keyboard Shortcuts
- Make Windows 10 Look and Feel Like Windows 7
- Change the Default Windows Font
- Turn Off Notification and System Sounds
- Change Your Desktop Background in Windows 10
- Change the Icon Size
- Give Windows 10 a Dark Theme
- Make Your Own Windows 10 Theme
- Hide Your Name on the Login Screen
- Add Another Column to the Start Menu
- Get Mac-Like File Previews
- Add My Computer Icon to Desktop
- Edit Photos to Fit as Backgrounds
- Add Accent Colors
- Customize Autoplay Menu
- Install and Delete Fonts
- Customize the Action Center
- Disable Transparency Effects
- Get Classic Solitaire and Minesweeper
- Change the Look of Windows 10 Books
- Add a URL Field to the Taskbar
- Add Clocks from Multiple Time Zones
- Get the Old Volume Control Back
- Disable Windows 10 Startup Delay
- Add Quick Contacts to the Start Menu
- Show Hidden Files and Folders
- Enable Spatial Sound
- Best Themes
- All Windows 10 Tips
- Change the Login Screen Background
- Install New Desktop Themes

