How to Pause Windows 10 Updates for Up to 35 Days
Newer Windows 10 builds allow users to press pause updates for up to 35 days. Of course, that’s not to say you should actually use it. Most updates are security fixes that patch holes and remove vulnerabilities from your system. Pausing the updates means you’re running vulnerable software, which obviously isn’t ideal. So generally, you should either allow automatic update or update Windows 10 manually. There are occasions, however, (like vacations), that you don’t really have the time to update, and pausing makes sense.
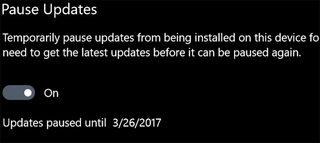
Here’s how to pause Windows 10 updates; use the information wisely.
1. Open the Start Menu.

2. Select Settings.

3. Click Update & Security.

4. Choose Advanced options under Windows Update.

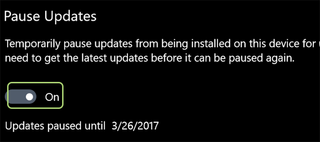
5. Toggle the Pause button to On.
Stay in the know with Laptop Mag
Get our in-depth reviews, helpful tips, great deals, and the biggest news stories delivered to your inbox.
Windows 10 Annoyances and Problems
- Repair Windows 10
- Remove the Lock Screen
- Disable or Enable Grayscale Mode
- Set Compatibility Mode for Apps
- Access the BIOS on a Windows 10 PC
- Stop Windows Update from Automatically Restarting Your PC
- Turn Off App Notifications
- Fix a Slow-Opening Windows Downloads Folder
- Disable Personalized Ads on Microsoft Sites and Apps
- Stop Skype’s Annoying Auto Updates
- Fix a 'Boot Configuration Data File is Missing' Error
- Clear the Run Command's History
- Disable Cortana
- Uninstall and Restore Built-in Apps
- Restore a Missing Battery Icon
- Fix a Boot Configuration File Error
- Get to the Advanced Startup Options Menu
- Delete a Locked File
- Restart without Rebooting
- Roll Back Windows 10 to an Earlier Version
- Disable Automatic Driver Downloads
- Disable Internet Explorer
- Pause Windows Updates for Up to 35 Days
- Use Battery Saver
- Downgrade to Windows 10 S
- Save Netflix Videos for Offline Viewing
- All Windows 10 Tips
- Worst Windows 10 Annoyances
- Disable Password Prompt on Wake
