How to Turn Your Windows PC into a Wi-Fi Hotspot

Want to share your Windows laptop's internet access with your other devices over Wi-Fi? Windows 10 comes with a hidden built-in tool to turn your computer into a Wi-Fi hotspot, and there are third-party utilities that also make sharing your internet connection a cinch.
The hotspot feature comes in handy when your hotel room has only one Ethernet connection or you're limited to one login for a Wi-Fi network. You can get your Wi-Fi-only tablets and other devices online using your laptop (or desktop PC). The methods below also work with previous version of Windows, from Windows 7 and up.
Before you get started, though, you might want to check if your computer's Wi-Fi adapter supports this feature, called "hosted network" or "AP mode." Use the steps here to see if yours will work with either third-party utilities or Windows 10 and above.
Turn Your Windows PC into a Wi-Fi Hotspot with Connectify
The easiest way to create a Wi-Fi hotspot with your computer is with freemium software Connectify. The free version lets you share your computer's internet connection to other Wi-Fi devices, whether you go online from your computer over Wi-Fi or over a wired Ethernet connection. For most people, the free, ad-supported version should do.
1. Download Connectify Hotspot. (Choose the "Continue to Download" option unless you want to buy one of the premium versions.)
2. Double-click the downloaded EXE file to install it.
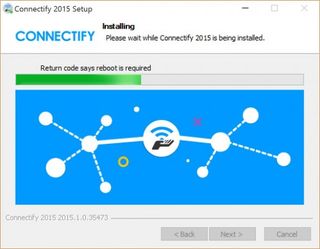
If you're using Avast or possibly another anti-virus program, you might have to temporarily disable for the installation to continue. (For Avast, right-click on the Avast icon in the system tray and go to Avast shields control > Disable until computer is restarted. The process should be similar for other A/V programs that have a problem.)
Stay in the know with Laptop Mag
Get our in-depth reviews, helpful tips, great deals, and the biggest news stories delivered to your inbox.
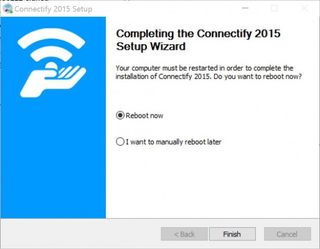
4. Reboot the computer to finish the installation.
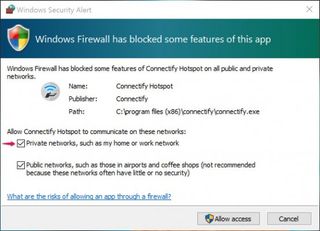
5. After the computer reboots, check the box "Allow Connectify Hotspot to communicate on these networks:" next to "Private networks, such as my home or work network.
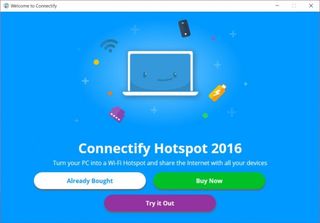
6. Click the purple "Try It Out" button in the Connectify screen. You'll be presented with an offer to buy the program, but you can just click "Try Now" to continue.
7. Follow the prompts in the Connectify wizard to complete the installation.
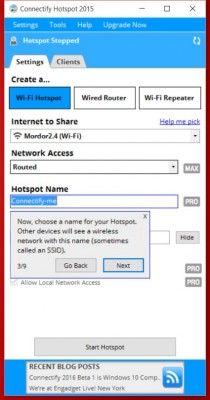
Once done, your new Wi-Fi hotspot will be created (by default called "Connectify-me") and your other devices will be able to use your laptop's internet connection by connecting to the Connectify Wi-Fi hotspot. When connecting to the new Wi-Fi hotspot, make sure you use the password set in the Connectify settings tab.
To stop the Wi-Fi hotspot, click the "Stop Hotspot" button in the program.
Alternatives: The Connectify Hotspot free version is ad-supported, but it is free to use. The Connectify premium versions ($35-50) offer more features, such as sharing internet from your computer's 3G or 4G card or turning your computer into a Wi-Fi repeater. If you're running Windows 8 or Windows 7, however, you can use the open source Virtual Router instead, which is completely free (and ad-free) but, unfortunately, doesn't seem to work on Windows 10.
Turn Your Windows PC into a Wi-Fi Hotspot from the Command Line
Windows 10, like Windows 7 and 8 before it, comes with a built-in Wi-Fi hotspot feature that can share your computer's internet access. However, it requires you to have a wired internet connection or a second network adapter (i.e., plugged into the router or modem via Ethernet) or two Wi-Fi cards--one for sharing and one for your laptop. In Windows 8 and Windows 10, this internet connection sharing feature is hidden, with no graphical interface, but you can enable and disable it from the Command Prompt.
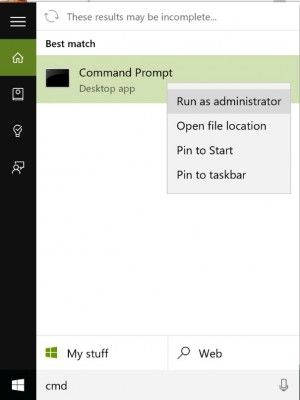
1. Open a command prompt with administrative privileges. The quickest way is to tap the Windows key, type in cmd, and then right-click on the Command Prompt app listing and choose "Run as an administrator."
2. In the command prompt window, type in netsh wlan set hostednetwork mode=allow ssid=[SSID] key=[bpassword]. Replace [SSID] and [password] with the network name you want for the Wi-Fi network and the password for it (without the brackets).
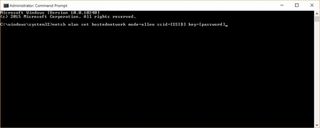
This will set up and enable a new Wi-Fi network with the SSID and passphrase you set, but we're not done yet.
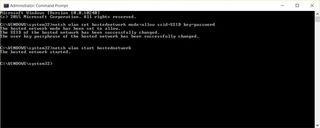
3. Type netsh wlan start hostednetwork at the prompt and hit Enter to start the network:
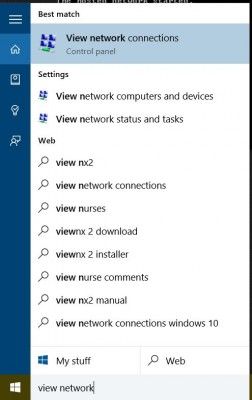
4. Open Network Connections (search in the Start menu for "view network connections" and click on the result)
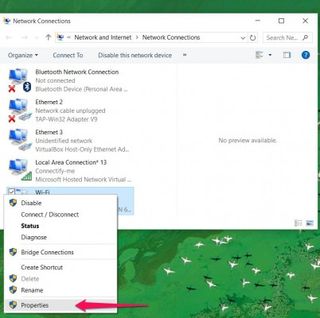
5. Right-click on your main network connection and choose "Properties."
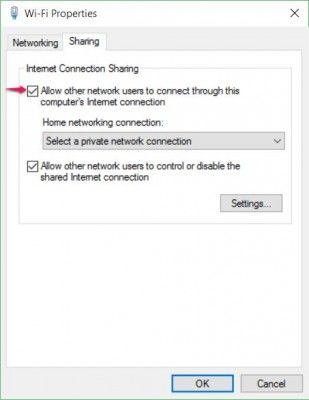
6. Go to the Sharing tab and click the checkbox labeled "Allow other network users to connect through this computer's internet connection".
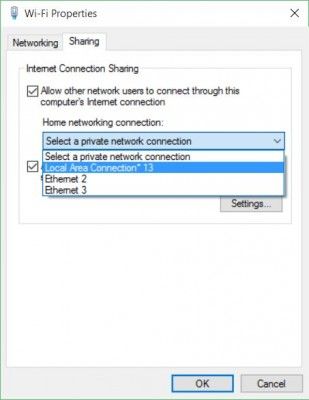
7. In the dropdown box right below that, choose the network connection your computer is currently using. Click OK.
This will set up your new Wi-Fi hotspot. To stop the hosted network, type in netsh wlan stop hostednetwork in the command prompt and hit Enter.
Windows 10 Security and Networking
- Use the Windows 10 Parental Controls
- Find Your MAC Address
- Turn Your Windows PC into a Wi-Fi Hotspot
- Password Protect a Folder
- Create a Guest Account in Windows 10
- Enable Windows Hello Fingerprint Login
- Set Up Windows Hello Facial Recognition
- How to Restrict Cortana's Ever-Present Listening in Windows 10
- Automatically Lock Your PC with Dynamic Lock
- Blacklist Non-Windows Store Apps
- Find Saved Wi-Fi Passwords
- Set Up a Metered Internet Connection
- Use Find My Device
- Stream XBox One Games
- All Windows 10 Tips
- Map a Network Drive
- Create Limited User Accounts
- Set Time Limits for Kids
- Pin People to Your Taskbar
