How to Upgrade Your Dell XPS 13's SSD
One of the best laptops on the market, the Dell XPS 13 comes standard with a speedy SSD inside. However, if you bought the laptop with a 128 or 256GB drive and want more storage space, you can perform your own upgrade, using a third-party SSD. All you need is a few minutes of time, along with the correct upgrade SSD, a couple of small screw drivers, an external backup drive and a USB flash drive.
Getting the Right SSD and Tools to Install It
To determine, what kind of SSD you need, first check to see whether your XPS 13 has an Intel 5th gen (aka Broadwell) or 6th Gen (aka Skylake) processor. If your CPU's model number begins with a 5 (ex: Core i5-5200U), you have Broadwell but if it begins with a 6 (ex: Core i5-6200U), you have Skylake.
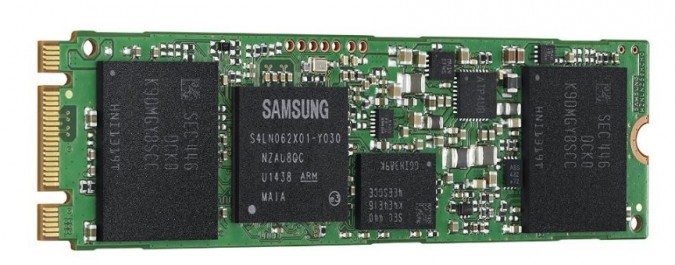
Both models require an M.2 Type 2280 SSD on a chip, rather than a traditional 2.5-inch drive. Though both the early and late 2015 laptops can take M.2 SSDs with a standard SATA interface, the newer Skylake models can accept blazing-fast PCIe SSDs as well. A standard SATA M.2 SSD such as the Samsung 850 EVO costs as little as $85 for a 250GB model and just over $150 for a 500GB capacity. A speedy PCIe M.2 drive like the Samsung 950 Pro costs $100 to $200 more but is triple the speed.
To open up the XPS 13's chassis you'll need two different screw drivers: a small pentalobe we could find and a tiny Phillips Head #000. You'll also need a 4GB USB Flash Drive to serve as a rescue disk and an external hard drive to back up your software and files.
Boot Disk and Rescue Media
You don't want to take your old SSD out without being able to put your Windows operating system, applications and files on the new drive. In order to transfer your data, you need to create a backup file on an external hard drive. Any USB hard drive -- or even a large capacity Flash drive -- should do the job. In these steps, we'll show you how to make a backup and rescue media before you get down and dirty with the hardware. We'll be using free software called Macrium Reflect. Here's how:
1. Download and install Macrium Reflect. You can find it here.
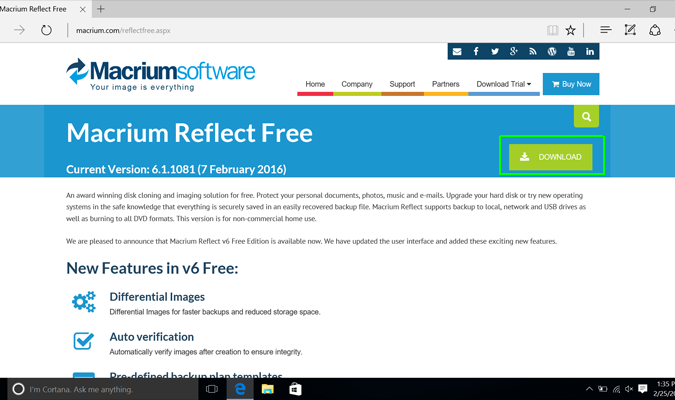
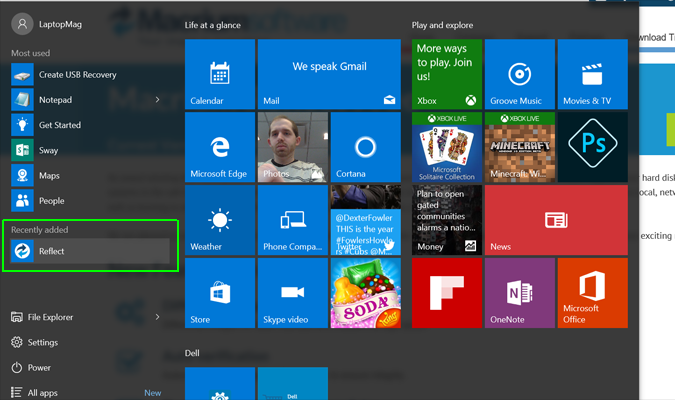
2. Open Macrium Reflect from the Start menu.
Get The Snapshot, our free newsletter on the future of computing
Sign up to receive The Snapshot, a free special dispatch from Laptop Mag, in your inbox.
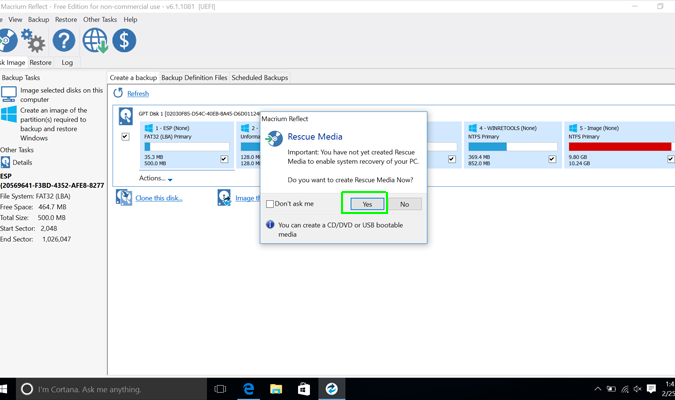
3. Click Yes when prompted to create Rescue Media. This is what will allow you to recover your data later on.
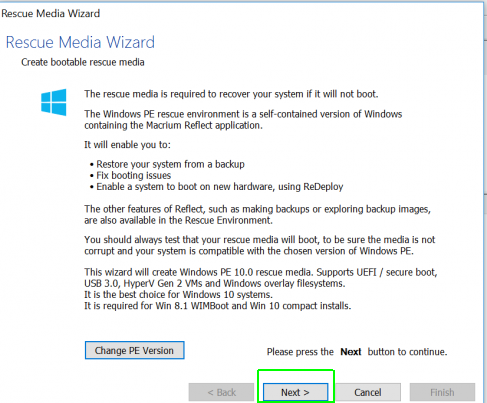
4. Click Next in the Rescue Media Wizard.
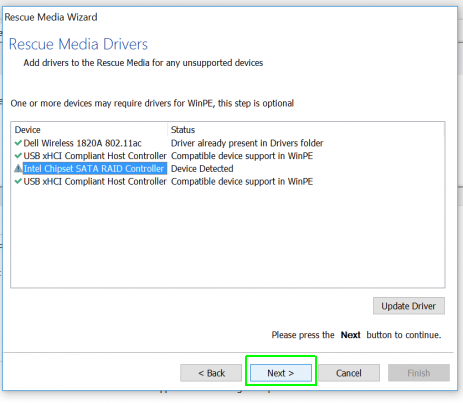
5. Click Next if your drivers are all up to date. If they aren't, you may need to update them.
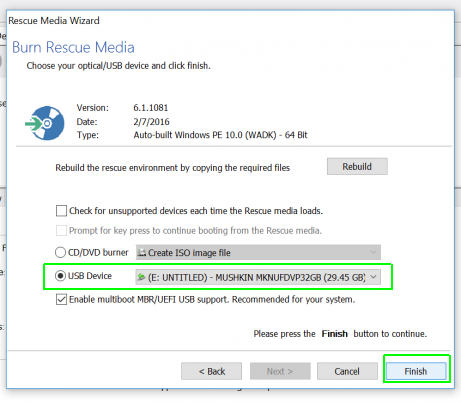
6. Plug in a USB Drive and select USB Device. Choose your USB device as the location for the ISO image and click Finish.
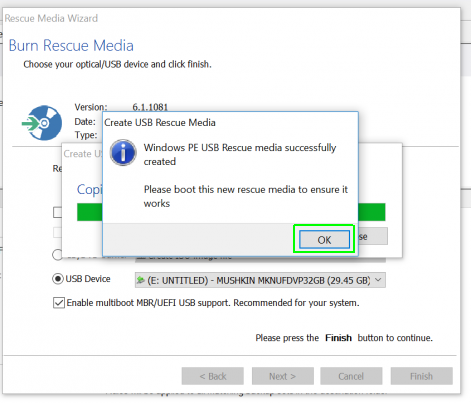
7. Click OK when the process is complete. You'll want to try booting from it to make sure it works.
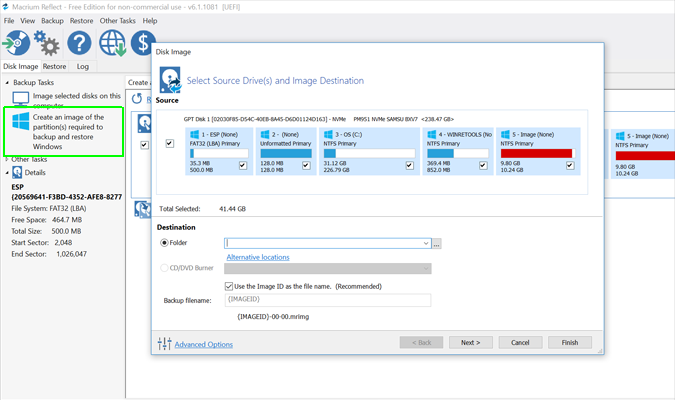
8. Click "Create an image of the partition(s) required to backup and restore Windows" in the left pane.
9. Choose your backup drive and click Next. We're using a Seagate external hard drive.
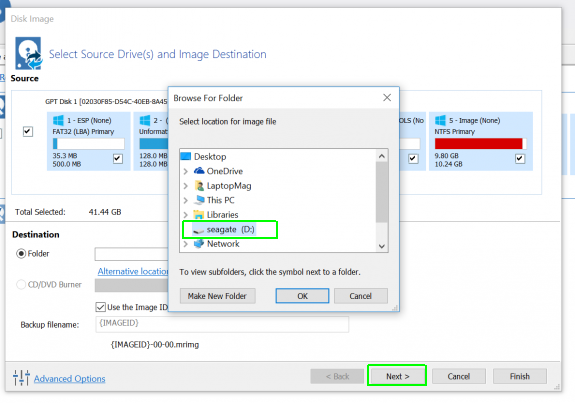
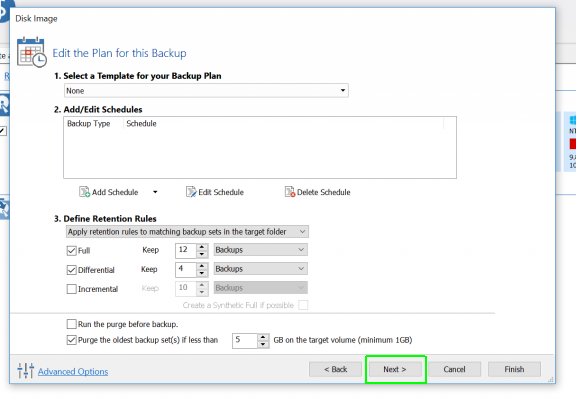
10. Click Next.
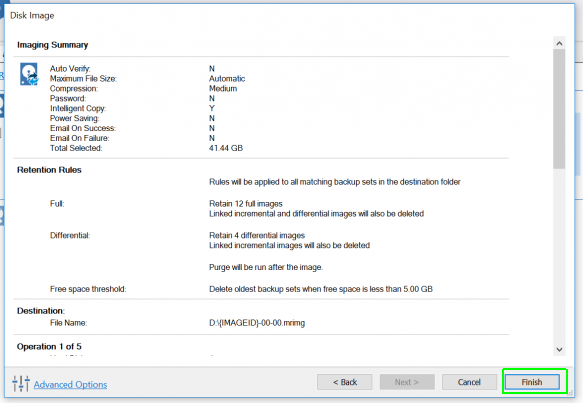
11. Click Finish.
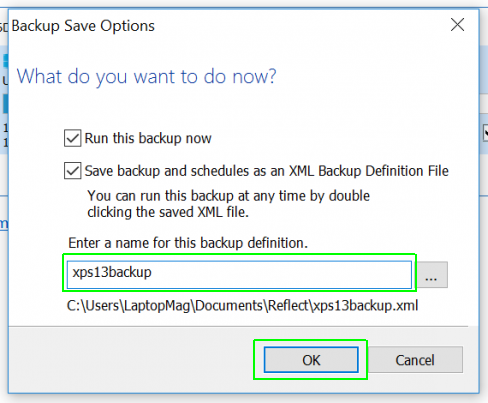
12. Name your backup and click OK.
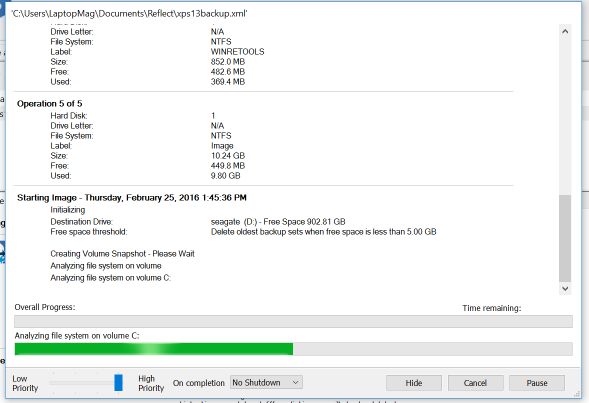
The backup will run. This may take a few minutes, so go get a snack or something.
13. Click OK when the process is complete. You can exit Macrium Reflect.
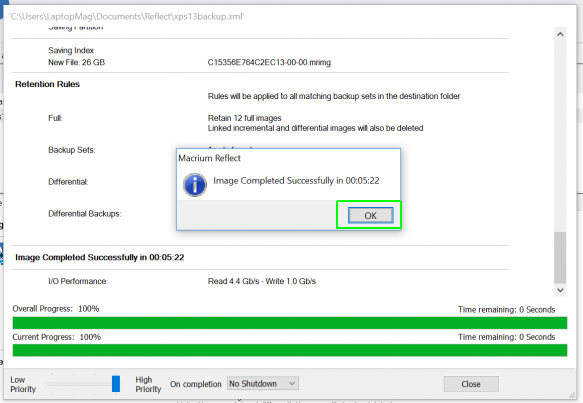
Boot From The Rescue Media
Now that you have your backup and rescue media on your USB drive and external hard drive, you want to make sure your XPS 13 will boot to the rescue media after you put in your new SSD. Here's how:
1. Go to Settings > Update & security
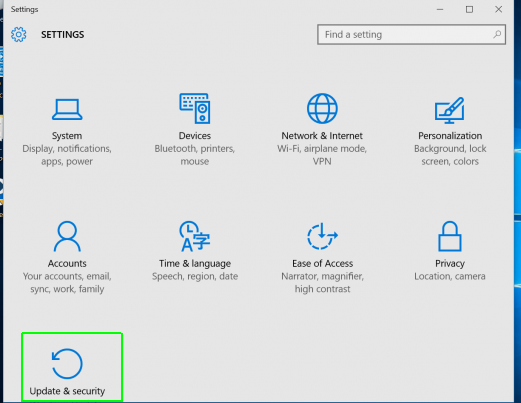
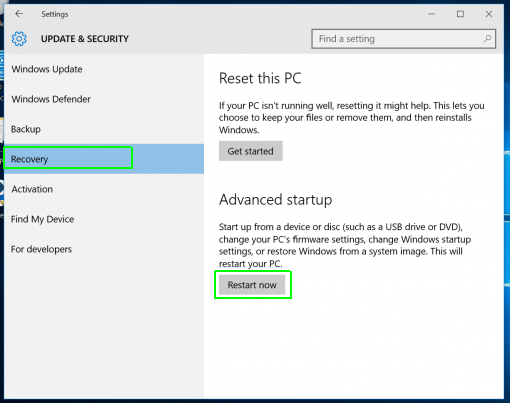
2. Under Recovery, click Restart now. It's under Advanced startup.
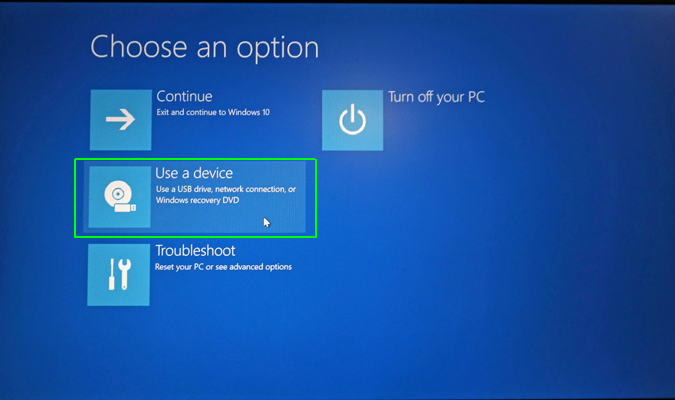
3. Click "Use a device" in the "Choose an option" menu.
4. Click Advanced options.
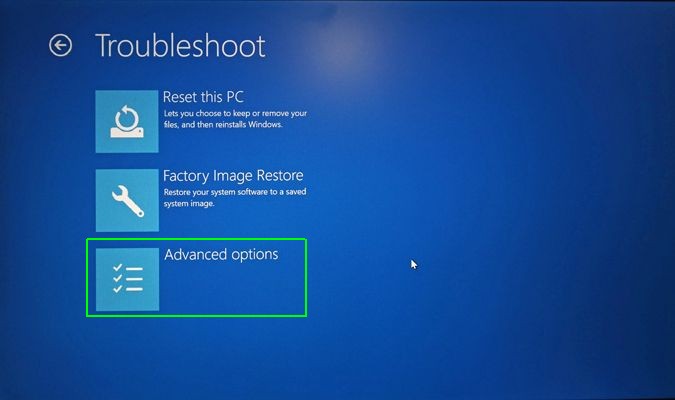
5. Click "UEFI Firmware Settings."
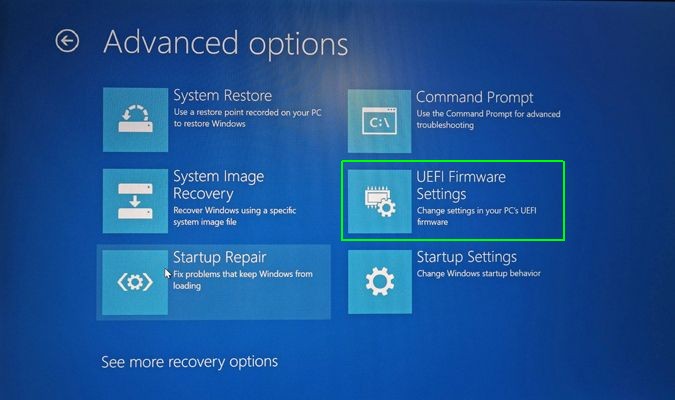
6. Click Restart.
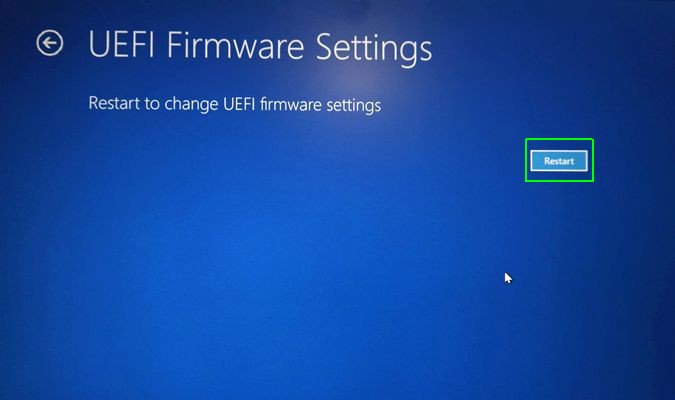
7. Click General > Boot Sequence and move your USB drive to the top of the list after you're taken to the BIOS.
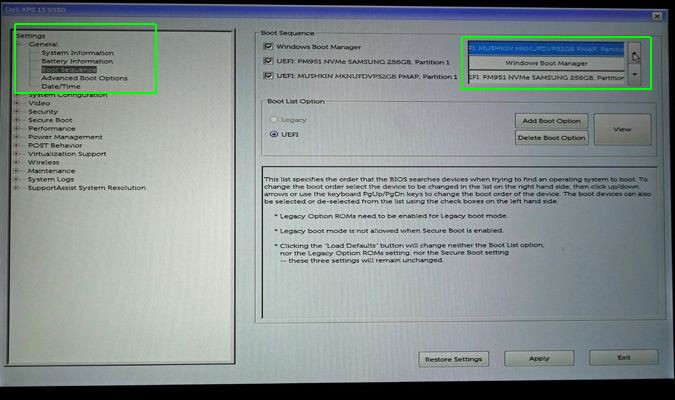
Now, next time you boot the laptop with the rescue drive attached, it will load up the Macrium Reflect software.
Switch Out the SSDs
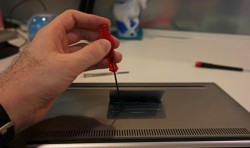
Time to get your hands dirty. Now that your XPS 13 is prepared to boot from your rescue media so that you can restore your backup, it's time to open up your laptop, take out your SSD and put in a new one. You'll need two screwdrivers -- we used the smallest pentalobe we could find and a Phillips Head #000. Don't forget to use a cup or bowl to store your loose screws so you don't lose them.
1. Place the XPS 13 face down on a table or desk.
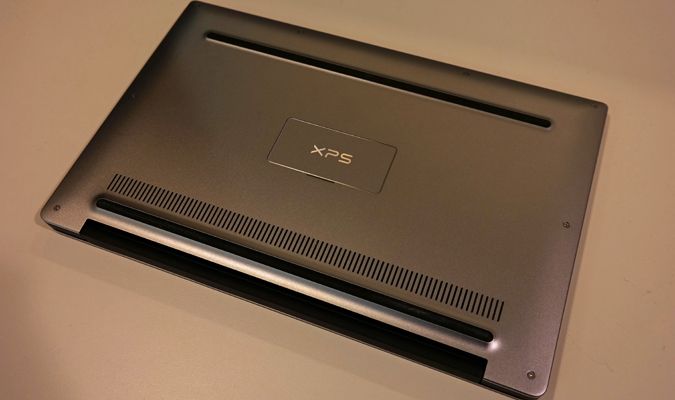
2. Remove the eight screws along the outside of the base, which hold the bottom of the computer to the deck. You'll need a pentalobe driver for this.
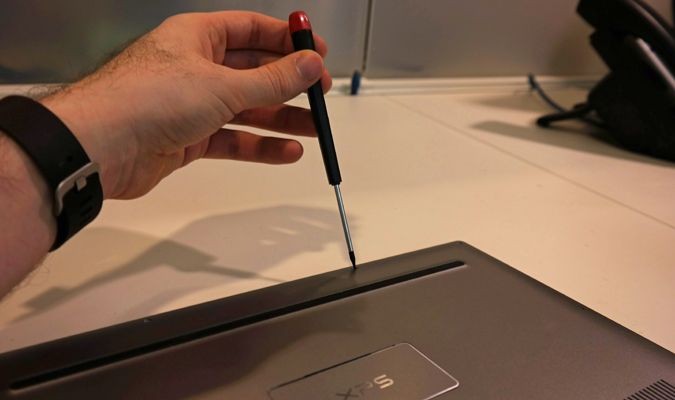
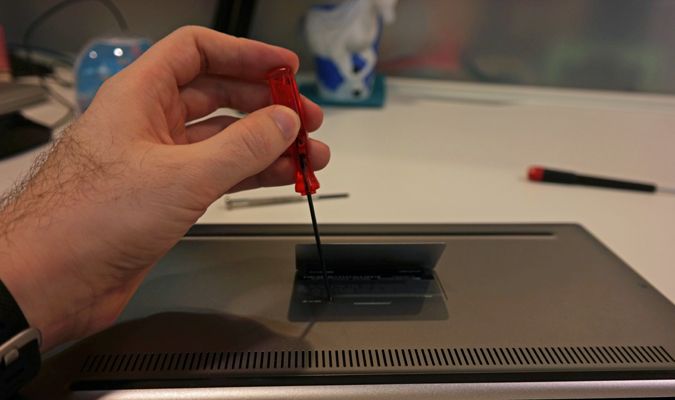
3. Flip up the magnetic XPS badge and remove the screw underneath. We used a Phillips Head #000 for this.
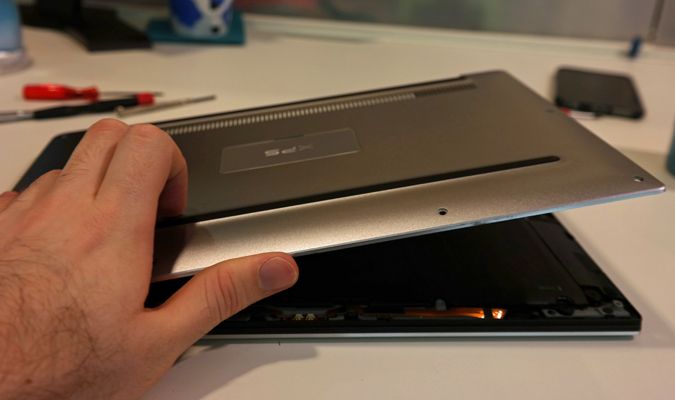
4. Pry off the base. It's on tight, so this will take patience. We managed to get the base off with a plastic scribe, but if you don't have that, you can try a guitar pick or be really careful with a flathead screwdriver.
5. Remove the screw holding in the SSD. You'll want to use the Phillips head again.
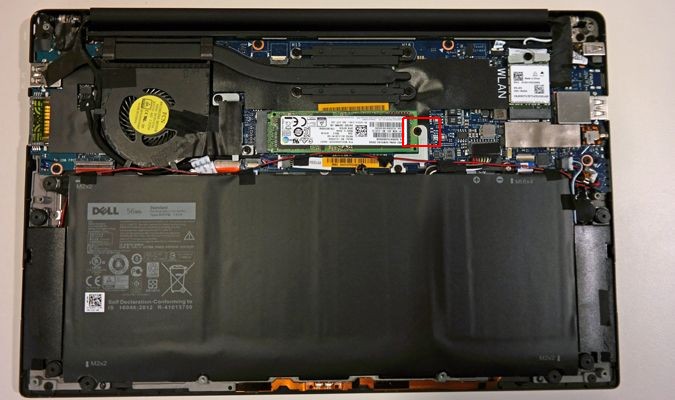
6. Carefully lift the existing SSD out of its setting.
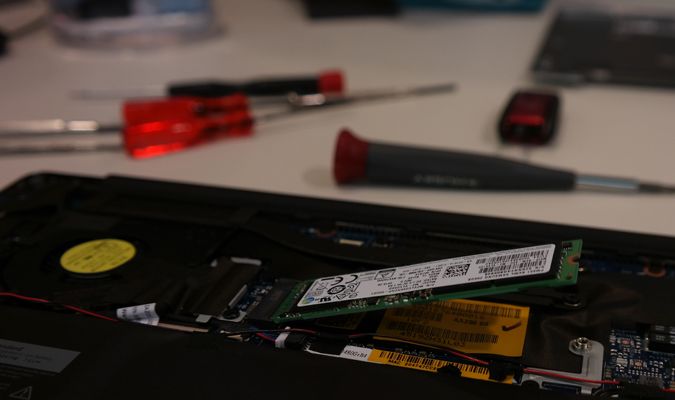
7. Place the new SSD into the setting. Make sure the contacts are completely aligned.
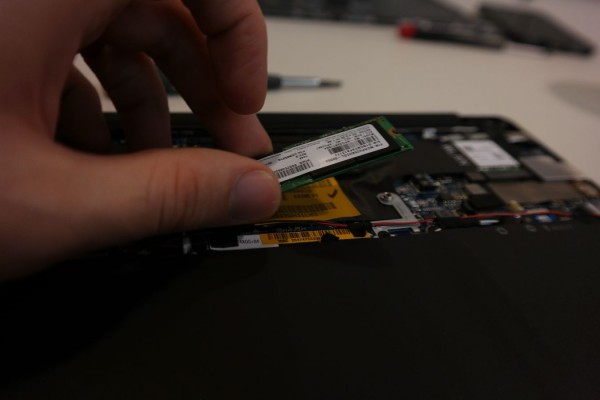
8. Replace the screw that holds in the SSD.
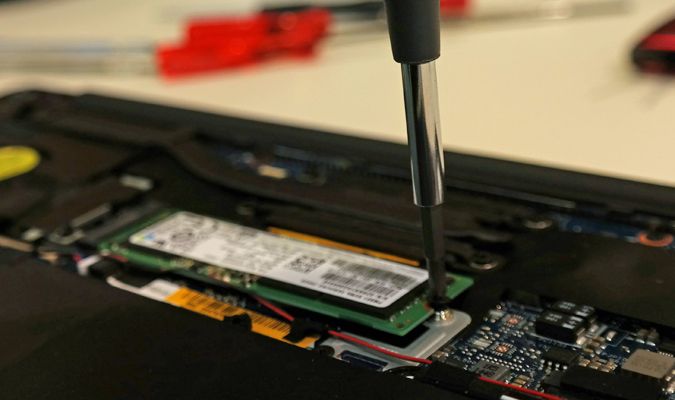
9. Put the case back on and replace the screws.
Restoring Your Backup
With the new SSD is your laptop, it's time to restore your backup so you can get back to using your laptop.
1. Plug in your USB drive with the rescue media and external hard drive with the backup .
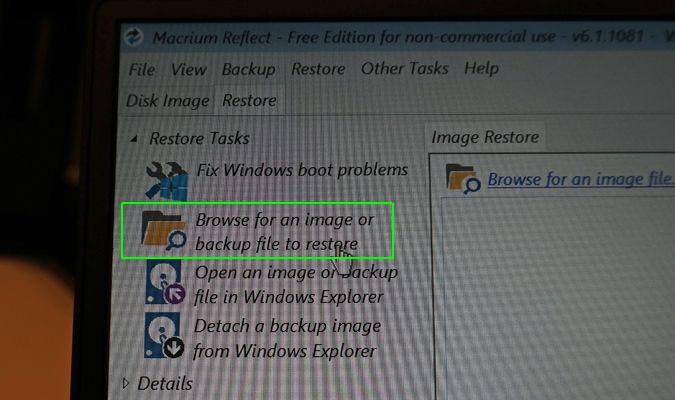
2. Boot up your XPS 13 into Macrium Reflect and click "Browse for an image or backup file to restore."
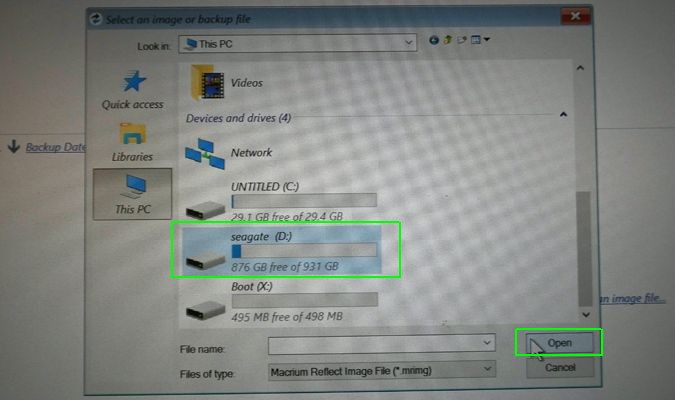
3. Choose your external hard drive.
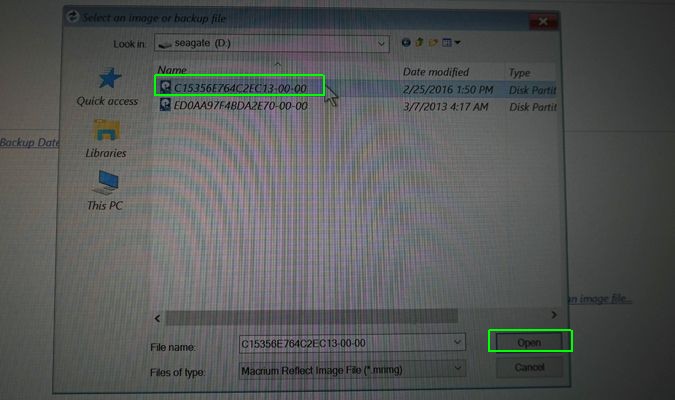
4. Select the backup that you made.
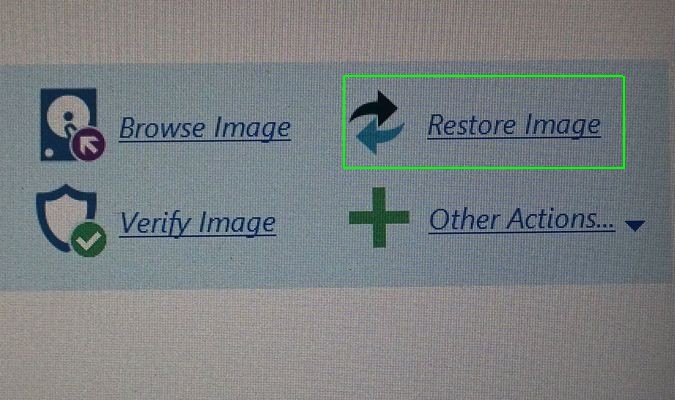
5. Click Restore Image.
6. Click "Select a disk to restore to..." and choose your new SSD. Click Next. We had used our SSD previously, but your SSD will likely be empty.
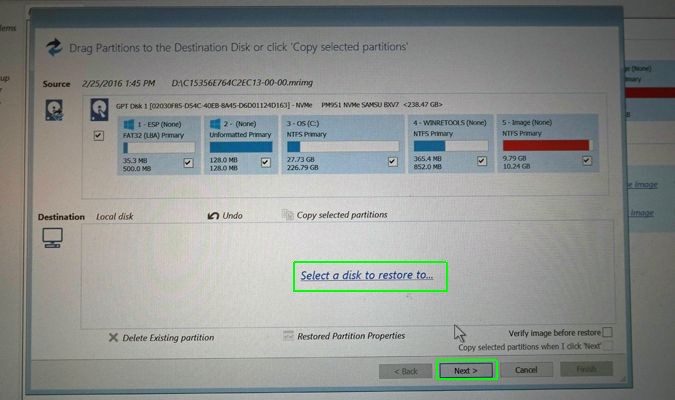
7. Click Next.
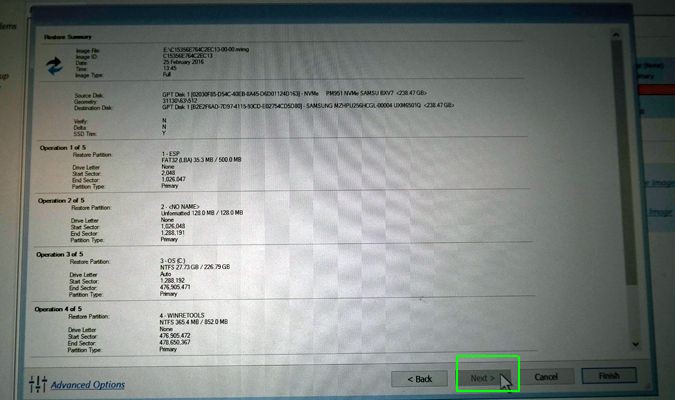
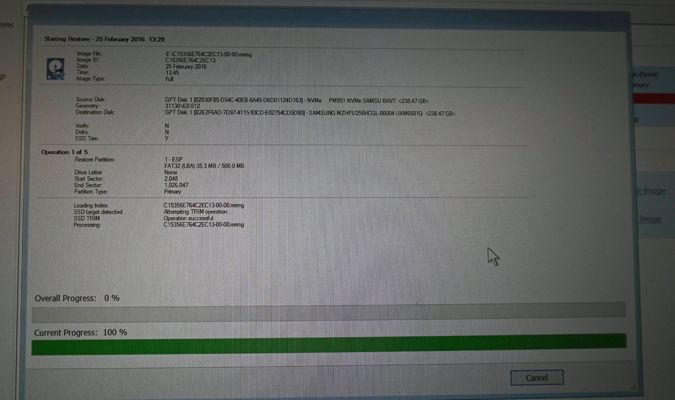
Your data will copy over from your external hard drive to your new SSD. This may take a bit, so sit back and make a cup of tea.
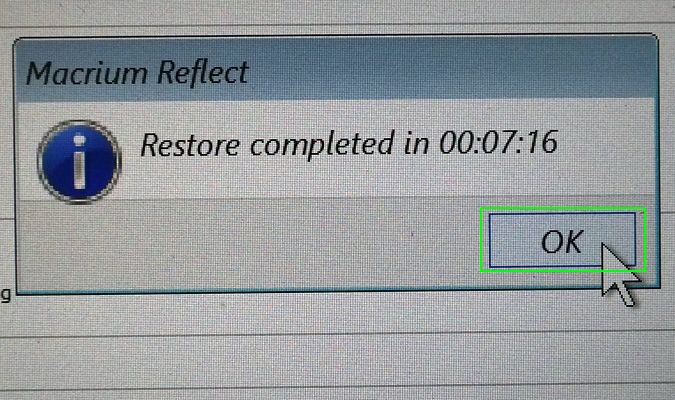
8. Click OK when the process is complete.
9. Reboot your computer. It should have all of your original data on your new SSD.
Dell XPS 13 User Guide
Andrew is a contributing writer at Laptop Mag. His main focus lies in helpful how-to guides and laptop reviews, including Asus, Microsoft Surface, Samsung Chromebook, and Dell. He has also dabbled in peripherals, including webcams and docking stations. His work has also appeared in Tom's Hardware, Tom's Guide, PCMag, Kotaku, and Complex. He fondly remembers his first computer: a Gateway that still lives in a spare room in his parents' home, albeit without an internet connection. When he’s not writing about tech, you can find him playing video games, checking social media and waiting for the next Marvel movie.
