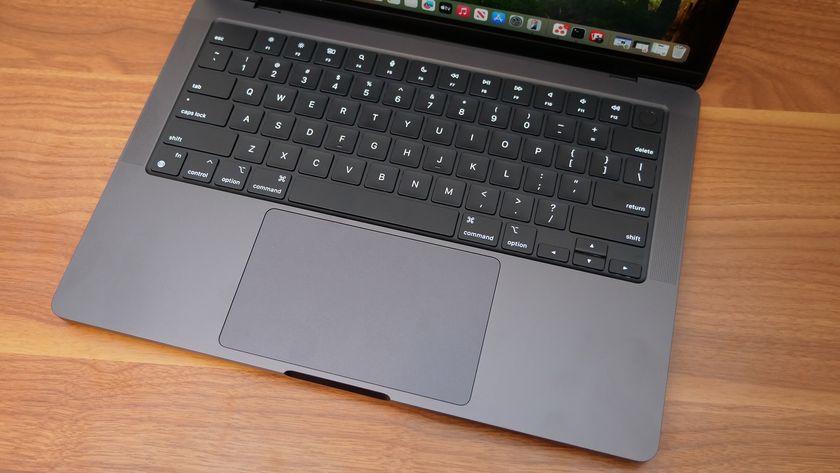
MacBook tips: 5 Utilities to supercharge your macOS experience
Make your Mac even more efficiently

Out of the box, your MacBook offers tools to accomplish most of what you’d want to do on your computer. But you don’t have to settle with its built-in features, which aren't always the best option for getting work done. Since macOS supports third-party software, there’s a treasure trove of additional utilities you can equip your Mac with to supercharge your desktop experience.
On the Mac App Store and other marketplaces, you’ll find better and more creative solutions to improve just about every workflow and tool, from copy-pasting to multitasking. Here are a handful of clever, free apps you should have on your Mac to get the most of your laptop.
1. Quit going back and forth to move files with Dropover
When you want to relocate files from multiple locations to another, you'd ordinarily juggle between various folders. Dropover is a third-party app that saves you all these round trips to the Finder and lets you drag and drop everything in one go.
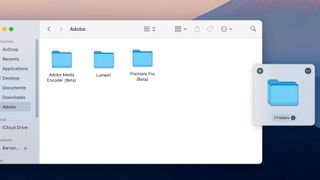
Dropover creates a temporary floating shelf while you’re copying files and folders. You can stash (drop) anything there, proceed to the next location, and repeat. Once you have all the items you need to move in your Dropover shelf, head over to the destination, and paste it all in a click. It works with any format including clipboard text.
Dropover also caches your past collections so you can revisit and re-copy them if you want to. Furthermore, it’s compatible with cloud services like Google Drive and Dropbox, so you have the option to generate a public link for your stashes’ content and then share it.
Dropover is free for two weeks. When that expires, you will have to pay a one-time $4.99 fee.
2. Turn all your regular actions into keyboard shortcuts
Keyboard shortcuts enable you to do tasks that otherwise would have taken a bunch of clicks in a snap. However, there’s a limit to what you can do with your keyboard on macOS by default. That’s where a utility called Keysmith steps in.
Stay in the know with Laptop Mag
Get our in-depth reviews, helpful tips, great deals, and the biggest news stories delivered to your inbox.
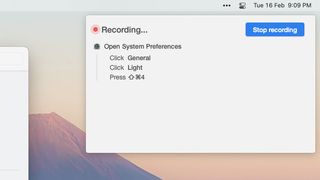
Using Keysmith, you can compress nearly any action into a key combination. Whether you want to snooze emails to next week on Gmail’s website or send a thumbs up on the Slack app, Keysmith has you covered.
The process to create a shortcut is straightforward too; all you need to do is execute the task as you would usually and Keysmith will automatically record the steps. You can then assign a group of keys to the task so you only have to hit that keyboard shortcut the next time.
You don’t have to pay for Keysmith as long as you only want to build up to five keyboard shortcuts. For more, you’ll have to shell out for the $34 license.
3. Customize the volume level for each app separately
Your MacBook’s volume controls function like a universal remote, which means you have to continuously adjust it for different audio sources. You may prefer a louder output for iTunes’ music playback but a much quieter one for Google Chrome where some pesky websites have auto-playing videos.
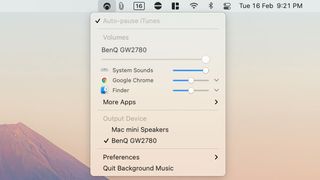
Thankfully, an app plainly titled “Background Music” can help. It does so by allowing you to personalize the volume level separately for each app. It lives in the menu bar at the top of your computer’s screen and offers dedicated volume bars for all the apps you have installed on your Mac. Plus, you can choose to activate a feature that automatically pauses your current playback when you hit play on another app.
Background Music is free and you can download it from here.
4. Open links in the app of your choice
If you rely on multiple apps for the same file type and often find yourself launching, say, a link on different browsers, try OpenIn.
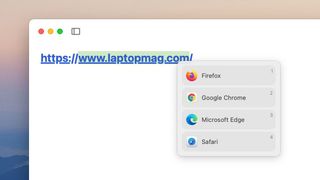
OpenIn improves upon your Mac’s existing settings for defaults by taking over the single-click action. When you open a link or any other kind of file, it lets you pick which app to launch right there. Therefore, you no longer need to go into the right-click menu to select a non-default app or constantly update the defaults for a particular file type.
OpenIn especially comes in handy for links. You can set a default browser for a specific address. So for example, if Zoom works better in Chrome and for everything else, Safari is your preferred browser, you can take advantage of OpenIn to automate this behavior instead of manually selecting the two browsers every time.
OpenIn is free and you can grab it from the Mac App Store.
5. Fine-tune how the menu bar looks with Bartender
Although Apple bundles its own set of editing tools for macOS’s menu bar, they’re barely enough for someone who heavily depends on it for quick access. A third-party software called Bartender fills that gap.
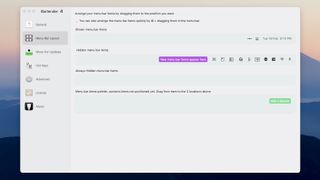
Bartender adds all the options you’d need to precisely tweak the menu bar’s appearance. You can hide all the icons and reveal them when you move your cursor over the bar, edit which apps appear in it and their order, adjust the spacing between them, and more.
For a handful of system-level menus, you can also set up triggers and have them displayed based on an event. As an example, you can configure the Wi-Fi dropdown to show up in the menu bar only when you’re not connected to a network.
Bartender is priced at $15 but there is a free trial you can try for a couple of days.
Shubham Agarwal is a freelance technology journalist from Ahmedabad, India. His work has previously appeared in Business Insider, Fast Company, HuffPost, and more. You can reach out to him on Twitter.
