How to mount and run an ISO in Windows 11
Mount and run your ISO files effortlessly in Windows 11

An ISO file or image is a compilation of data that contains all necessary files and applications to run a program. ISO images substitute physical disks, such as CDs and DVDs, that would instead have been needed to install a program. It is commonly used for large software such as operating systems or games.
Like a physical disk, an ISO image needs to be mounted first before being run. Mounting means accessing the ISO file’s contents similar to how your computer would read a physical disk. You can think of it as your computer simulating a CD running, but instead, it is software that it is reading.
- Windows 11 review: Is it better than Windows 10?
- How to use Virtual Desktops in Windows 11
- How to connect multiple monitors on Windows 11
You have two ways to mount an ISO file. The first method is using Windows’ own ISO mounting program, and the second would be using third-party programs. The first method is only available if you are using Windows 8.1 and above.
How to Mount an ISO File in Windows 8.1 and Above
1) To mount an ISO image with its built-in mounting program, first, navigate to your ISO file’s location.
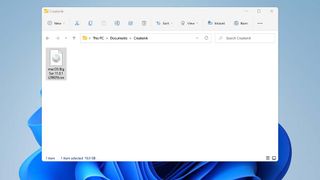
2) Second, right-click the ISO file to open its context menu. In this menu, you can see various actions that you can do with your ISO, such as open, delete, copy, cut, open with, and more.
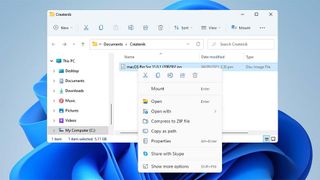
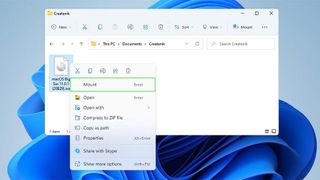
3) Select Mount from the context menu. Depending on your computer’s processing power, it may load for a few seconds before the mounting is complete.
4) Go to My Computer (if below Windows 10) or This PC (Windows 10 and above).
Stay in the know with Laptop Mag
Get our in-depth reviews, helpful tips, great deals, and the biggest news stories delivered to your inbox.
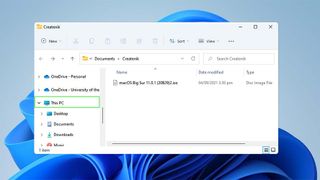
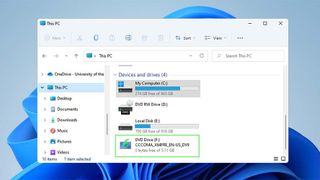
5) Under Devices and drives, click on the DVD Drive with the name of your ISO file. This will open the ISO file to show you its contents.
How to Mount an ISO File with a Third-Party ISO Mounting Apps
In this guide, we will be using the free ISO mounting app WinCDEmu by Sysprogs. Do not worry. You can also use other disc mounting programs. Most of them will require the same or similar steps, as shown below.
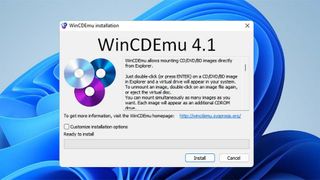
1) Download WinCDEmu from this link. Double-click the installer and follow the instructions shown. Its default settings would be enough for our needs.

2) After installing the program, right-click the ISO file to open its context menu.
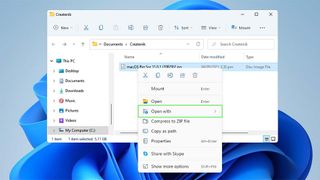
3) Click on “Open with” to show programs capable of running ISO files.
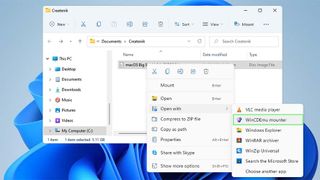
4) Select WinCDEmu mounter from the options. This step should open a WinCDEmu window that lets you set your preferences when mounting your ISO file.
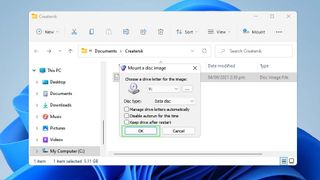
5) After setting your preferences, click OK.

6) Go to My Computer (if below Windows 10) or This PC (Windows 10 and above).
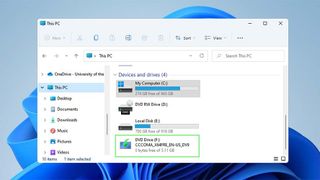
7) Under Devices and drives, click on the DVD Drive with the name of your ISO file. This will open the ISO file to show you its contents.
