How to securely wipe and prepare your Mac for sale (or recycling)
Sell the Mac, not the data
When selling a Mac, few people give it much thought. You list the item for sale, collect the money, and wilfully hand over a device that contains a rather intensive snapshot of your daily life. Most contain photos, saved passwords, documents, and any number of other things meant for your eyes only. And even if you remember to delete the important things before giving your device to its new owner, chances are you forgot to sign out of some services, wipe the hard drive, or reconfigure key components that could still contain traces, or fragments, of your data.
Identity theft is a major problem, and this is just one of the ways hackers collect vast amounts of data from unwitting victims: discarded or sold devices. And while it’s not a certainty that the person buying it has the intention, or the knowledge, in how to use any of this information, it’s still a good idea to hand over a device in its factory default condition, even if only to let them experience the joy of setting up and configuring their new purchase.
In the rest of this tutorial, we’ll show you how to do everything you need to in order to keep some of your most private information safe by wiping your Mac and preparing it for resale (or the trash).
First things first, you’ll want to create a backup. This is especially useful if you’re moving to a new Mac, as Apple’s import utility allows you to simply move these files from one device to another without much thought. The first, and easiest method for backing up a Mac is to store all of your files in iCloud -- assuming you have the space. To backup your Mac to iCloud, just head to the Apple menu, and then System preferences. From there, click Apple ID (if you’re using macOS Mojave or earlier, you don’t have to click anything here). Sign in with your Apple ID, select iCloud Drive, and then select all of the items from the menu at the right that you want to back up.
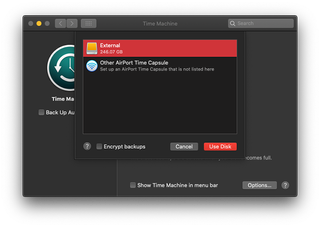
If you would rather stick with physical storage, you can create a Time Machine backup. Just plug in an external storage device. From here, Apple does the heavy lifting. It will ask if you want to use this drive to back up with Time Machine. Select Encrypt Backup Disk (highly recommended) and then Use as Backup Disc.
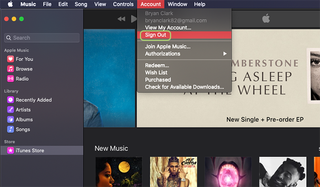
If you’re on macOS Mojave or earlier, you’ll also need to sign out of iTunes. More current versions of macOS can skip this step. From the menu bar at the top of the iTunes menu, click Account > Authorizations > Deauthorize this Computer. If prompted, enter your Apple ID and password, and then click Deauthorize.
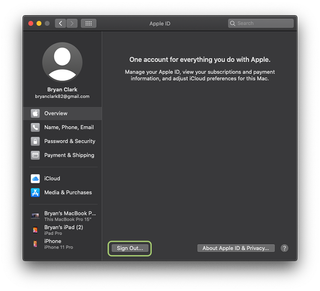
Next you’ll want to sign out of iCloud. If you’re using macOS Catalina or later, head to the Apple menu > System Preferences and then click Apple ID. From the sidebar, choose Overview, and then click Sign Out. If you’re running macOS Mojave or earlier versions of macOS (or OS X) go to the Apple menu > System Preferences > iCloud and then click Sign Out.
Stay in the know with Laptop Mag
Get our in-depth reviews, helpful tips, great deals, and the biggest news stories delivered to your inbox.
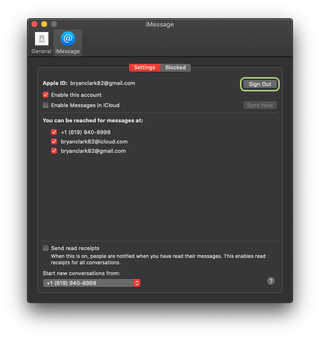
Sign out of iMessage next, if you use it. Any user running OS X Mountain Lion or later needs to open the Messages app, then choose Messages > Preferences from the menu bar. Click iMessage, and then Sign Out.
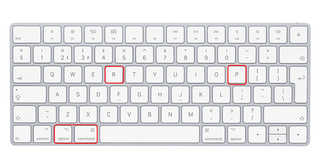
After signing out of iMessage, you’ll want to reset the NVRAM on your Mac to clear the cache and user settings from memory. It’s simple. Just shut down your Mac, and then turn it back on. As soon as you hit the power button, hold down Option + Command + P + R on the keyboard. You can release the keys after about 20 seconds.
Once done, your final step is to erase the hard drive and reinstall macOS. We’ve got you covered with this last step in a previous tutorial. You can find it here.
